How To Fix Handheld PC Console Bumper Switch Snapping?
Does your handheld PC console bumper button feel loose or unresponsive? You are not alone. This is one of the most common issues gamers face with their devices.
The LB and RB buttons take a lot of pressure during gameplay. Over time, this constant clicking can cause the switch inside to snap or pop out of place. This leaves you with a bumper that feels mushy or stops working completely.
The good news is that this problem does not always mean you need a full replacement. In many cases, the fix is simpler than you think.
In a Nutshell
- Check for debris first. Dust and grime often block the bumper button. This is an easy fix and does not need any disassembly tools beyond basics.
- Snapping usually means the switch popped out. The tactile switch can slip loose from its metal bracket. This causes that snapping feeling when you press the button.
- You can often fix this yourself. Full controller replacement is rarely necessary. A careful re-seat of the switch solves most cases.
- Disassembly requires patience. Open your console slowly and keep track of small screws and clips. Rushing this step causes more problems later.
- Reassembly matters just as much as repair. Even a perfect fix fails if you put the controller back together incorrectly. Take your time here.
- Professional help is optional, not mandatory. Most bumper switch issues are fixable at home with the right guidance and a steady hand.
Understanding Bumper Switch Snapping: What It Is and Why It Happens
Bumper switch snapping happens when the small tactile switch inside your handheld console’s bumper button breaks or pops out of place. This is one of the most common failures in modern gaming controllers.
The bumper buttons (LB and RB on Xbox controllers, L and R on Nintendo Switch) experience constant pressure during gameplay. They get pressed thousands of times, and the internal components wear down over time. The metal bracket holding the switch can bend, or the switch itself can crack from repeated impact.
Why does this happen? The bumper switches use a spring mechanism to return to their resting position. When you press the button, a small tactile switch clicks and registers your input. If you press too hard, drop your controller, or use it intensively for years, this switch can snap or become misaligned.
There are two main failure types. First, physical obstruction happens when dust or debris blocks the button from moving freely. Second, mechanical snapping occurs when the actual switch component breaks inside the controller.
The LB and RB buttons fail most often because they take more abuse than other buttons during combat games, racing games, and shooter titles. Players grip controllers tightly during intense moments, putting extra stress on these buttons.
The good news? Many snapped bumper switches can be repaired without buying a new controller. The switch sometimes just pops out of its bracket and needs to be re-seated. In other cases, you can clean away debris and restore full function.
Understanding what causes the snapping helps you prevent future damage. Gentler button presses and regular cleaning can extend your controller’s lifespan significantly.
Signs Your LB/RB Bumper Switch Is Failing
Your bumper switch is likely failing if you notice specific warning signs during gameplay. Pay attention to how your buttons respond when you press them.
The most obvious sign is unresponsiveness. You press the LB or RB button, but nothing happens in your game. Sometimes the button works intermittently, meaning it responds only after you press it multiple times. This inconsistency is a red flag.
Listen for clicking sounds. A healthy bumper switch makes a clean click when pressed. If you hear a dull thud or no sound at all, the internal mechanism may be damaged. Some users report a mushy feeling instead of a crisp press.
Check if the button feels loose or wobbly. Press it gently and see if it moves side to side. A secure button should only move up and down. Excessive lateral movement suggests the switch has popped out of its bracket.
Notice if the button sticks or gets stuck in the pressed position. It should snap back immediately after you release it. Delayed return or permanent sticking indicates a mechanical problem.
Pay attention to pressure sensitivity. Does the button require unusual force to activate? Conversely, does it activate too easily with light touches? Both extremes suggest internal failure.
Test both the LB and RB buttons separately. Often one fails before the other, though both can deteriorate over time. Compare them to see which one behaves abnormally.
These signs appear gradually or suddenly depending on the damage type. Debris causes gradual degradation, while physical snapping happens abruptly. Identifying which signs you experience helps determine whether your switch needs cleaning, re seating, or replacement.
Tools and Preparation Before You Begin
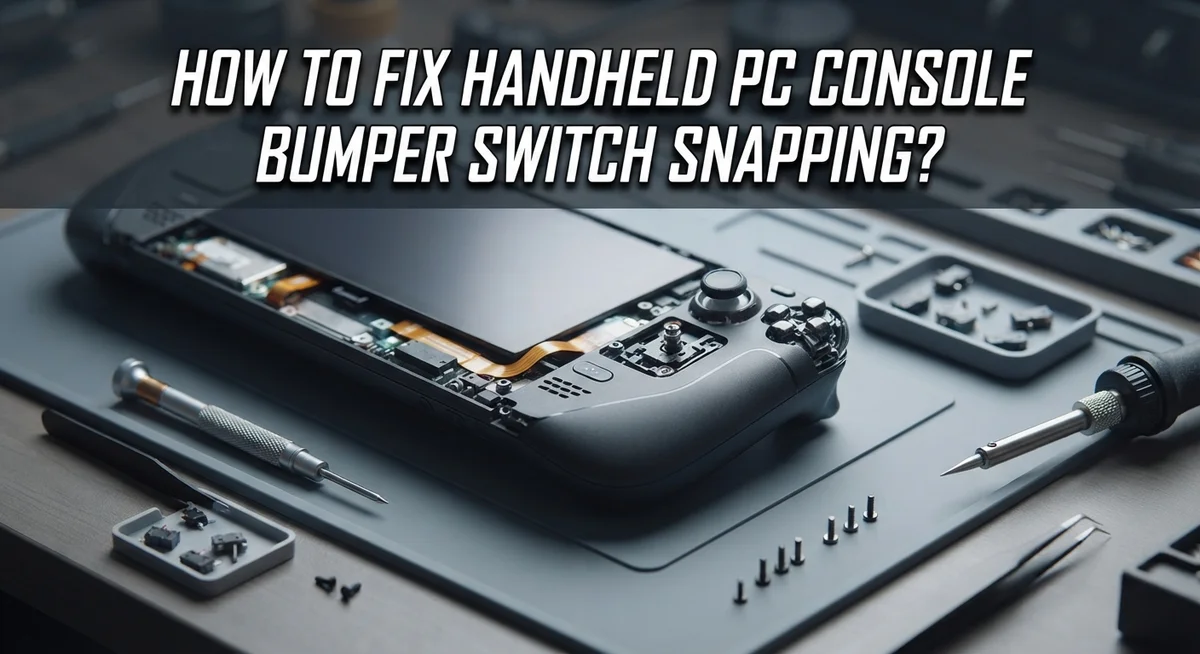
Before you start fixing your bumper switch, gather the right tools. You need a small Phillips head screwdriver to open your console. A plastic pry tool helps you separate panels without scratching the surface. Metal tweezers let you handle tiny components safely.
Have a clean workspace ready. Dust and debris can damage delicate parts. Use a small container to organize screws as you remove them. Label each screw’s location so reassembly goes smoothly. A soft cloth protects your console from scratches during work.
Lighting matters more than you think. A desk lamp or headlamp helps you see inside the console clearly. Poor lighting causes mistakes that make repairs harder. You need to spot small springs and switches easily.
Consider using a magnifying glass for detailed inspection. Bumper switches are small, and you must examine them carefully. This helps you identify whether debris is blocking the button or if the switch actually snapped.
Gather compressed air to remove dust and particles. A small brush works too, but compressed air is safer for electronics. Clean the area around the bumper button before opening anything.
Have your console’s disassembly guide nearby. Different handheld systems require different approaches. Nintendo Switch, Steam Deck, and Xbox controllers all open differently. Reference materials prevent costly mistakes.
Keep your phone or tablet close. Take photos during disassembly so you remember how everything connects. This visual reference is invaluable when putting pieces back together.
Finally, prepare a static free surface if possible. Static electricity can damage circuit boards. A simple rubber mat works well for this purpose.
Step-by-Step Guide: Disassembling Your Controller Safely
Before you touch any screws, power down your handheld console completely. Unplug any cables and remove the battery if possible. This simple step prevents electrical damage and keeps you safe while working.
Find a clean, flat workspace with good lighting. You need to see small components clearly. A desk lamp or work light helps you spot tiny screws and parts. Lay down a soft cloth or mat to prevent scratching your device’s exterior.
Gather your tools in one organized area. You’ll need a small screwdriver set with precision tips. Most handheld consoles use T8, T9, or similar torx screws. Have a container ready to hold screws as you remove them. Label the container or take photos of screw locations before disassembly.
Take photos before you start. Photograph each step as you remove components. Your phone camera becomes your memory guide when reassembling. This prevents confusion later about where pieces go.
Ground yourself to avoid static electricity damage. Wear an anti-static wrist strap if you have one. Static can harm sensitive electronic components inside your device.
Start by removing the outer casing screws. Work slowly and don’t force anything. If a screw feels stuck, apply gentle pressure and try again. Never strip screw heads by using the wrong tool size.
Keep track of different screw types separately. Your console likely uses screws of varying lengths. Mixing them up during reassembly causes problems. Store each type in its own small container or on a labeled piece of tape.
Once the casing opens, you’ll see the internal button mechanisms. Take another photo before touching anything inside. This reference image helps you understand how components fit together.
Diagnosing the Problem: Debris vs. Mechanical Snap
When your bumper switch stops working, you need to figure out what caused the problem. The issue falls into two categories: debris blocking the button or the switch itself breaking apart. Knowing which one you have saves time and money.
Debris obstruction happens when dust, dirt, or food particles get stuck under the button. This makes the switch feel sticky or unresponsive. The button may work sometimes but not consistently. You’ll notice the problem gets worse over time as more particles accumulate.
To check for debris, look at the button from the side. Does it move smoothly? Press it gently several times. If you hear grinding sounds or feel resistance, debris is likely the culprit. Compressed air can sometimes clear this issue without opening your controller.
Mechanical snapping means the internal switch component actually broke. This happens from repeated impact or excessive force during gameplay. The button might feel completely loose or make a different clicking sound. Sometimes the button won’t spring back after you press it.
To identify a snap, gently press the bumper button and watch for movement. Does the button depress normally? Does it return to its original position? If the button moves but doesn’t feel right, the switch may be damaged internally.
The easiest way to confirm mechanical failure is disassembly. Open your controller and look at the switch directly. A snapped switch shows visible cracks or a separated component. The switch may be partially popped out of its metal bracket.
Start with the simple solution first. Try compressed air to clear debris. If that doesn’t work, you likely have a mechanical problem requiring disassembly and repair.
How to Re-Seat or Repair a Snapped Bumper Switch
Once you’ve confirmed the bumper switch is snapped or popped out, re-seating becomes your first repair attempt. This process works best when the internal tactile switch has simply disconnected from its metal bracket rather than breaking completely.
Start by locating the small tactile switch component inside your controller. It sits beneath the bumper button and connects to a metal bracket. Gently examine whether this switch has popped out of position. If it has, you can often push it back into place carefully.
Use a small tool like a plastic spoon handle or soft brush to guide the switch back onto its bracket. Apply gentle, steady pressure rather than forcing it. The switch should click into position with minimal effort. If you encounter resistance, stop and inspect for broken pieces or misalignment.
After re-seating, test the button before fully reassembling. Press the bumper repeatedly to confirm it responds consistently. Listen for the satisfying click sound that indicates proper function. The button should feel firm and responsive, not loose or mushy.
If re-seating doesn’t work, the switch may have internal damage. In this case, you have two options: replace just the switch component or replace the entire bumper assembly. Replacement switches are smaller and more affordable than full assemblies, but require careful installation.
When reassembling, ensure all components align properly. Misaligned parts often cause continued problems even after repair attempts. Double check that the button moves freely without catching on surrounding components.
Some snapped switches cannot be saved. If the plastic housing cracked or internal springs broke, replacement becomes necessary. Take your time with this repair. Rushing through re-seating often causes additional damage.
Reassembly Tips for Long-Lasting Results
When you put your controller back together, several key steps determine whether your repair lasts or fails again quickly.
Alignment matters most. Before you close the casing, check that the bumper button sits flush with its opening. Press it gently several times. The button should move smoothly without catching or sticking. If it feels tight or loose, something isn’t seated correctly.
Make sure the tactile switch component sits fully on its metal bracket. This small piece is what actually registers your button press. If it’s tilted or partially off, your repair won’t hold.
Reassemble in reverse order. Put internal components back exactly where they came from. Take your photos from disassembly and follow them backward. This prevents parts from shifting during use.
Tighten screws evenly and gently. Don’t force them. Overtightening can crack plastic components or misalign the button mechanism. Hand tighten first, then add slight pressure if needed.
Before you close the final casing screw, test the bumper button multiple times. Press it at different angles. Push it firmly and softly. This catches problems before you seal everything up.
After reassembly, let your controller rest for a few minutes. Then test it on your actual console. Use the bumper button in a real game or app for at least 10 minutes. This confirms your repair works under normal conditions.
Store your controller carefully. Avoid dropping it or placing heavy objects on top. Keep it in a protective case if possible. The repaired switch is stronger now, but rough handling can damage it again.
Your repair should last months or longer if you follow these steps correctly.
Common Mistakes to Avoid During Repair
Rushing through disassembly is one of the biggest mistakes people make. You might strip screws or break plastic clips if you move too fast. Take your time and work slowly with the right tools.
Don’t skip the debris check. Many people assume the switch snapped when dust or food particles actually block the button. You waste time on repairs that aren’t needed. Always inspect for obstructions first.
Forcing the button back into place causes more damage. If the switch doesn’t slide smoothly onto its bracket, stop and look for the problem. Pushing too hard can crack the component further or bend the metal bracket.
Using the wrong tools damages internal parts. Avoid metal tools that scratch or puncture delicate components. Soft plastic tools work much better for guiding switches back into position.
Reassembling in the wrong order creates new problems. Each part has a specific sequence. Putting pieces back randomly means buttons won’t align properly. Follow the reverse order of how you took it apart.
Overtightening screws strips the threads. Your casing won’t seal properly, and debris enters again. Tighten screws firmly but gently. You should feel resistance, not excessive force.
Testing only once before closing everything up leads to repeated failures. Press the bumper button dozens of times during reassembly. Make sure it clicks consistently and returns to its normal position.
Ignoring small cracks or damage means the switch fails again soon. If you notice the bracket is bent or the switch shows visible damage, replacement becomes necessary. Partial repairs on severely damaged components don’t last.
Finally, don’t reassemble with moisture or dust inside. Wipe the interior clean before closing the casing. A quick inspection prevents future problems and extends your repair’s lifespan.
Final Thoughts
Fixing a snapped bumper switch is easier than most people think. You don’t need fancy tools or expert skills. You just need patience and a steady hand.
Most bumper switch problems come from debris, not broken parts. Always check for dust or crumbs first. This simple step saves you time and effort.
If the switch has popped out, re-seating it often solves the problem. Gently guide it back onto its bracket. Test the button before you close everything up.
Sometimes the switch suffers internal damage. In these cases, re-seating won’t help. You may need to accept that the part needs replacing.
Reassembly matters just as much as the repair itself. Rushing this step causes new problems. Take your time and follow the correct order.
Check alignment before closing the casing. The button should sit flush and press smoothly. This small check prevents future headaches.
Avoid common mistakes like overtightening screws or skipping tests. These errors lead to repeat failures. A careful approach gives better results every time.
Your controller doesn’t always need a full replacement. Many bumper switch issues get fixed at home. This saves money and keeps your gear ready for play.
If your first attempt doesn’t work, don’t give up. Try the process again with fresh eyes. Sometimes a second attempt reveals what you missed.
Handheld console repairs teach useful skills over time. Each fix builds your confidence for future problems. Soon, small repairs feel simple instead of stressful.
In the end, fixing a bumper switch is about patience, care, and attention to detail. Follow each step carefully. Your controller will thank you with smooth, reliable performance.
Frequently Asked Questions
Why do bumper switches snap on handheld consoles?
Bumper switches fail for two main reasons. Physical debris like dust, food particles, or lint blocks the button from moving freely. This makes the button feel stuck or unresponsive. Mechanical wear happens over time from repeated pressing. The tactile switch component inside can pop out of its metal bracket or suffer internal damage. Most people assume the switch is broken when debris is actually the culprit.
Can I fix a snapped bumper switch without buying a new controller?
Yes, many bumper switch problems are fixable at home. If the switch popped out of its bracket, you can re-seat it back into place. If debris is blocking the button, cleaning removes the obstruction. Even switches with minor cracks sometimes work again after careful reassembly. However, if the switch suffered severe internal damage, replacement may be necessary. The key is checking what caused the failure first.
What’s the most common mistake people make when repairing bumper switches?
Rushing through disassembly tops the list. People take apart their controller too quickly and lose track of where parts go. Another huge mistake is skipping the debris check. Many assume the switch snapped when dust actually blocks it. Forcing the button back into place causes more damage. Overtightening screws during reassembly strips the threads and creates new problems.
How do I know if my bumper switch is truly broken or just stuck?
Test the button first before opening your controller. Press it repeatedly from different angles. If it responds occasionally, debris likely blocks it. If it never responds and feels completely loose, the switch probably popped out. Look for visible cracks or damage around the button opening. These signs indicate mechanical failure rather than a simple obstruction.

Hi, I’m Archie Flynn, the founder and writer behind RapidResizerHub! 👋 I’m a passionate tech enthusiast who loves exploring the latest gadgets, smart devices, and trending electronics on Amazon. Through my honest, hands-on reviews and detailed buying guides, I help readers make smarter, well-informed shopping decisions.