How To Fix Ergonomic Split Keyboard Tent Leg Hinge Breaking?
Your split keyboard felt perfect until that tenting leg hinge snapped. Now your keyboard wobbles or sits flat on the desk. All that ergonomic comfort you loved seems gone in an instant.
Don’t worry. A broken tent leg hinge is a common problem for split keyboard users. The good news is you can fix it or find a smart workaround.
This guide walks you through practical ways to repair or replace a broken hinge. We will cover simple fixes you can try at home. You will also learn about sturdy alternatives that hold up better over time.
In a Nutshell
- Hinge breaks usually happen from weak materials, repeated stress, or over tightening. Knowing the cause helps you pick the right fix.
- Simple repairs work best. Try tightening loose screws, using glue for small plastic cracks, or adding support with tape before buying new parts.
- 3D printed adapter plates offer a solid long term fix. They give you attachment points that hold up better than original hinges.
- Small tenting legs on the inner sides of each split half can replace broken hinges entirely. This spreads weight more evenly.
- Strap based systems work great if you move your keyboard often. They skip hinges completely and stay portable.
- Test your setup after any repair. Sit upright, adjust your chair height, and check that the tenting angle still supports your wrists properly.
- Prevention beats repeated fixes. Avoid over-engineering your setup and change positions throughout the day to reduce strain on hinges and on your body.
Why Tenting Legs and Hinges Break Down Over Time
Tenting legs and hinges experience constant stress from your daily work routine. Every time you adjust your keyboard angle or move it across your desk, the hinge bears weight and pressure. Over months and years, this repetitive motion weakens the connection points.
Material fatigue is the primary culprit. Most split keyboards use plastic or aluminum hinges designed for moderate use. Plastic hinges become brittle over time, especially in dry office environments. Aluminum hinges can develop micro cracks that spread gradually. Neither material stays as strong as the day you unboxed your keyboard.
Improper setup accelerates hinge breakdown significantly. If your chair sits too low or too high relative to your desk, you place uneven stress on one side of the hinge. This imbalance forces the hinge to compensate, wearing out faster. Overly aggressive tenting angles also strain hinges beyond their intended limits.
Over tightening attachment screws creates another common problem. You might think tighter equals more stable, but excessive force actually damages the threads and weakens the hinge mechanism. Screws can strip, and plastic around the screw hole can crack.
Environmental factors play a role too. Temperature changes cause materials to expand and contract. Humidity affects plastic durability. Dust accumulation around the hinge can prevent smooth movement, forcing the mechanism to work harder.
Finally, poor quality hinges fail faster than well engineered ones. Budget split keyboards sometimes use hinges not rated for frequent adjustments. The hinge might look fine initially but lacks internal reinforcement to handle daily use.
Understanding these failure patterns helps you prevent future problems. Proper setup, gentle adjustments, and appropriate tenting angles keep your hinges functioning longer.
Diagnosing Your Hinge Damage Before You Repair It
Before you attempt any repair, you need to understand exactly what broke. A proper diagnosis saves time and prevents wasted effort on the wrong fix.
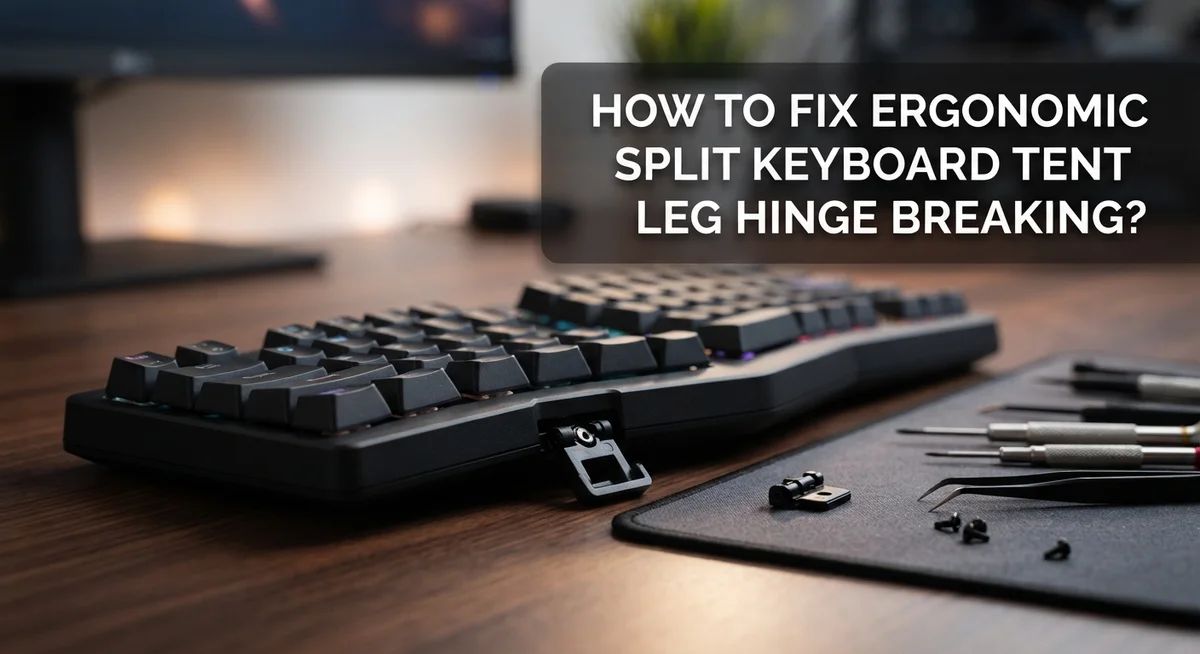
Start by examining the hinge connection point where the tenting leg attaches to your keyboard. Look for visible cracks in plastic components. Check if metal parts bent or separated. Gently wiggle the leg to feel how much movement exists. Does it flop completely, or does it hold some position?
Next, inspect the attachment mechanism itself. Is the screw still present and tight? Does the screw hole appear stripped or enlarged? Test whether tightening the screw restores stability. Many hinges feel broken when they simply need adjustment.
Examine the hinge material closely. Plastic hinges show stress fractures differently than metal ones. Plastic often cracks cleanly or develops fine lines. Metal hinges typically bend, twist, or develop gaps at connection points.
Check both sides of your split keyboard. Sometimes one hinge breaks while the other remains intact. This affects how you approach your repair strategy. A single broken hinge requires different solutions than both sides failing.
Test the keyboard’s stability without any tenting at all. Place it flat on your desk. Does it sit level? This tells you if the break affected overall balance.
Document what you find. Take photos of the damage from multiple angles. Note whether the break is sudden or gradual. Did you hear a snap, or did it slowly worsen?
This information guides your next steps perfectly. You will know whether you need simple tightening, glue reinforcement, replacement parts, or a complete redesign of your tenting system.
Step-by-Step: Repairing or Reinforcing a Broken Tenting Hinge
Start by gathering the tools you’ll need. You want a screwdriver set, super glue or epoxy, small clamps or rubber bands, and sandpaper. Having everything ready before you begin makes the repair process smooth and efficient.
Assess the damage carefully first. Look at whether the hinge cracked completely or if it’s just loose. A loose hinge needs tightening. A cracked hinge needs reinforcement or replacement. This determines which repair method works best for your situation.
For loose hinges, tighten all screws connecting the tenting leg to your keyboard. Use steady pressure without over tightening, which causes the same problem again. Test the stability after each turn of the screwdriver.
For cracked plastic hinges, clean the area thoroughly. Remove any dust or debris around the break. Sand the surfaces lightly so glue adheres better. Apply epoxy or super glue into the crack, then hold it firmly for the time recommended on the product instructions.
Add reinforcement while the glue dries. Wrap the hinge area with strong tape or use small clamps to keep pressure on the joint. This prevents the crack from reopening as the adhesive sets.
Consider adding support materials. Small metal brackets or plastic reinforcement plates can strengthen weak hinges. Attach these pieces across the break point using additional screws if possible.
Test your repair by gently pushing on the tenting leg. It should feel stable without wobbling. If movement persists, the repair needs more reinforcement or a different approach entirely.
Stabilizing a Wobbly Keyboard While You Fix the Hinge
Your keyboard needs stability while you work on the broken hinge. A wobbly keyboard makes repairs harder and risks further damage. Here are practical ways to stabilize it during the fixing process.
Use your desk surface as your primary support. Place the keyboard flat on the desk with the broken hinge facing up. This position keeps the keyboard stationary while you access the damaged area. If the keyboard tilts to one side, add support underneath the lower half.
Stacked books work well for this purpose. Position them under the keyboard half that’s lower. Adjust the height until both halves sit level. This prevents stress on the hinge while you repair it.
Clamps provide another effective stabilization method. You can clamp the keyboard halves to your desk surface. Make sure the clamps don’t interfere with the hinge area you’re working on. Leave enough space around the damage for your hands and tools.
Consider using foam blocks or rubber wedges. These materials grip the keyboard without damaging the case. They’re especially helpful if your keyboard has a curved or angled base. Stack them strategically to support both halves evenly.
Prevent the keyboard from shifting during repair work. Secure any loose cables or wires before you start. Move your mouse and other peripherals away from your work area. This creates a clean workspace and reduces accidents.
Test your stabilization setup before beginning repairs. Gently push on the keyboard from different angles. It shouldn’t move or rock. If it does, adjust your support materials until the keyboard stays completely still.
A stable keyboard makes repairs faster and more successful. You’ll have better access to the hinge and can work more carefully. This foundation ensures your repair work holds up properly.
Setting Up Your Tented Keyboard the Right Way After Repair
Once your hinge repair is complete, proper setup makes a huge difference. Your keyboard’s stability depends on how you position it relative to your body and desk.
Start by sitting upright in your chair. Your back should feel straight, not slouched forward. This posture is essential because tenting angles work best when your spine is aligned. Bring the repaired keyboard closer to your body than you normally would. The tenting legs should point toward you at an angle, not away from you.
Next, adjust your chair height. Your forearms need to stay parallel to the ground when your hands rest on the keyboard. If your chair sits too low, the tenting angle won’t help your wrists. Raise your chair until your elbows bend at roughly 90 degrees. Your desk height matters too. The keyboard should sit at a level where your wrists feel neutral and relaxed.
Test the tenting angle gradually. Start with a modest angle, around 15 to 20 degrees. Your wrists should feel supported, not strained. If the angle feels too steep, reduce it slightly. Avoid over-engineering your setup. Simple solutions often work better than complex ones.
Change your hand position throughout the day. Move your keyboard from one angle to another every hour or so. This variation prevents repetitive strain from building up. Your tendons and nerves benefit when you shift positions regularly.
Finally, check that both keyboard halves sit evenly. Uneven tenting puts stress on your wrists and can damage your repair work. Make sure each tenting leg contacts your desk surface firmly. A stable, balanced setup protects your repair and keeps your wrists comfortable during long work sessions.
Common Mistakes That Lead to Repeat Hinge Failures
Many people repeat the same hinge failures because they skip crucial setup steps. Your keyboard breaks again and again when you ignore how your body actually works during the day.
The biggest mistake is neglecting positional changes. You sit in one tenting angle for hours without moving. Your wrists stay locked in the same position. This constant pressure on the hinge joint causes stress and eventual failure. Your hinge wasn’t designed for static positioning all day long.
Improper chair and desk height creates another common problem. Your tenting angle only works when your overall setup supports it. If your chair sits too low or too high, the keyboard angles incorrectly. This misalignment forces extra pressure on the hinge connection point. The hinge breaks under load it wasn’t meant to handle.
Using incompatible hinge materials leads to repeat failures too. Some hinges use plastic that cracks easily under repeated stress. Others use metal that doesn’t match your keyboard’s weight. When materials don’t work together properly, failure happens faster.
Over engineering your solution causes problems as well. You add extra supports, heavy reinforcements, and complex attachment systems. This extra weight stresses the hinge more than necessary. Simple solutions often work better than complicated ones.
Finally, many people ignore warning signs before complete failure occurs. A slightly wobbly leg or minor creaking means your hinge needs attention now. Addressing small issues prevents major breaks later.
Your repair will last longer when you combine three things: proper ergonomic positioning, correct chair and desk heights, and simple reinforcement methods. These fundamentals stop the cycle of repeated hinge failures.
Troubleshooting Persistent Tenting Instability
A wobbly keyboard after hinge repair often signals incomplete stabilization or misaligned setup. The problem usually stems from one of three issues: the hinge itself still has play, the keyboard halves sit at different angles, or your desk surface doesn’t support the tenting properly.
First, check if your hinge repair fully cured. Adhesives need time to set completely. If you used glue, wait the full recommended time before testing. Metal brackets or reinforcement plates should be completely fastened with no loose screws or bolts.
Next, inspect both keyboard halves for even contact with your desk. Place a straight edge across the top of both halves. They should align at the same height. If one side sits lower, your hinge may still have a slight bend or your desk surface isn’t level.
Test the tenting angle gradually after repair. Apply gentle downward pressure on each leg. The keyboard should feel solid, not flex or rock. If it moves, your stabilization method needs adjustment.
Your chair and desk heights matter significantly here. Sit upright and position the tented keyboard close to your body. Your forearms should stay roughly parallel to the ground. When heights are wrong, you unconsciously shift the keyboard position, creating wobbling.
Consider adding a secondary support point. Many people place a small foam block or rubber wedge under the inner edge of each keyboard half for extra stability. This distributes pressure more evenly than relying solely on tent legs.
Change your hand position throughout the day to prevent putting constant pressure on one side. This simple habit reduces stress on your repaired hinge and prevents future failures. A stable setup combined with positional variety keeps your keyboard functioning properly long term.
Preventive Maintenance to Extend Hinge Lifespan
Your split keyboard tent leg hinge will last much longer when you prevent damage before it happens. Prevention is always easier than repair.
Start by checking your hinge connection points every week. Look for small cracks, loose fasteners, or visible wear. Catch problems early and they stay small. Tighten any loose screws gently but firmly. Do not over tighten, as this can strip the material.
Keep your keyboard clean and dry. Dust and moisture weaken hinge materials over time. Wipe down your keyboard weekly with a soft, dry cloth. Store it in a dry location when not in use.
Distribute weight evenly across both keyboard halves. Many people rest their wrist heavily on one side, which stresses that hinge constantly. Move your hands around throughout the day. This spreads the pressure and prevents one hinge from bearing too much load.
Avoid sudden movements or impacts near the hinge area. Do not drop your keyboard or bump the tenting legs against your desk. Handle the device with care during setup and adjustment.
Rotate your tenting angle occasionally. If you always use the same angle, the hinge wears unevenly. Changing angles slightly throughout the day distributes wear more evenly across the hinge mechanism.
Use compatible materials for your hinge system. Mismatched materials expand and contract at different rates, which causes stress. Check that your replacement parts match the original specifications.
Store your keyboard properly when traveling. Use a padded bag or case. Avoid storing it in positions that bend the hinge at extreme angles for long periods.
These simple steps keep your hinges strong and functional for years. Small actions now prevent expensive repairs later.
Final Thoughts
Fixing a broken tent leg hinge does not need to be complicated. Most repairs succeed when you match the fix to the actual damage.
Small cracks often respond well to simple bonding methods. Bigger breaks may need a replacement part or a printed adapter instead.
Your keyboard setup matters as much as the repair itself. A perfect hinge fix still fails if your chair height or hand position stays wrong.
Think of hinge repair as part of a bigger ergonomic picture. The tenting angle only helps your wrists when everything else lines up too.
Patience pays off during this process. Rushing a repair often leads to another break within weeks.
Give adhesives proper time to cure. Test new hinges gradually instead of pushing them to full tenting angle right away.
Watch your keyboard for early warning signs after any repair. Small wobbles or gaps often mean trouble is building again.
Catching these signs early saves you from repeating the whole repair process. A quick check now prevents a bigger headache later.
Regular maintenance protects your work. Once you fix a hinge, keep inspecting it weekly.
Clean your keyboard often and keep moisture away from hinge points. These small habits add years to your repair’s lifespan.
Remember that split keyboards exist to protect your wrists and tendons. A broken hinge should never force you back into flat typing positions that strain your body.
Take the time to fix it properly. Your hands will thank you for the extra effort.
With the right approach, your keyboard can serve you well for a long time. Simple fixes, careful setup, and regular checks keep your typing comfortable and pain free.
Frequently Asked Questions
What causes split keyboard tent leg hinges to break in the first place?
Tent leg hinges break for several reasons. Repetitive stress from uneven weight distribution is the most common culprit. When you rest your wrist heavily on one keyboard half, that hinge bears extra pressure over time.
Material incompatibility also causes failure. Plastic hinges paired with metal attachment points can crack under stress. Temperature changes and humidity affect materials differently, creating stress at connection points.
Improper tenting angles force hinges to work harder than they should. If your angle is too steep or too shallow, the hinge compensates by flexing in ways it was not designed to handle.
Can I repair a broken hinge without replacing the entire keyboard?
Yes, you can repair many broken hinges without replacing your keyboard. Small cracks in plastic hinges often respond well to strong adhesives designed for plastic bonding.
For hinges with bent metal components, careful straightening sometimes restores function. However, severely cracked or shattered hinges usually need replacement parts rather than repair.
3D-printed adapter plates offer another solution. These custom plates attach to your keyboard halves using compatible mounting systems. They provide new attachment points for tent legs, bypassing the damaged hinge entirely.
What is the best tenting angle for long term hinge durability?
Most ergonomic experts recommend tenting angles between 15 to 25 degrees. This range aligns your wrists with your forearms, reducing strain on both your hands and your hinges.
Angles steeper than 30 degrees place excessive stress on hinge connections. Your hinges work harder to support the keyboard at extreme angles, which shortens their lifespan.
The best angle is one you can maintain comfortably throughout your workday. Change your position frequently to avoid constant pressure on the same hinge points.
How do I know if my hinge repair will actually last?
After repair, inspect your hinge connection points daily for the first week. Look for new cracks, separation, or movement between components.
Test stability by gently pressing down on each keyboard half. If wobbling occurs, your repair needs reinforcement. Proper repairs should feel solid and immovable.
Give adhesives their full curing time before heavy use. Most strong adhesives need 24 hours minimum, though some require longer.

Hi, I’m Archie Flynn, the founder and writer behind RapidResizerHub! 👋 I’m a passionate tech enthusiast who loves exploring the latest gadgets, smart devices, and trending electronics on Amazon. Through my honest, hands-on reviews and detailed buying guides, I help readers make smarter, well-informed shopping decisions.