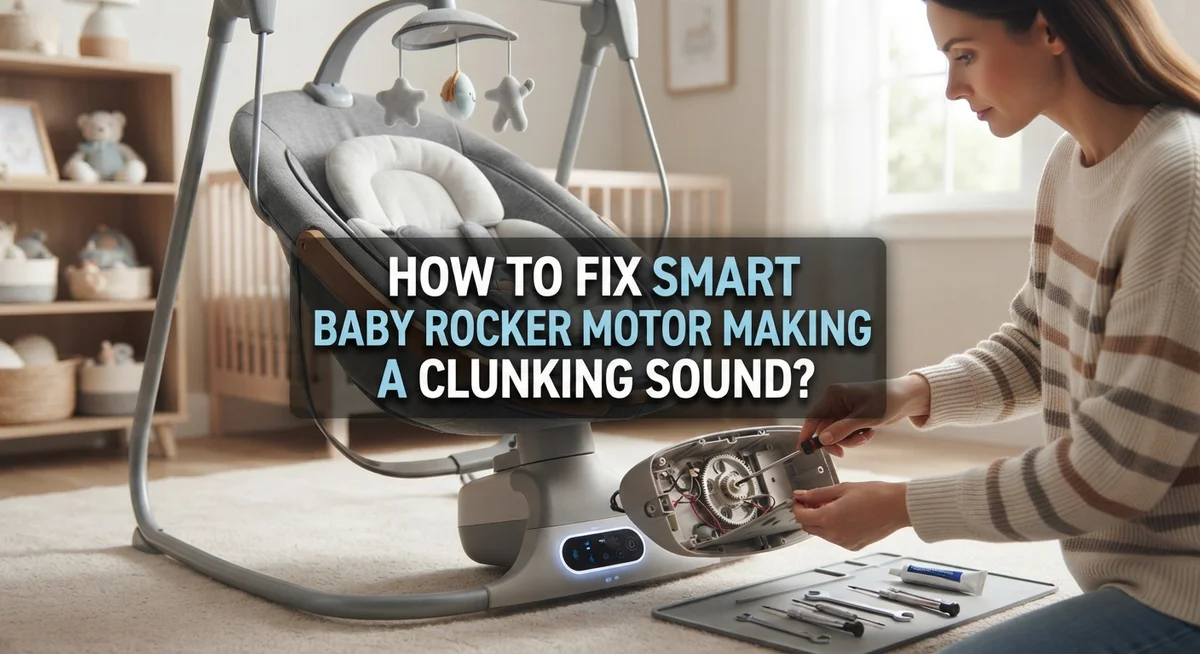
How To Fix Smart Baby Rocker Motor Making A Clunking Sound?
A clunking sound from your baby rocker can feel alarming. You expect soft hums and gentle motion, not strange noises during nap time.
The good news? This problem is fixable. Many parents face this same issue with their smart baby rockers.
Motor misalignment often causes this clunking sound. Sometimes it’s a gearing problem inside the motor housing. Other times, worn parts create friction between components.
Popular models like the 4moms Mamaroo and Graco baby swings are known to develop this issue. Glider rockers can show similar symptoms too.
In a Nutshell
- Start with cleaning. Dust and debris often cause the noise. Wipe down the motor area before doing anything else.
- Check for motor-flywheel misalignment. This is the most common cause of clunking sounds. It happens when internal parts shift out of place.
- Listen carefully to the sound type. Clicking and grinding point to different problems. Grinding usually means metal parts are rubbing together.
- Open the motor housing if cleaning doesn’t help. You may need to inspect internal components directly. Look for loose or damaged parts inside.
- Consider a motor swap for persistent noise. A loose-sounding unit often needs full motor replacement. This fixes the issue when other steps fail.
- Record the sound before contacting support. Intermittent noises are hard to diagnose at service centers. A recording gives real proof of the problem.
- Don’t ignore the sound. Waiting it out rarely solves the issue. Early action prevents bigger problems later.
Why Baby Rocker Motors Make Clunking or Grinding Sounds
Baby rocker motors make clunking or grinding sounds for specific mechanical reasons. Understanding these causes helps you fix the problem faster.
Motor flywheel misalignment is the top culprit. Your rocker’s motor connects to a flywheel that controls the rocking motion. When these parts shift out of position, metal components rub together. This friction creates that annoying clunking noise you hear.
Loose internal gearing also triggers grinding sounds. The motor has small gears that work together to produce smooth motion. If these gears wear down or become misaligned, they bump against each other during operation. The noise gets worse as the rocker runs longer.
Dust and debris pile up inside the motor housing over time. Small particles get caught between moving parts. When the motor spins, these particles create clicking or grinding sounds. This is why cleaning often solves the problem.
Bearing wear causes different types of noise. Bearings help the motor shaft spin smoothly. Once they age or get damaged, friction increases. You may hear squeaking or grinding instead of smooth operation.
Metal scraping sounds indicate serious mechanical friction. This means components are rubbing directly against each other. The damage worsens each time the rocker operates. Quick action prevents further harm to your motor.
The noise pattern matters too. Intermittent clunking is harder to diagnose than constant grinding. Some sounds only appear during specific rocking speeds or positions. This inconsistency makes it challenging for service centers to identify the exact problem.
Different rocker models have different motor designs. The 4moms Mamaroo and Graco swings experience these issues for similar reasons, though their internal layouts differ slightly. Knowing your model helps you understand which components need attention first.
Clicking vs. Clunking vs. Grinding: Identifying the Sound
A clunking sound differs from other motor noises. You need to identify which sound your baby rocker makes. This helps you understand the problem better.
Clicking sounds are sharp and rhythmic. They happen when the rocker rocks back and forth. Clicking usually points to loose internal parts or worn bearings. The noise repeats at regular intervals during operation.
Clunking sounds are heavier and more pronounced. They sound like metal hitting metal. Clunking typically means motor-flywheel misalignment or gearing problems. This noise may happen randomly or during specific rocker movements.
Grinding sounds are continuous and rough. They sound like scraping or friction between parts. Grinding indicates serious mechanical friction inside the motor. This noise suggests metal components rubbing together incorrectly.
Pay attention to when the noise occurs. Does it happen only when the rocker moves? Does it start when you power on the unit? Does it continue throughout operation? The timing tells you a lot about the root cause.
Record the sound with your phone. This helps service centers diagnose the issue faster. Intermittent noises are hard to catch during inspections.
Listen to the volume level too. Quiet clicking might resolve with cleaning. Loud clunking usually means internal damage. Grinding sounds often require motor replacement.
Test the rocker at different speeds. Some motors make noise only at high speeds. Others sound bad at all speeds. Speed sensitivity narrows down your diagnosis.
Different rocker models produce different noise patterns. The 4moms Mamaroo and Graco swings have distinct motor designs. Your model type affects which problems are most likely.
Once you identify your sound type, you can take the right next step toward fixing it.
Tools and Prep Work Before You Start
Before you start fixing that clunking motor, gather the right tools and prepare your workspace. This makes the repair process smoother and safer for both you and your baby rocker.
Start with basic supplies you likely have at home. You need a Phillips head screwdriver and a flathead screwdriver for opening the motor housing. A small flashlight or headlamp helps you see inside tight spaces. Keep a clean cloth nearby to wipe away dust as you work.
Safety comes first when working with motors. Unplug the rocker completely before touching any internal parts. Wait at least 30 minutes after unplugging to let any electrical charge dissipate. Never attempt repairs while the unit has power.
Organize your workspace carefully. Place the rocker on a flat, clean surface with good lighting. Lay out all screws and small parts on a white cloth or paper towel so nothing gets lost. Take photos of the motor housing before you open it. This helps you remember how components fit back together.
Have documentation ready. Keep your user manual nearby in case you need specific disassembly instructions for your model. If the rocker is still under warranty, gather your purchase receipt and any service records.
Consider recording the noise first. Use your phone to capture the clunking sound at different rocker speeds. This recording becomes valuable if you need to contact customer support later. Intermittent noises are hard for service centers to diagnose without audio evidence.
With these preparations complete, you are ready to safely investigate and fix the motor issue.
Step-by-Step: Cleaning the Motor and Flywheel Assembly
Cleaning the motor and flywheel assembly is your first defense against clunking sounds. This step often resolves noise issues without requiring full motor replacement.
Start by unplugging the rocker from the wall outlet. Wait at least five minutes for any residual power to drain completely. Safety matters most when working with electrical components.
Locate the motor housing underneath or behind the rocker seat. Most baby rockers have access panels held by Phillips head screws. Remove these screws carefully and set them aside in a small container so you don’t lose them.
Gently lift away the motor housing cover. You’ll now see the motor and flywheel assembly. Take a photo with your phone before proceeding. This reference helps you reassemble everything correctly later.
Use a soft brush or old toothbrush to sweep away dust and debris from the motor surfaces. Pay special attention to gaps between the motor and flywheel. Dust accumulation causes friction and creates grinding sounds.
For stubborn debris, use a dry cloth to wipe the motor casing. Never spray liquids directly on electrical components. Moisture can damage the motor permanently.
Inspect the flywheel for loose connections or visible damage. The flywheel should spin freely without wobbling. If it moves side to side, this indicates misalignment, which causes clunking.
Check all visible bolts and connectors around the motor assembly. Tighten any loose fasteners with your screwdriver. Sometimes vibration loosens these connections over time.
Once cleaning is complete, reassemble the motor housing carefully. Align the cover properly before inserting screws. Plug the rocker back in and test it at low speed first. Listen for improvement in the noise level.
Step-by-Step: Disassembling the Motor Housing for Inspection
Now that you’ve cleaned the motor and flywheel, the next step is to carefully disassemble the motor housing. This lets you inspect internal parts that cause clunking sounds.
Start by unplugging the rocker completely. Safety is your first priority when working inside the motor housing. Wait a few minutes to ensure any residual power drains from the unit.
Locate all screws holding the motor housing together. Most baby rockers have screws on the bottom, sides, or back of the housing. Use your Phillips head screwdriver to remove each screw slowly. Place each screw in a small container so you don’t lose them.
Take photos as you disassemble. Use your phone camera to document where each screw came from and how parts fit together. This makes reassembly much easier later.
Gently separate the motor housing halves. Don’t force anything. If the housing feels stuck, check for additional screws you may have missed. Once open, you’ll see the motor, gears, and flywheel inside.
Inspect the motor shaft for debris or rust. Look at the bearings on both sides of the motor. Check if the flywheel sits properly on the shaft or if it appears loose or misaligned.
Examine all gears for broken teeth or damage. Metal shavings inside the housing indicate grinding between components. Wipe away any debris with a dry cloth.
Check every bolt and connector inside the housing. Loose fasteners often cause the clunking noise you hear. Tighten any loose bolts by hand first, then use your screwdriver if needed.
Document any damage you find with photos. This information helps you decide whether cleaning alone fixes the problem or if you need motor replacement.
Fixing Misalignment, Swapping the Motor, or Replacing Bearings
When your smart baby rocker makes a clunking sound, three main repair paths exist: fixing misalignment, swapping the motor, or replacing bearings. Each approach targets a different root cause.
Fixing Misalignment is often your first solution. The motor and flywheel can shift out of position during normal use or shipping. Start by checking if all bolts around the motor assembly are tight. Use your screwdriver to gently tighten each one. Loose connections create that metal scraping sound you hear. Spin the flywheel by hand (with power off) to feel for grinding resistance. If it rotates smoothly after tightening, misalignment was your issue.
Swapping the Motor becomes necessary when the motor itself is damaged. If you hear grinding that won’t stop after tightening bolts, the motor bearings may be worn. Document the motor’s position with photos before removal. Note which wires connect where. Disconnect all electrical connectors carefully. Remove the mounting bolts and slide the motor out. Install a replacement motor in reverse order, ensuring wires reconnect to their original positions.
Replacing Bearings works best for glider rockers and certain swing models. Bearings wear out over time and create clicking or grinding noises. Access the bearings by disassembling the motor housing completely. Remove the old bearing by gently prying it out with a flathead screwdriver. Install the new bearing by pressing it firmly into place until it sits flush.
Important tip: Record your clunking noise before attempting repairs. This helps you track whether your fix actually worked. If noise returns after these steps, contact the manufacturer’s service team with your recording.
Common Mistakes That Make the Clunking Worse
Many parents make mistakes that actually make the clunking sound worse. Understanding these errors helps you avoid further damage to your rocker.
Ignoring the noise and hoping it goes away is the biggest mistake. The clunking typically gets louder over time as components wear. What starts as a small sound becomes a major problem within weeks. Early action prevents expensive motor replacement later.
Continuing to use the rocker at high speeds while it’s making noise causes additional stress on the motor. The faster the motor runs, the more friction builds between misaligned parts. This friction creates more damage each time you rock. Stop using high speed settings until you fix the issue.
Applying oil or lubricant to the motor housing without proper disassembly is another common error. Oil attracts dust and debris, which then stick to motor components. This buildup makes the clunking worse, not better. Never spray lubricants inside the motor without opening it completely.
Tightening bolts randomly without a plan often backfires. You might tighten the wrong bolt or over tighten connections. Over tightening can crack plastic housings or strip screw threads. Only tighten bolts after you identify which ones are actually loose.
Not documenting the noise pattern complicates warranty claims and repairs. Record a short video of the clunking sound. Note when it happens (during specific speeds, at startup, or constantly). This information helps service centers diagnose faster.
Disassembling the motor without taking photos leads to reassembly problems. You forget where screws belong or how parts connect. Always photograph each step before removing components.
These mistakes transform a simple fix into a complicated repair situation.
Troubleshooting Intermittent Noises and Documenting Them for Warranty Claims
When your smart baby rocker makes intermittent clunking sounds, documenting them becomes critical for warranty claims and service center repairs. Start by recording the noise with your smartphone whenever it occurs. Capture at least 10 to 15 seconds of clear audio. Position your phone close to the motor housing so the sound records distinctly.
Note the exact conditions when the noise happens. Does it occur when the rocker moves at high speed or low speed? Does it happen during the first few minutes of operation or after extended use? Write down the date, time, and duration of each incident in a simple log.
Take video recordings as well. Film the rocker from multiple angles while it’s making the sound. This visual documentation helps service technicians see if the motor housing vibrates excessively or if specific parts move abnormally.
Describe the noise type accurately. Is it a grinding sound, a clicking noise, or a metal scraping sound? Different sounds point to different problems. Grinding usually indicates gear issues, while clicking suggests loose components.
Save all recordings and notes on your phone or cloud storage. Don’t delete them. Create a folder labeled with the rocker model and date for easy access.
When you contact the manufacturer or service center, share your documentation immediately. Explain that the noise is intermittent and may not reproduce during inspection. Your recordings serve as proof that the problem exists, even if technicians don’t hear it themselves.
This approach strengthens your warranty claim significantly. Service centers take documented evidence seriously because it eliminates guesswork from the diagnosis process.
Final Thoughts
A clunking sound in your baby rocker feels scary at first. But now you know it usually points to simple mechanical issues.
Motor misalignment, worn gears, or loose bolts cause most of these noises. Each problem has a clear fix you can try at home.
Start with the easiest solution first. Check for debris, tighten loose parts, and inspect the gears before assuming the motor is broken.
Grinding sounds often mean something different than clicking sounds. Learning this difference helps you pick the right repair path quickly.
Never ignore the noise and hope it disappears. This mistake leads to bigger motor damage and costly repairs later.
Recording the sound remains your best tool. It helps you diagnose the issue and supports any warranty claims you file.
Intermittent noises make diagnosis tricky. Detailed notes and videos give service centers the proof they need to help you.
Swapping the motor solves most severe cases. This works especially well when the unit sounds loose or damaged beyond simple fixes.
Bearing replacement helps glider rockers specifically. This step targets the exact parts causing friction in these particular models.
Some parents rush repairs and skip important steps. Taking photos during disassembly saves you from reassembly headaches later.
Your baby’s safety matters most in this process. A properly functioning rocker gives both you and your little one peace of mind.
Trust your instincts if the noise seems unusual. Contact the manufacturer or a repair professional when home fixes don’t work.
Most clunking issues have straightforward solutions. With patience and the right approach, you can restore smooth, quiet operation to your rocker.
Take action today rather than waiting. Your baby deserves a rocker that works safely and quietly every single time.
Frequently Asked Questions
Why is my baby rocker making a clunking sound?
A clunking noise usually comes from motor misalignment or worn internal gears. The motor and flywheel may shift slightly during normal use. Metal parts rub together, creating that concerning sound.
Loose bolts can also cause clunking. Check if any fasteners have vibrated free over time. Sometimes debris gets stuck inside the motor housing too.
Is the clunking sound dangerous for my baby?
The noise itself won’t harm your baby. However, it signals a mechanical problem that may get worse. A failing motor could stop working suddenly during use.
Stop using the rocker at high speeds while it’s making noise. This prevents extra stress on damaged parts. Have the issue checked before continued use.
How do I know if it’s a motor problem or something else?
Grinding sounds often mean internal motor damage. Clicking or tapping usually points to loose bolts. Listen carefully and try to describe the exact noise.
Record a video from multiple angles. This helps technicians diagnose the problem faster, especially if the noise is intermittent and won’t reproduce at the service center.
Can I fix a clunking rocker myself?
Start with basic cleaning. Remove dust and debris from the motor housing exterior. Check all visible bolts and tighten them gently if loose.
Beyond that, motor work requires disassembly expertise. Most repairs need professional service. Opening the motor housing without proper knowledge can cause more damage.
When should I contact the manufacturer about the noise?
Contact them as soon as the noise starts. Share your video recordings and detailed descriptions. Intermittent sounds are harder to diagnose, so documentation strengthens your warranty claim.
Most manufacturers offer repair or replacement options under warranty. Acting quickly protects your coverage.

Hi, I’m Archie Flynn, the founder and writer behind RapidResizerHub! 👋 I’m a passionate tech enthusiast who loves exploring the latest gadgets, smart devices, and trending electronics on Amazon. Through my honest, hands-on reviews and detailed buying guides, I help readers make smarter, well-informed shopping decisions.