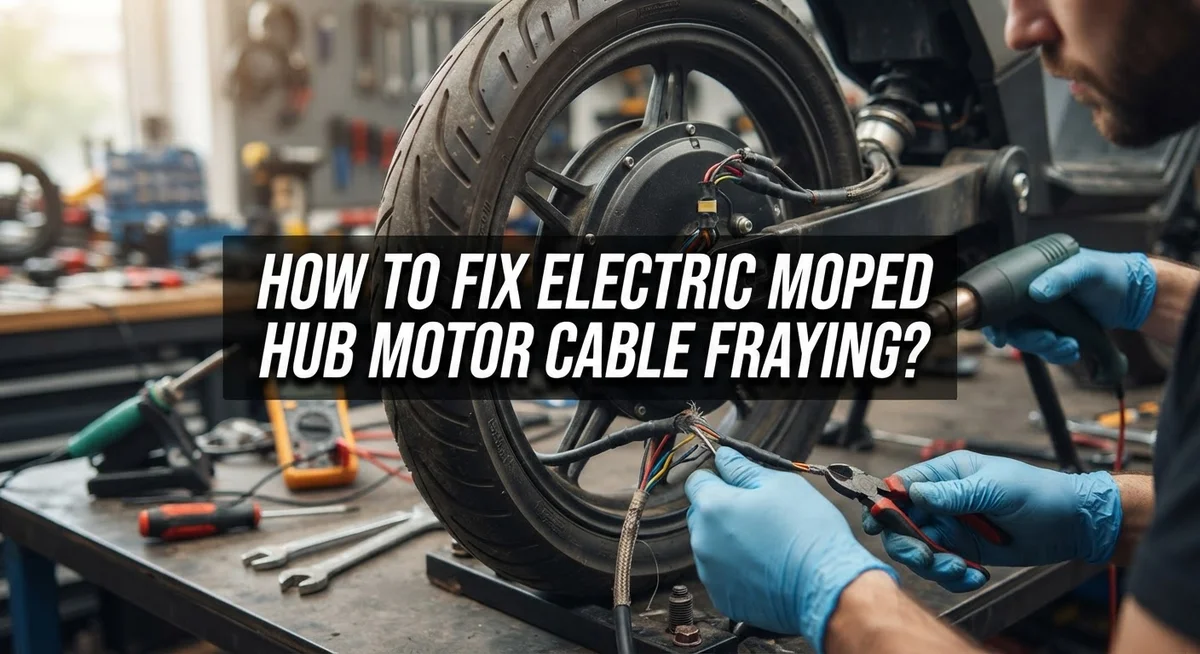
How To Fix Electric Moped Hub Motor Cable Fraying?
Your electric moped suddenly cuts power on bumpy roads. You check the wiring and spot it. The hub motor cable looks frayed and worn.
This is a common problem for moped owners. Cables rub against moving parts over time. They wear down and expose the wires inside.
A frayed cable is more than a small issue. It breaks electrical continuity. This can cause power loss or even safety risks while riding.
Many riders think electrical tape fixes the problem. It does not. Tape covers damage but does not restore a solid connection.
In a Nutshell
- Check the damage location first. Cables near the axle are much harder to fix than those along the frame.
- Never rely on electrical tape. It looks like a fix, but it does not restore a safe electrical connection.
- Open the hub carefully. Magnets inside create resistance, so gently work the casing free without forcing it.
- Strip and solder the wire. Remove the damaged section, then join the wires with a clean solder joint for a strong connection.
- Seal it with heatshrink tubing. This step protects your repair from moisture, dirt, and future wear.
- Know when to replace instead of repair. If the fraying sits too close to the axle, a full cable harness swap is often the safer choice.
Why Hub Motor Cables Fray and Why It Matters
Hub motor cables fray for several straightforward reasons. Understanding why this happens helps you prevent it and fix it properly.
Vibration and movement cause most fraying. Your moped bounces on rough roads, and cables shift constantly inside the motor housing. Over time, this rubbing wears through the outer insulation layer. The inner wires then expose themselves to air, moisture, and further damage.
Poor cable routing creates another common cause. If cables bend too sharply or rest against sharp edges inside the hub, the insulation gets cut gradually. Cables should follow smooth paths without kinks or tight angles. When they do not, fraying happens faster.
Age and weather play a role too. Rubber and plastic insulation break down naturally over years of sun exposure, heat cycles, and cold temperatures. Salt spray or moisture accelerates this breakdown significantly. Old cables become brittle and fray more easily than new ones.
Manufacturing defects occasionally cause fraying right out of the box. Some cables arrive with weak insulation or poor solder joints at the connector points. These weak spots fail quickly under normal riding conditions.
Why does fraying matter so much? Exposed wires break electrical continuity. Your motor cannot receive consistent power when the connection is interrupted. You experience sudden power loss, stuttering acceleration, or complete shutdowns.
Safety becomes a real concern. Exposed wires can short circuit against the metal hub casing. This creates heat, potential fire risk, and damage to your motor controller. Frayed cables also allow moisture and dirt inside the motor, causing corrosion and component failure.
Catching fraying early prevents expensive repairs. A small frayed section caught immediately costs far less than replacing an entire motor or controller. This is why regular cable inspections matter for every electric moped owner.
Signs Your Hub Motor Cable Is Fraying
Frayed hub motor cables show clear warning signs that you should catch early. Look for visible wire strands poking out from the cable sheath. These exposed wires are the first red flag that damage has started.
Listen for intermittent power loss or stuttering acceleration. Your moped might cut out for a second, then work fine again. This on and off pattern usually points to a broken electrical connection from fraying.
Check for burnt smells near the motor area. Exposed wires can create small arcs or short circuits, which produce that distinctive burnt odor. Never ignore this sign, as it indicates serious electrical stress.
Inspect the cable physically during routine maintenance. Run your fingers along the entire length slowly. Feel for rough spots, bumps, or areas where the outer coating feels thin or compromised.
Watch the damage location carefully. Fraying near the wheel axle looks different from fraying along the frame. Axle-adjacent damage feels stiff and harder to move, while frame-area fraying may bend more easily.
Notice if your moped loses power specifically on bumpy roads. Vibration makes fraying worse, so rough terrain often triggers the problem. Smooth roads might mask the issue temporarily.
Check around cable connectors and joints. These stress points fray first because they flex more than straight cable sections. Look for discoloration or corrosion around connection points.
Pay attention to performance changes over weeks. Gradual power loss suggests progressive fraying rather than a sudden break. Early detection at this stage means simpler repairs.
Temperature changes matter too. Cold weather makes cable sheaths brittle and more prone to cracking. Hot weather can soften the outer coating. Check cables after extreme weather swings.
Your moped tells you when something is wrong. These signs give you time to fix the problem before it becomes dangerous or expensive.
Tools and Materials You’ll Need Before Starting
Before you start fixing your hub motor cable, gather the right tools and materials. Having everything ready makes the job faster and safer.
Soldering equipment is essential. You need a soldering iron with enough wattage to heat wire connections properly. A solder sucker or desoldering braid helps remove old solder from damaged sections. Lead free solder works well for electrical connections on mopeds.
Wire strippers remove the outer insulation from damaged cable sections. Choose strippers that fit your cable gauge. A multimeter checks electrical continuity before and after your repair, confirming the fix worked.
Heatshrink tubing protects your soldered joints from moisture and dirt. Buy several sizes to match your cable diameter. A heat gun or lighter shrinks the tubing around the repair. This step prevents future fraying at the same spot.
Safety gear matters too. Wear safety glasses when working with hot solder. Insulated gloves protect your hands from burns. Work in a well ventilated area since solder fumes can irritate your lungs.
Basic hand tools round out your kit. You need a screwdriver set to open the hub motor casing. Needle nose pliers help manipulate small wires during soldering. A small brush cleans away flux residue after soldering.
Cable management supplies prevent future problems. Zip ties secure cables away from moving parts. Adhesive backed foam tape cushions cables against vibration. These items stop new fraying from starting.
Cleaning materials prepare your work area. Use isopropyl alcohol and a small cloth to clean wire ends before soldering. Clean connections make stronger solder joints.
Check that your soldering iron heats to the right temperature before starting. Most hub motor cable repairs need 350 to 400 degrees Fahrenheit. Having all materials nearby prevents interruptions during the actual repair work.
Step-by-Step Guide to Repairing a Frayed Hub Motor Cable
Start by removing your electric moped from service. You won’t be able to work safely while the motor is powered, so disconnect the battery completely. This prevents accidental electrical shocks during your repair work.
Next, locate the frayed section of your hub motor cable. Examine where the damage occurs. If fraying sits near the wheel axle, your repair becomes significantly more complex. Cable damage close to the axle often requires full cable harness replacement instead of simple patching.
For fraying that occurs along the cable run or near connectors, you can proceed with localized repair. Gently pull the cable to create slack in the damaged area. This slack gives you room to work without straining the wires further.
Remove the outer insulation from the damaged section using your wire strippers. Strip back about half an inch of the cable sheath to expose the frayed inner wires. Be careful not to nick or cut the actual conductors underneath.
Now comes the critical soldering step. Heat your soldering iron to the proper temperature. Join the exposed wires back together using solder. This restores electrical continuity that the fraying broke. Allow the solder joint to cool completely before touching it.
Slide heatshrink tubing over your soldered repair. Apply heat carefully to shrink the tubing around the joint. This creates a waterproof seal that protects your work from moisture and dirt. The tubing also prevents future fraying at this exact spot.
Test your repair before fully reassembling the motor. Power on your moped and listen for normal motor sounds. Check that acceleration feels smooth without stuttering or power loss.
If fraying occurs again within weeks, the problem likely stems from improper cable routing or a manufacturing defect. Consider replacing the entire cable harness rather than attempting multiple repairs on the same cable.
Repair Without Opening the Hub: When It’s Possible
Sometimes you can fix fraying without opening the entire hub motor. This approach works best when the damage sits along the cable run or near connectors, away from the axle area.
Check your damage location first. If fraying happens in the middle section of the cable or at connection points, you have a good chance of success. Damage that sits very close to the axle usually requires full hub opening, which is more complex.
For accessible fraying, start by removing the outer insulation from the damaged section. Use wire strippers to carefully peel back the sheath. Work slowly to avoid cutting into the copper wires underneath.
Once exposed, examine how many wires are damaged. If only the outer protective layer frayed but the wires stayed intact, your repair becomes simpler. You can skip soldering and move straight to protection.
Apply heatshrink tubing over the exposed area. Slide the tubing over the damage before you do anything else. This prevents moisture and dirt from entering while you work.
If wires actually broke or separated, you’ll need to solder them back together. Make sure your soldering iron reaches proper temperature. Work quickly to avoid overheating the cable insulation.
After soldering, slide your heatshrink tubing into place and apply heat. The tubing shrinks tight around the repair, creating a protective seal.
Test your moped before full reassembly. Turn on the motor and check for power delivery. Listen for any stuttering or unusual sounds.
This method works well for minor fraying in accessible locations. However, if fraying keeps happening in the same spot within weeks, the problem likely stems from how the cable routes through your frame. You may need to adjust cable positioning or consider a full harness replacement to prevent recurring damage.
Common Mistakes to Avoid During Cable Repair
Many people make critical errors when repairing frayed hub motor cables. Understanding these mistakes helps you avoid expensive failures and safety hazards.
Electrical tape alone won’t solve fraying problems. Many people wrap tape around damaged sections and assume the repair is complete. Tape deteriorates quickly from heat, moisture, and vibration. Your motor generates significant heat during operation. The tape peels away within weeks, exposing wires again and creating electrical shorts.
Attempting repairs without proper soldering equipment is another common mistake. You might try twisting wires together or using crimp connectors instead. These methods fail because they don’t create reliable electrical continuity. Your motor needs strong connections to function safely. Weak joints cause resistance, heat buildup, and potential fires.
Not accounting for magnet resistance causes problems when opening the hub. The permanent magnets inside your motor create strong magnetic fields. This resistance makes the hub difficult to open. People force it open too aggressively and damage internal components. Take your time and use steady, even pressure.
Skipping the heatshrink tubing step is a major oversight. After soldering, your joints are exposed to the environment. Moisture and dirt corrode the connections over time. Heatshrink tubing provides essential protection. Always slide it over your repair before applying heat.
Ignoring cable routing issues leads to repeated fraying. If your cable rubs against sharp edges or bends too tightly, fraying returns quickly. Check your cable path after repairs. Secure loose sections with appropriate management supplies.
Testing your repair before reassembly matters greatly. Some people close everything up without checking their work. Power on your moped briefly in a safe location. Listen for unusual sounds and feel for heat near the repair. This catches failures before they become dangerous.
Finally, don’t attempt repairs on axle-proximate fraying. When damage occurs too close to the axle connection, full cable replacement is safer than localized repair.
Troubleshooting: When Repair Isn’t Enough
Sometimes your hub motor cable fraying gets so bad that simple repair won’t fix it. You need to know when to stop trying and replace the entire cable harness instead.
Axle proximity matters most. If fraying happens near where the cable connects to the axle, repair becomes risky. The space is too tight for proper soldering work. Heat from your soldering iron can damage nearby components. Moisture also gets trapped in tight spaces, causing corrosion later. In these cases, full replacement saves you time and prevents future failures.
Check the extent of damage. If more than half the wires in your cable are broken or separated, localized repair won’t restore full electrical flow. Your motor won’t get consistent power. You’ll experience stuttering, reduced speed, or complete shutdowns. A new cable harness handles the full current load safely.
Look for repeated fraying. If the same spot frays again within weeks after your repair, something is wrong with how the cable sits in your motor. Either the routing is poor or the cable itself has a manufacturing flaw. Replacing the harness with better routing prevents the problem from happening again.
Consider age and condition. Older cables that fray in multiple locations show signs of overall wear. Repairing one spot won’t help if other sections fail soon after. A complete replacement gives you reliability and peace of mind.
Professional assessment helps. If you’re unsure whether repair or replacement makes sense, have someone experienced examine your motor. They can spot issues you might miss. The cost of replacement cable harnesses varies based on your motor model, so get pricing before deciding.
When repair isn’t enough, replacement protects your investment and keeps your moped running smoothly.
Final Thoughts
Fixing a frayed hub motor cable takes patience and the right approach. You now understand the core steps involved in this repair process.
Small fixes work well for minor fraying. You can strip the damaged section, solder the wires, and seal everything with heatshrink tubing.
Bigger problems need bigger solutions. When fraying happens near the axle, replacement often makes more sense than repair.
Your safety matters throughout this process. Always disconnect the battery before touching any wiring on your moped.
Take your time when opening the hub motor. Rushing this step often leads to stripped screws or damaged components.
Quality tools make a real difference. A good soldering iron and proper heatshrink tubing will save you frustration later.
Testing your work before final reassembly saves time. This simple step catches problems while they’re still easy to fix.
Regular inspection helps you catch fraying early. Check your cables every few months, especially if you ride often.
Weather exposure speeds up cable wear. Store your moped somewhere dry when possible to extend cable life.
Some riders feel nervous about this repair at first. That feeling fades once you complete your first successful fix.
Remember that practice builds confidence with these repairs. Your second repair will feel much easier than your first.
If a repair feels beyond your skill level, that’s okay too. Many local shops handle hub motor issues for a reasonable fee.
Trust your judgment on when to repair versus replace. You know your moped’s history and condition better than anyone else.
Cable maintenance keeps your moped running smoothly for years. A little care now prevents bigger headaches down the road.
Frequently Asked Questions
Why does my hub motor cable keep fraying in the same spot?
Repeated fraying in one location signals an underlying issue. Your cable may experience constant friction against the motor housing or axle. Movement during riding creates stress on that weak point. The original repair might not have addressed the root cause of the problem.
Check how your cable routes through the motor assembly. Poor cable management causes wires to rub against sharp edges. Vibration from riding amplifies this friction over time. You need to fix the routing, not just the frayed wires.
Can I use electrical tape instead of heatshrink tubing?
Electrical tape provides temporary protection only. It doesn’t create a permanent seal around your wires. Moisture and dirt work their way under the tape over time. Your connection becomes vulnerable to corrosion and electrical failure.
Heatshrink tubing bonds tightly to the cable when heated. It protects against water, dust, and physical damage far better. Tape eventually peels away or loses its stickiness. For any hub motor repair, heatshrink tubing is the proper choice.
How do I know if my cable needs full replacement instead of repair?
Extensive damage near the axle connection means replacement makes more sense. If fraying affects more than half your cable’s wires, localized repair won’t hold. Multiple frayed spots along the cable suggest widespread deterioration.
Age and overall cable condition matter significantly. Older cables that show wear in several places need replacement. A single small fray on a newer cable deserves repair. When in doubt, assess whether the damage is isolated or widespread.
What makes opening a hub motor difficult?
Strong permanent magnets inside create significant resistance. The magnets pull metal tools toward them with force. You need patience and careful handling to avoid damage. Sudden movements can cause tools or components to snap into the magnets unexpectedly.
Plan extra time for this step. Work slowly and deliberately around the magnetic field.

Hi, I’m Archie Flynn, the founder and writer behind RapidResizerHub! 👋 I’m a passionate tech enthusiast who loves exploring the latest gadgets, smart devices, and trending electronics on Amazon. Through my honest, hands-on reviews and detailed buying guides, I help readers make smarter, well-informed shopping decisions.