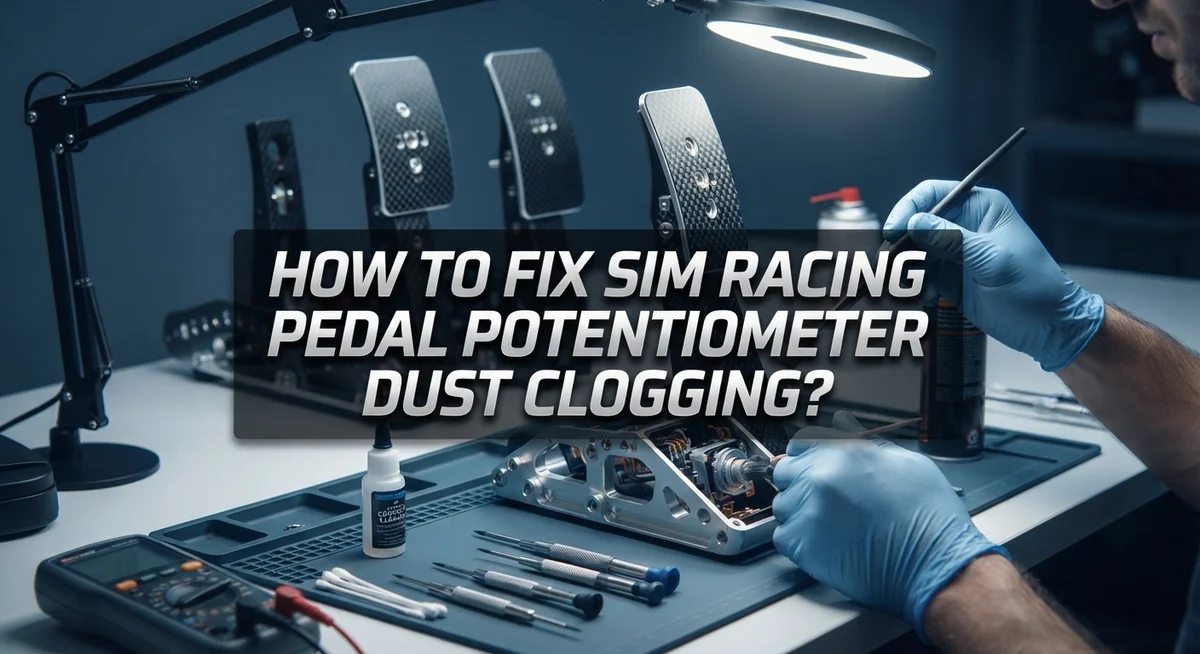
How To Fix Sim Racing Pedal Potentiometer Dust Clogging?
Do your sim racing pedals feel jittery or unresponsive? Does your throttle stutter even when you press it smoothly? Dust clogging inside the potentiometer is often the hidden culprit.
Many pedal sets, like the Logitech G29 and non-load cell CSL Elite Pedals, use potentiometers with an unsealed can-style design. This design leaves them open to dust, dirt, and even pet hair. Over time, this buildup causes erratic pedal behavior that ruins your racing experience.
The good news? You can fix this problem yourself with a few simple steps.
In a Nutshell
- The cause: Potentiometers use an unsealed can design. Dust and pet hair sneak inside and disrupt the signal.
- The fix: Open the pedal housing and take out the pedal assembly. This gives you direct access to the potentiometer.
- Cleaning method: Blow out the dust using compressed air or manual blowing. Both work well for loosening trapped particles.
- When needed: Use contact cleaner for stubborn grime. This helps clear residue that air alone cannot remove.
- Avoid this mistake: Don’t just wipe the surface of the pedal. You must disassemble the housing for the cleaning to actually work.
- Long term care: Keep your pedals in a clean, dust free space. Regular maintenance keeps them working smoothly for longer.
Understanding How Potentiometer Pedals Work and Why Dust Clogs Them
Potentiometer pedals work by using a variable resistor that changes electrical resistance as you press the pedal. When you move the pedal, a wiper inside the potentiometer slides across a resistive surface. This creates different voltage signals that your racing sim reads as throttle, brake, or clutch input.
The potentiometer sits inside an unsealed can design. This open construction lets air flow freely, which is great for electronics cooling. However, it also means dust and dirt can enter easily from your racing environment.
Over time, dust particles settle on the resistive surface inside the potentiometer. Pet hair, skin cells, and ambient dust all accumulate in this confined space. When enough particles build up, they block the wiper from making clean contact with the resistive material.
This blockage causes inconsistent electrical signals. Your sim receives jittery input even when you press smoothly. You might notice throttle stuttering, sudden drops in input, or erratic pedal behavior during races.
The problem gets worse in dusty rooms or homes with pets. Every time you press the pedal, dust gets pushed deeper into the can. The accumulation happens gradually, so you might not notice until the problem becomes severe.
Hall Effect pedals avoid this issue completely because they use sealed magnetic sensors instead of exposed mechanical contacts. These sensors have no moving parts inside, so dust cannot interfere with their operation.
Potentiometer pedals require active maintenance to stay responsive. Regular cleaning prevents dust from building up to problematic levels. Understanding this design weakness helps you maintain your pedals effectively and keep your racing experience smooth and consistent.
Signs Your Pedal Potentiometer Is Clogged With Dust
Your pedals send warning signs before they completely fail. Learning to spot these signals helps you catch dust clogging early.
Jittery throttle input is the most common warning sign. When you press the pedal smoothly, the throttle should respond with steady acceleration. Instead, it jumps around or stutters. This happens because dust blocks parts of the potentiometer’s resistive surface.
Inconsistent pedal response shows up during racing. One lap your braking feels normal. The next lap the same pedal pressure gives different results. Your sim car might brake harder or softer than expected without you changing your foot position.
Dead zones appear when certain pedal positions stop working properly. You might notice the throttle doesn’t respond until you press it halfway down. Or the brake pedal ignores light pressure. These gaps indicate dust has settled on specific areas of the potentiometer.
Stuttering acceleration is particularly noticeable in online racing. Your virtual car hesitates or lurches forward unpredictably. Other drivers might see your car behaving erratically even though you’re pressing smoothly.
Erratic braking behavior makes the car hard to control. The brake input jumps between values instead of smoothly increasing. You might lock up wheels or lose stopping power unexpectedly.
Audible crackling sometimes happens inside the pedal housing. This sound indicates dust particles moving across the resistive element as you press.
Pay attention to these signs during your racing sessions. The earlier you notice problems, the easier the cleaning process becomes. Don’t wait until pedals fail completely. Start cleaning as soon as you spot any of these warning signals.
Tools and Materials You’ll Need Before Starting
Before you start cleaning your sim racing pedal potentiometer, gather the right tools. You’ll make the job easier and avoid damaging your equipment.
Screwdrivers are essential. You need both Phillips and flathead types to open your pedal housing. Check your pedal model first to see which sizes fit your screws. A magnetic screwdriver helps prevent losing small fasteners inside tight spaces.
Compressed air works best for blowing out dust from the potentiometer. A manual air blower also works if you don’t have compressed air available. Both methods push dust out without touching delicate internal parts. Never use a vacuum cleaner near electronics, as static electricity can cause damage.
Contact cleaner handles stubborn grime that air alone won’t remove. This spray dissolves buildup on the resistive surface inside the potentiometer. Let the cleaner dry completely before reassembling your pedals. Some people prefer isopropyl alcohol as an alternative for light cleaning.
Small brushes help dislodge particles stuck in corners. Use soft bristles to avoid scratching the potentiometer’s internal components. A toothbrush works in a pinch for gentle brushing.
Lint free cloths prevent fibers from getting inside your pedals during reassembly. Paper towels leave behind particles that cause future clogging. Cotton rags are your best choice.
A small container keeps your screws organized while the housing is open. Losing fasteners means you can’t properly reassemble your pedals.
Optional lighting like a flashlight or headlamp helps you see inside the pedal housing clearly. Good visibility prevents accidental damage to small components.
Gather these items before opening your pedals. Preparation prevents frustration and keeps your equipment safe throughout the cleaning process.
Step-by-Step Guide to Disassembling Your Pedal Housing
Start by unplugging your pedal set from your racing rig. This keeps you safe while you work on the electronics inside. Let the pedals sit for a few minutes so any residual charge dissipates completely.
Locate the screws on your pedal housing. Most sim racing pedals have screws on the bottom or sides of the unit. Count them carefully and note where each one goes, since different screw lengths often go in different positions.
Remove the screws slowly and place them in your small container. Rushing this step can strip the screw heads or cause you to lose parts. Keep the housing pieces organized so you remember how they fit back together.
Gently separate the pedal housing halves. Don’t force them apart if they seem stuck, as internal wires might still be connected. Look for any ribbon cables or wires linking the two halves before pulling them completely open.
Locate your pedal assembly inside the housing. You’ll see the mechanical components that move when you press down. Identify which part connects to the potentiometer you need to access.
Carefully disconnect any wires or clips holding the pedal assembly in place. Take a photo with your phone before disconnecting anything. This photo becomes your reference guide when reassembling everything later.
Lift out the pedal assembly and set it aside on a clean surface. Now you have clear access to the potentiometer sitting inside the housing. The potentiometer looks like a small cylindrical component with a metal shaft.
Take your time during disassembly. Rushing creates mistakes that damage your pedals permanently. Keep all pieces visible and organized throughout this process.
Cleaning the Potentiometer: Compressed Air and Contact Cleaner Methods
Once you have your pedal assembly removed and ready, cleaning the potentiometer becomes straightforward. The potentiometer sits inside your pedal assembly and collects dust through its unsealed design. You’ll access it by gently removing the potentiometer from its housing slot.
Compressed air works as your first cleaning method. Hold the potentiometer steady and aim the air stream directly into the sensor opening. Short bursts work better than one long stream. This approach dislodges loose dust particles quickly. Move the nozzle around the entire potentiometer surface to ensure complete coverage. Let any dislodged dust fall away naturally.
If compressed air alone doesn’t restore smooth pedal response, contact cleaner becomes your next step. Spray a small amount directly onto the potentiometer’s internal contacts. The cleaner dissolves stubborn grime and oxidation that accumulates over time. Allow the cleaner to dry completely before reassembling. This typically takes five to ten minutes depending on humidity levels in your space.
Manual blowing also works if you lack compressed air. Position the potentiometer at a slight angle and blow firmly into the sensor opening. This method takes more effort but produces similar results. Repeat several times until you feel confident the dust has cleared.
Check the potentiometer visually after cleaning. You should see clean contacts without visible dust buildup. The sensor opening should appear clear when you look through it. Once satisfied with the cleaning, you’re ready to reassemble your pedal assembly back into the housing.
Regular cleaning prevents dust from accumulating to problematic levels. Monthly maintenance keeps your potentiometer responsive and extends your pedal’s usable lifespan significantly.
Reassembling and Testing Your Pedals After Cleaning
After cleaning your potentiometer, you need to reassemble everything carefully. Take your time during this step. Rushing leads to loose connections or damaged components.
Start by reconnecting any wires or clips you disconnected from the pedal assembly. Make sure each connection clicks firmly into place. Gently guide the pedal assembly back into the housing. Align it properly so nothing catches or bends during insertion.
Position the housing halves so they match up evenly. Check all edges before pressing them together. Misaligned halves can pinch wires or create gaps. Press the halves together gently until they sit flush against each other.
Insert your screws back into their original holes. Tighten them in a cross pattern, like tightening car wheel lugs. This prevents uneven pressure that warps the housing. Don’t overtighten screws, as this cracks plastic housings.
Plug your pedal set back into your racing rig. Open your racing game or pedal calibration software. Press each pedal through its full range of motion slowly. Watch the input values on your screen to confirm smooth response.
Test for stuttering or erratic behavior. If your throttle pedal jumps or skips values, the potentiometer still needs cleaning. If your brake pedal reads inconsistently, repeat the cleaning process.
Smooth, consistent values across the entire pedal range mean your cleaning worked. Your pedals should now respond accurately to your inputs. If problems persist after a second cleaning, the potentiometer itself may be damaged and need replacement.
Run a few practice laps to ensure everything feels normal during actual racing. Pay attention to throttle response and brake pressure feedback.
Preventing Future Dust Buildup and Maintenance Schedules
Dust buildup happens because potentiometer pedals have unsealed designs. Environmental particles slip inside during normal use. The best approach is stopping this problem before it starts.
Create a regular maintenance schedule for your pedal set. Check your potentiometers every two to four weeks if you race frequently. Monthly inspections work well for casual racers. This routine catches dust accumulation early before it causes throttle stuttering.
Keep your racing area clean and dust free. Avoid placing your pedals near fans, open windows, or high traffic zones. Pet hair becomes a major culprit in many homes. If you have cats or dogs, place your pedals away from their living spaces.
Store your pedals in a clean container when not in use. A sealed box or storage case prevents dust from settling on your equipment. This simple step extends the time between cleanings significantly.
Wipe down your pedal housing with a soft, dry cloth weekly. This removes surface dust before particles enter through gaps and crevices. Never use water or wet cloths on your pedals.
Consider environmental factors in your setup. High humidity can attract dust particles more easily. Dry environments reduce dust accumulation rates. Air purifiers in your racing room help minimize airborne particles.
Document your cleaning dates in a simple calendar or notebook. This helps you track maintenance patterns and identify when problems typically occur. Some racers need cleaning every month. Others go three months without issues depending on their environment.
Consistent maintenance prevents expensive repairs down the road. Spending fifteen minutes monthly on prevention beats spending hours troubleshooting erratic pedal behavior during important races. Your pedal performance stays smooth and reliable when you follow a regular schedule.
Common Mistakes to Avoid When Cleaning Pedal Potentiometers
Many people make critical mistakes when cleaning their potentiometer pedals. The biggest error is attempting surface cleaning without taking the pedal apart. You cannot remove dust effectively from outside the housing.
Avoid shallow cleaning methods. Wiping the exterior does nothing for internal contamination. Dust sits deep inside the potentiometer can where your fingers cannot reach. You must disassemble the pedal to access the problem areas properly.
Another common mistake is using excessive liquid cleaners. Some people spray contact cleaner directly into the potentiometer without control. This creates puddles inside the component and can damage internal connections. Apply cleaner sparingly and let it dry completely before reassembly.
Do not rush the disassembly process. Many users force screws or bend clips trying to open the housing quickly. This breaks plastic parts and makes reassembly impossible. Work slowly and note where each screw came from.
Skipping the visual inspection step wastes your effort. After cleaning, look inside the potentiometer with a flashlight. You need to confirm the dust actually left. If you see residue remaining, repeat the cleaning process.
Never reassemble wet components. Moisture inside the potentiometer causes electrical problems and corrosion. Always wait for everything to dry completely after using contact cleaner.
Do not forget to reconnect wires properly during reassembly. Loose connections create the same symptoms as dust clogging. Double check that all clips and connectors snap into place firmly.
Finally, avoid ignoring the problem until your pedals fail completely. Regular maintenance prevents severe dust accumulation. Cleaning your potentiometers every few months keeps them responsive and extends their lifespan significantly.
Final Thoughts
Dust clogging in sim racing pedal potentiometers is a common problem. But it’s also an easy fix.
Your Logitech G29 or CSL Elite Pedals will keep working well if you clean them regularly. The unsealed can style design means dust and pet hair get inside over time.
The good news is that fixing this issue does not require expensive tools. You just need patience and a careful approach to disassembly.
Compressed air and contact cleaner solve most dust related pedal problems. These simple tools handle the job without damaging sensitive components inside your potentiometer.
Remember that surface cleaning never solves internal dust issues. You must open the housing and access the potentiometer directly for real results.
If your pedals still stutter after cleaning, something else might be wrong. Consider checking wire connections or looking for physical damage inside the housing.
For racers who want to skip this maintenance entirely, Hall Effect pedals offer a solution. Their sealed sensor design blocks dust completely, so you never deal with clogging again.
But if you already own potentiometer based pedals, regular cleaning keeps them running smooth. This small investment of time protects your equipment and your racing performance.
Think of pedal maintenance like changing oil in a car. Skipping it causes bigger problems later, while regular care keeps everything running perfectly.
Your racing setup deserves this small effort. Clean pedals mean consistent, accurate inputs every time you hit the track.
Take action now rather than waiting for complete failure. A little maintenance today saves you frustration and money tomorrow, keeping your sim racing experience smooth and enjoyable for years to come.
Frequently Asked Questions
Why do sim racing pedals get dusty inside if I keep them clean?
Potentiometer pedals use an unsealed can style design. This means dust and pet hair can enter from the environment even when your pedals look clean on the outside. The internal components sit exposed to air, so particles naturally accumulate over time. Your racing area, carpet, and even air circulation bring in contaminants. Regular use also creates vibrations that help dust settle inside the housing.
Can I clean my pedal potentiometer without taking it apart?
No. Surface wiping does not reach the internal dust. You must open the pedal housing and remove the potentiometer assembly to access the contaminated areas. Shallow cleaning methods waste your time and leave the problem unsolved. The dust sits inside the can where a cloth cannot reach. Disassembly takes only fifteen minutes and gives you real results.
What should I use to blow out the dust from my potentiometer?
Compressed air works best for this job. Hold the can upright and use short bursts to push dust out of the potentiometer opening. Manual blowing also works if you do not have compressed air available. After blowing out loose particles, you can apply contact cleaner to remove stubborn residue. Let everything dry completely before reassembling.
How often should I clean my potentiometer pedals?
Monthly cleaning prevents most dust buildup issues. If you race frequently or live in a dusty environment, clean every two weeks. Store your pedals in a clean container when not in use. Wipe the exterior housing weekly with a dry cloth. This routine maintenance keeps your pedals responsive and extends their lifespan significantly.
Will Hall Effect pedals avoid this dust problem entirely?
Yes. Hall Effect sensors use sealed designs that block dust from entering. These pedals require no internal cleaning maintenance. However, if you already own potentiometer based pedals, regular cleaning keeps them working smoothly for years.

Hi, I’m Archie Flynn, the founder and writer behind RapidResizerHub! 👋 I’m a passionate tech enthusiast who loves exploring the latest gadgets, smart devices, and trending electronics on Amazon. Through my honest, hands-on reviews and detailed buying guides, I help readers make smarter, well-informed shopping decisions.