How To Fix Arcade Cabinet Joystick Microswitch Leaf Bending?
Your arcade joystick suddenly refuses to move left. Or maybe it skips inputs during a fast combo. This is frustrating, especially mid game.
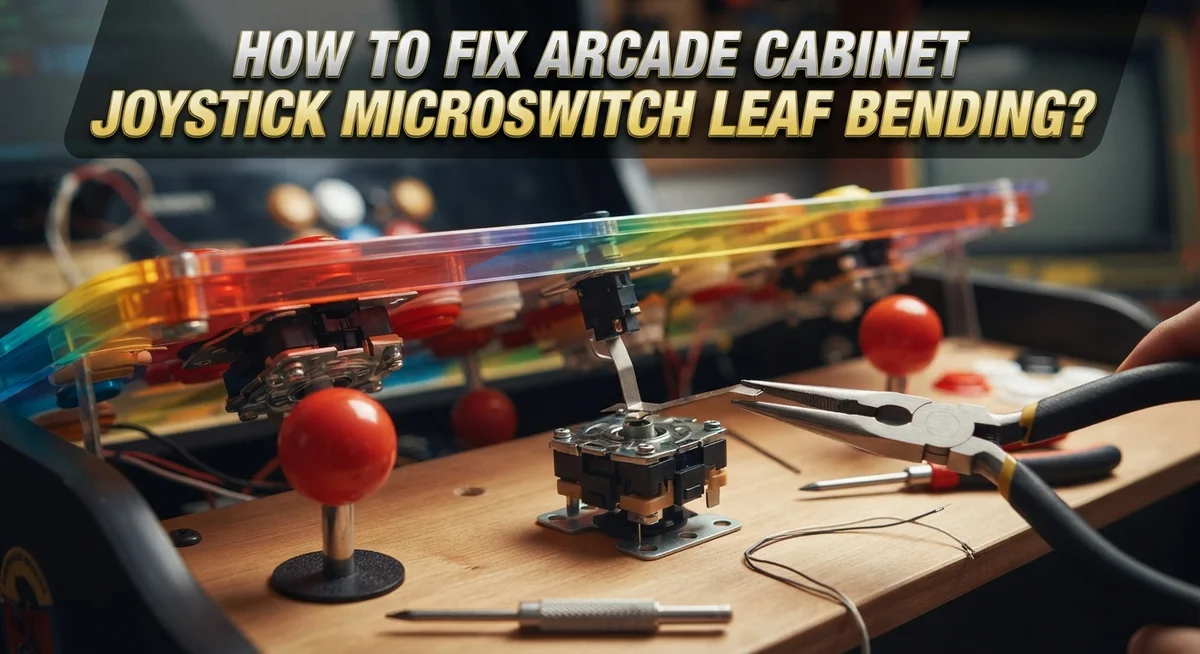
In most cases, the real culprit is a bent microswitch leaf. These tiny metal leaves control every direction your joystick registers. When they bend out of shape, your inputs stop working correctly.
The good news? You can fix this yourself. No need to replace the whole switch or joystick.
In a Nutshell
- Check continuity first. Before blaming the leaf, test the switch and check solder joints. Wiring issues often mimic leaf damage.
- Bent leaves cause missed directions. If your joystick won’t register a move, a bent leaf is often the reason. This blocks proper contact.
- Adjust near the switch body. Never bend the leaf at its tip. Always make your bends close to where the leaf meets the switch.
- Overcorrect, then straighten. Bend the leaf inward more than needed first. Then bend it back out to the correct spot. This method gives you better control over the final position.
- Clean contacts before adjusting. Oxidation on the leaf can cause the same symptoms as bending. A stiff card or business card works well here.
- Know when to stop repairing. If leaves are salvageable, adjust them. If they are cracked or snapped, replacement is your best option.
Follow these points and your joystick should respond properly again.
Understanding Leaf Microswitches and How They Work
Leaf microswitches are the electrical hearts of arcade joysticks. They detect when you push the stick in each direction. Understanding how they work helps you fix bent ones correctly.
A leaf microswitch contains a metal leaf that sits inside the switch housing. When you move the joystick, a plastic actuator pushes against this leaf. The leaf bends downward and makes contact with a stationary contact point below it. This contact completes an electrical circuit, sending a signal that registers your input.
The gap between the leaf and contact point matters greatly. If the gap is too wide, the leaf won’t reach the contact even when pushed. If the gap is too tight, the leaf may touch the contact constantly, causing false inputs. The correct spacing allows the leaf to move freely until pressed, then make clean contact.
A bent leaf throws off this precise spacing. The leaf might curve away from the contact point permanently. This means pushing the joystick in that direction won’t make the leaf bend far enough to touch. Your game won’t register the input at all.
Bent leaves happen from repeated use, impact, or manufacturing defects. The leaf gradually warps over time. Sometimes a single hard press can bend it instantly.
The key insight is this: the leaf must be straight and positioned at exactly the right distance from the contact. Even a tiny bend ruins the spacing. The leaf becomes unreliable or stops working completely in that direction.
This is why arcade technicians focus on straightening the leaf and restoring proper gap spacing. You’re not replacing broken parts. You’re returning the leaf to its original straight position and correct distance from the contact point. Once the leaf is straight and properly spaced, the switch functions normally again.
Signs of Bent or Misaligned Leaf Switches
Your arcade joystick shows clear warning signs when a leaf switch bends. Learning to spot these signs helps you catch problems early and fix them before they get worse.
The most obvious sign is directional failure. Your joystick stops responding in one direction. You push left, and nothing happens. You push right, up, or down, and the game registers the input fine. This one-direction failure points directly to a bent leaf in that specific switch.
Another telltale sign is inconsistent input registration. Sometimes the joystick works in a direction, and sometimes it doesn’t. You might need to push harder or angle the stick differently to make it register. This happens because the bent leaf barely touches the contact point. The slightest pressure difference breaks the connection.
You may also notice sluggish response times. The joystick reacts slower than normal in certain directions. Games feel unresponsive or laggy in that particular direction. This occurs when the leaf sits too far from the contact point due to bending.
Visual inspection reveals bent leaves easily. Remove the joystick shaft and look at the microswitch leaves inside. A straight leaf sits parallel to the switch body. A bent leaf angles away or sits crooked. Compare the suspected leaf to a working leaf on another switch. The difference becomes obvious immediately.
Auditory clues matter too. A bent leaf may produce a softer click or no click at all when pressed. Working switches produce a crisp, audible click. If one direction sounds different, suspect a bent leaf.
Contact oxidation can mimic bent leaf symptoms. Brown or greenish discoloration on the leaf or contact point suggests oxidation buildup. This prevents proper electrical connection even if the leaf is straight. Clean these contacts with a stiff paper to rule out oxidation before assuming the leaf bent.
Diagnosing the Problem Before You Bend Anything
Before you touch a single leaf, you need to know if bending is actually your problem. Many arcade technicians skip this step and waste time adjusting switches that work fine.
Start with the basics. Unplug your cabinet and remove the joystick shaft completely. This gives you clear access to the microswitches underneath. Look at each switch carefully. Do you see leaves that are visibly bent or twisted? Compare them side by side. A straight leaf and a bent leaf look noticeably different.
Test continuity next. Use a multimeter set to continuity mode. Touch the probe to the switch terminals while pressing the joystick in each direction. You should hear a beep or see a reading when the leaf makes contact. If you get no response in one direction, the leaf may not be reaching the contact point at all.
Check your solder joints. Sometimes the problem isn’t the leaf. It’s a cold solder connection at the switch terminals. A weak joint breaks continuity just like a bent leaf does. Look for dull, grainy solder instead of shiny connections. Reflow these joints if needed before assuming leaf damage.
Clean the contacts. Oxidation on the leaf surface mimics bent leaf symptoms perfectly. Take a stiff business card or thin paper and slide it between the leaf and contact point several times. This scrapes away corrosion. Test continuity again after cleaning.
Inspect the gap spacing. Even straight leaves can fail if the gap is wrong. The leaf should sit close to the contact but not touching when the joystick is neutral. If the gap looks too wide, the leaf cannot reach the contact during normal play.
Only after completing these checks should you proceed to actual bending work. You may find the real problem isn’t what you expected.
Step-by-Step Guide to Fixing Bent Microswitch Leaves
Now that you’ve confirmed the leaf is actually bent, it’s time to straighten it. This process requires patience and precision. Work slowly and make small adjustments.
Start by removing the joystick shaft completely. You need clear access to the microswitch housing. Locate the bent leaf inside the switch. Use your eyes to identify which direction it’s curved.
The key technique is counterintuitive: bend the leaf inward first, then bend it back to the correct position. This method relieves stress on the metal and helps restore its natural state. Don’t try to straighten it in one movement.
Use a small, flat tool like a plastic spoon handle or wooden stick. Metal tools can scratch the leaf or cause electrical problems. Position your tool near the switch body, not at the leaf tip. The leaf base is where you apply pressure. Adjusting at the tips causes uneven stress and often makes the problem worse.
Bend inward about one quarter inch. Hold it there for a few seconds. Then slowly bend it back past the original position by the same amount. Return to center. Repeat this process two or three times, making smaller movements each time.
After bending, inspect the leaf visually. It should look straight and parallel to the contact point. The gap between leaf and contact should be consistent along the entire length.
Test the continuity again with your multimeter. Place one probe on the leaf and one on the contact point. You should hear a beep or see continuity when the leaf is in its resting position. If continuity doesn’t register, the leaf may have internal damage. In that case, replacement is your only option.
Reinstall the joystick shaft and test directional input. Move the stick in all directions. The input should register smoothly without hesitation. If one direction still fails, the leaf may need additional adjustment or the switch may require replacement.
Cleaning Contacts and Adjusting Switch Gap Spacing
Cleaning your microswitch contacts is the first step before any bending work. Oxidation builds up on leaf surfaces over time. This buildup blocks electrical signals and feels identical to a bent leaf problem.
Use a stiff business card or thin paper to clean the contacts. Slide it gently between the leaf and the contact point. Move it back and forth several times to scrape away oxidation. Do this carefully so you don’t damage the delicate leaf surface.
Electrical tape is your best friend for gap spacing adjustments. Wrap a thin layer around the spacer or contact area to increase the gap distance. This method costs nothing and requires no special tools. Test your joystick after each tape layer to find the sweet spot.
The correct gap spacing matters more than most people realize. Too close and the leaf touches constantly, causing stuck inputs. Too far and the leaf never makes contact, creating dead zones. Your goal is a gap where the leaf just barely touches when pressed.
After cleaning, check continuity again with your multimeter. Place one probe on the leaf and one on the contact point. You should hear a beep or see a reading when the leaf makes contact. This tells you if your cleaning actually solved the problem.
Straight alignment is equally important as gap spacing. Look at the leaf from the side. It should form a smooth curve without kinks or twists. Any visible bend means the leaf needs straightening before gap adjustment.
Make all adjustments near the switch body, never at the leaf tip. The tip is too thin and breaks easily. Working closer to where the leaf connects gives you better control and prevents accidental damage.
Test frequently during this process. Small adjustments create big changes in how your joystick responds.
Common Mistakes to Avoid When Adjusting Leaves
Many people damage their arcade joystick leaves by making adjustments in the wrong location. The leaf tip is fragile and bends unpredictably. Always work near the switch body where the leaf connects to the housing. This area is thicker and more forgiving.
Bending at the tip causes permanent creasing. Once a leaf creases, it won’t return to a proper position. The metal loses its structural integrity. You’ll need to replace the entire microswitch if this happens.
Another common mistake is applying too much force too quickly. Patience matters here. Metal fatigues when you bend it repeatedly or aggressively. Small, gentle adjustments work better than one large bend. Test your continuity with a multimeter after each small adjustment.
Gap spacing errors ruin perfectly good leaves. People often bend leaves too far inward to “guarantee” contact. This actually causes the opposite problem. The leaf springs back too forcefully and breaks contact intermittently. The correct gap is usually between 0.015 and 0.025 inches. Your leaf should touch the contact button with light pressure, not heavy force.
Skipping electrical diagnostics before bending is a major error. Many people assume a bent leaf is the problem without testing. They bend the leaf, then discover the real issue was oxidized contacts or a loose solder joint. You’ve now damaged a good leaf for nothing.
Rushing the process leads to mistakes. Take your time. Remove the joystick shaft first. Work in good lighting so you can see the leaf clearly. Keep a multimeter nearby to test continuity frequently. Make one small adjustment, test it, then make another if needed.
Never force leaves straight with pliers or screwdrivers. These tools apply uncontrolled pressure. Use your hands or a soft plastic tool instead. Your hands give you better feedback about how much force you’re applying.
Troubleshooting Persistent Directional Input Issues
When your arcade joystick won’t respond in one direction, the problem often points to persistent directional input issues. These problems happen when microswitch leaves don’t make proper electrical contact. Understanding what causes these issues helps you fix them correctly.
The most common cause is improper gap spacing between the leaf and the actuator. If the gap is too wide, the leaf never touches the contact point. If the gap is too narrow, the leaf bends permanently and loses its spring tension. Either way, your joystick ignores commands in that direction.
Another frequent culprit is oxidation on the switch contacts. Even if the leaf position looks correct, dirty contacts prevent electrical flow. This creates the same symptom as a bent leaf, which is why cleaning comes before bending work.
Wiring problems also cause directional input failures. Check that all solder connections are solid and wires aren’t loose. A broken wire feels identical to a bent leaf when you test the joystick, but bending won’t fix it.
Continuity testing with a multimeter reveals the real issue. This simple electrical check tells you whether the problem is mechanical or electrical. If continuity exists, your wiring is fine. If it doesn’t, you know the leaf or contacts need attention.
Misalignment of the entire switch assembly creates persistent issues too. The microswitch must sit perfectly centered under the joystick shaft. Even slight tilting causes one direction to fail while others work fine.
Start troubleshooting by testing each direction individually. Note which directions fail and which work perfectly. This pattern helps you identify whether the issue is a single bent leaf or something affecting the whole switch assembly. Document your findings before attempting any repairs.
Final Thoughts
Fixing a bent microswitch leaf is not complicated. It just takes patience and a careful hand.
Most arcade joystick problems come down to three things. Dirty contacts, wrong gap spacing, or bent leaves. Check them in that order.
Start simple before you touch any leaf. Clean the contacts first. Test continuity next. Only bend leaves as your last step.
Rushing this process causes more damage than the original problem. Many gamers create bigger issues by skipping straight to bending. Slow down and work through each stage properly.
Remember the golden rule. Always adjust near the switch body. Never touch the leaf tip. This one habit saves you from ruined switches.
Your joystick deserves careful handling. These switches are small and delicate. A little too much force can crease metal permanently.
Test after every small adjustment. Don’t wait until the end to check your work. This habit catches mistakes early, before they become permanent.
If a leaf still won’t hold its position after careful bending, it may be damaged beyond repair. That’s normal. Some leaves reach a point where replacement makes more sense than repair.
Good news though. Most bending issues respond well to patient adjustment. You don’t need special tools or expert skills.
Basic care and attention fix most problems. A steady hand and some practice go a long way here.
Keep your switches clean going forward. Regular maintenance prevents future bending problems. Oxidation and dust cause many issues that get blamed on leaf damage.
Your arcade cabinet will thank you for this care. Responsive controls make every game more enjoyable. That satisfying click when you move the joystick? That’s the sound of a job well done.
Take your time with each switch. Test thoroughly. Trust the process. Your joystick will work like new again.
Frequently Asked Questions
Why does my joystick only work in some directions?
The most common cause is improper gap spacing between the leaf and the actuator. When the leaf bends too far inward or stays too far outward, the joystick misses inputs in certain directions.
Start by testing each direction with a multimeter to check continuity. If continuity fails in one direction, the leaf needs adjustment. Clean the contacts first with a stiff paper to remove oxidation. Sometimes dirt alone causes directional failure.
Check your wiring and solder connections too. A loose wire can mimic a bent leaf problem.
What is the correct way to bend a microswitch leaf back into position?
Bend all leaves inward excessively first, then carefully bend them back to the correct position. This method prevents creasing and permanent damage.
Make adjustments near the switch body, not at the leaf tips. Bending at the tips causes permanent creasing that cannot be fixed.
Use steady, controlled pressure with your fingers. Never use pliers or screwdrivers, as these tools apply uncontrolled force.
How do I know if a leaf is damaged beyond repair?
If a leaf won’t hold its position after careful bending, it may be damaged beyond repair. Look for permanent creases or cracks in the metal.
Test continuity with a multimeter. If the leaf makes electrical contact but still won’t work properly after adjustment, the damage is likely permanent.
At that point, replacement is your best option.
Should I clean my microswitch before bending the leaf?
Yes, absolutely. Clean contacts first with stiff paper or a business card to remove oxidation.
Oxidation blocks electrical contact and mimics a bent leaf problem. Many people bend leaves unnecessarily when simple cleaning solves the issue.
Test continuity after cleaning to see if the problem disappears.

Hi, I’m Archie Flynn, the founder and writer behind RapidResizerHub! 👋 I’m a passionate tech enthusiast who loves exploring the latest gadgets, smart devices, and trending electronics on Amazon. Through my honest, hands-on reviews and detailed buying guides, I help readers make smarter, well-informed shopping decisions.