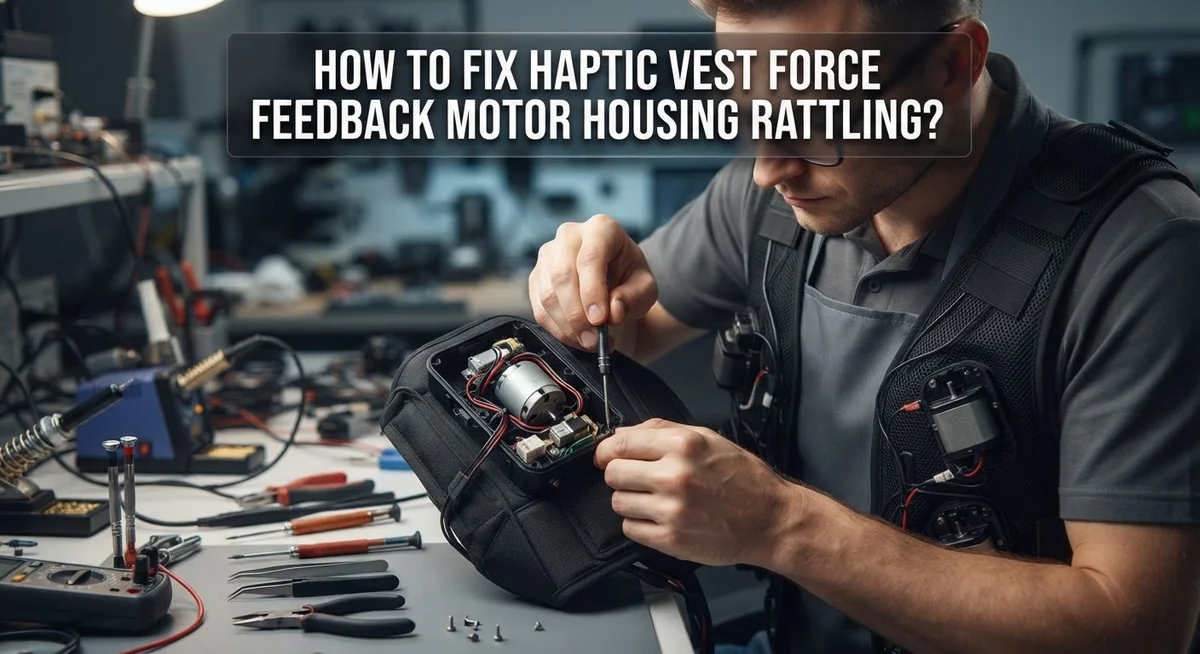
How To Fix Haptic Vest Force Feedback Motor Housing Rattling?
Your haptic vest should feel smooth and quiet. But if you hear an annoying rattle every time it vibrates, something is loose inside.
That sound usually means a force feedback motor has come unstuck from its housing. Once a motor shifts even slightly, it knocks against the plastic casing. This creates that rattling noise you notice during gameplay.
The good news? This is a common problem with a simple fix. In most cases, the motor just needs to be secured back in place.
In a Nutshell
- Find the source first. Open the housing and locate the motor that moved. It usually sits loose near the PCB.
- Glue the motor firmly. Apply glue on both sides of the motor against the casing. This stops it from shifting around.
- Check housing integrity. Look for cracks or damage on the front housing. Replace it if the plastic feels weak or broken.
- Wear the vest snugly. A tight fit keeps internal parts from bouncing. This reduces rattling even before you open the housing.
- Test after each fix. Turn on the vest and feel for feedback strength. Secure motors give sharper, clearer haptic response.
- Know when to replace parts. If rattling continues after gluing, the housing itself may need swapping out.
Follow these steps in order. Most rattling problems get solved with a little glue and a tighter fit. Your vest should feel smooth and quiet again soon.
What Causes Motor Housing Rattling in Haptic Vests
Motor housing rattling happens for straightforward reasons. The force feedback motors inside your vest lose their grip on the casing over time. This movement creates that annoying sound you hear during use.
Vibration is the main culprit. Every time your vest activates, the motors shake slightly. Without proper adhesive securing them, motors gradually shift position. Eventually, they rattle freely inside the housing instead of staying fixed.
Wear and tear speeds up this problem. If you use your vest frequently, the glue holding motors degrades faster. Temperature changes also matter. Heat and cold cycles weaken adhesive bonds over months of regular use.
Loose fasteners contribute too. Some motor housings rely on screws or clips. If these fasteners loosen, motors move around during feedback activation. The housing itself may flex slightly during intense haptic moments, allowing motors to shift.
Poor initial assembly causes issues as well. Manufacturers sometimes apply insufficient adhesive during production. Motors that weren’t glued securely from the start rattle sooner.
The fit of your vest matters more than you think. Wearing it too loosely allows internal components to bounce around. This extra movement stresses the motor mounting points and accelerates failure.
Damaged housing also plays a role. Cracks or warping in the casing reduce the surface area where motors attach. This means less glue contact and weaker motor stability.
Understanding these causes helps you prevent future problems. Regular inspection catches loose motors early. Proper fit and careful handling extend the life of your motor housing. Knowing what causes rattling lets you take action before feedback quality suffers significantly.
Why Rattling Hurts Haptic Feedback Quality
Rattling in your haptic vest motor housing directly damages the feedback you feel. When motors aren’t firmly attached to the casing, they vibrate loosely instead of transferring force to your body.
Poor feedback intensity is the first problem you’ll notice. A secure motor creates strong, precise haptic sensations. A rattling motor loses energy as it bounces around the housing. You feel weaker vibrations and less detail in the feedback. Actions that should feel sharp and impactful become dull and unclear.
The rattling also creates unwanted noise. This noise masks the subtle haptic cues your vest should deliver. Your brain struggles to interpret feedback when it’s mixed with mechanical rattling sounds.
Feedback accuracy suffers significantly too. Your vest uses specific vibration patterns to communicate information. When motors rattle, these patterns become distorted. Timing gets thrown off. The vest can’t sync multiple motors properly. You lose the spatial awareness that quality haptic feedback provides.
Heat buildup is another concern. Loose motors vibrate inefficiently and generate extra heat. This reduces the lifespan of your motor components and can damage the PCB over time.
The rattling also indicates structural failure. If glue has failed once, the motor will keep coming loose. This cycle continues unless you address the root cause properly.
Quality feedback depends on stable motor mounting. When motors stay firmly attached to the housing, they transfer vibrations directly to you. Every haptic sensation becomes clearer and stronger. Your vest performs as intended.
Ignoring rattling means accepting degraded performance. You paid for a device that delivers precise haptic feedback. Loose motors prevent that from happening. Fixing the rattling restores your vest to full effectiveness.
Tools and Materials You’ll Need Before Starting
Before you start fixing your haptic vest, gather the right tools and materials. Having everything ready makes the repair process smooth and prevents interruptions.
You’ll need adhesive specifically designed for electronics. Look for options that bond well to plastic and metal surfaces. The glue must remain flexible after drying so it won’t crack under vibration. Epoxy resin works well for this application.
Get a small screwdriver set with both Phillips and flathead options. Most haptic vests use small screws to hold the housing together. You may also need a precision screwdriver for tiny fasteners inside the motor compartment.
Gather some cleaning supplies before assembly. Isopropyl alcohol removes dust and old adhesive residue from motor surfaces. A soft cloth or cotton swabs help you clean tight spaces without causing damage.
Protective equipment keeps you safe. Wear safety glasses when opening the housing. Gloves protect your hands from adhesive and sharp edges. Work in a well ventilated area if using strong epoxy.
Have a small clamp or weight available. After applying glue, you need to hold the motor firmly against the housing while it cures. A clamp maintains consistent pressure, or you can use a heavy object.
Gather a multimeter or testing device to check your work afterward. This lets you verify the motor functions properly once reassembled.
Keep your instruction manual nearby if you have it. Reference images show exactly how components fit together. This prevents reassembly mistakes that could cause new problems.
Store everything in one location before starting. Organization saves time and reduces frustration during the repair process.
Step-by-Step Guide to Securing Loose Motors
Start by powering off your vest completely and unplugging it from any power source. Safety comes first when working with electronic components.
Locate the loose motor by gently pressing on different areas of the housing. You’ll feel vibration or hear rattling when you find the problem spot. Mark this area so you don’t lose track of it.
Remove the front housing panel carefully. Most vests use simple screws or clips to hold panels in place. Keep all fasteners organized in a small container so you don’t lose them.
Inspect the motor mounting area closely. Look for dried adhesive that has cracked or separated. Check if the motor has shifted position inside the casing. Examine the housing itself for cracks or damage that might allow movement.
Clean the motor and housing surfaces thoroughly. Remove old adhesive residue completely using appropriate cleaning supplies. Wipe away any dust or debris that could prevent a strong bond.
Apply fresh adhesive to both sides of the motor. Press the motor firmly against the housing casing. Hold it in place for the time recommended by the adhesive instructions.
Use a small clamp or weight to maintain pressure while the adhesive sets. This ensures a tight, secure connection between motor and housing. Don’t skip this step because premature movement ruins the bond.
Allow full curing time before reassembling your vest. Check your instruction manual for specific timing requirements. Different adhesives need different amounts of time to reach full strength.
Reattach the front housing panel once everything is completely dry. Reinstall all fasteners securely. Power on your vest and test the motor to confirm the rattling has stopped and feedback feels strong again.
Adjusting Vest Fit to Reduce Internal Movement
Wearing your haptic vest too loosely is one of the biggest causes of internal motor rattling. When the vest sits away from your body, the motors shift around inside the housing with every movement you make. This creates the annoying vibration noise you hear and reduces the quality of your haptic feedback.
Start by adjusting the straps and fasteners on your vest. Pull them snug against your torso. Your vest should feel firm but still comfortable. You want minimal space between the internal components and the housing walls.
Check all adjustment points on your vest. Most vests have straps on the sides, shoulders, and sometimes the chest. Tighten each one gradually. Avoid over tightening in one spot, as this can damage the fabric or straps.
Pay attention to how the vest sits on your shoulders. Loose shoulder straps allow the entire vest to shift downward. This movement transfers directly to the motors inside. Secure shoulder areas first, then work your way down.
Walk around and move your arms while wearing the tighter vest. Notice if the rattling decreases. You should feel less internal movement. The motors should stay firmly in place during normal activity.
A properly fitted vest keeps motors stable, which means better feedback quality and less noise. You might need to readjust the fit multiple times to find the sweet spot. Some people need tighter fits than others based on body shape and size.
If rattling continues even with a snug fit, the motors themselves may be loose inside the housing. In that case, you’ll need to open the vest and secure the motors with adhesive as described in your manual.
Common Mistakes That Cause Rattling to Return
Many people make the same mistakes when trying to stop their haptic vest from rattling. Understanding these errors helps you avoid them and keep your vest working properly.
The biggest mistake is leaving motors completely unsecured inside the housing. Some users think minor rattling is normal and ignore it. This is wrong. Loose motors reduce feedback quality significantly. The vibrations become weak and unclear. You lose the immersive experience the vest should provide.
Another common error is wearing the vest too loosely. People put on their haptic vests without adjusting the straps properly. When the vest sits loosely on your body, internal components move around freely. This movement causes motors to bounce against the housing. The rattling gets worse over time. A snug fit keeps everything stable and in place.
Many users also ignore early warning signs of rattling. They hear a small noise and hope it goes away on its own. It doesn’t. Small rattles become loud ones. The problem spreads to other motors. What starts as a quick fix becomes a bigger repair job.
Some people use the wrong adhesive for their repairs. They apply weak glue that doesn’t hold motors securely. The motors shift again after a few uses. You need adhesive specifically designed for electronics to create a lasting bond.
Finally, users often skip the curing time after applying adhesive. They reassemble their vest too quickly. The glue hasn’t fully set yet. Motors slip loose again immediately.
Avoid these mistakes by securing motors properly, wearing your vest snugly, addressing rattling early, using correct adhesive, and allowing full curing time. These simple steps keep your haptic feedback strong and your vest quiet.
Troubleshooting Persistent Rattling and When to Replace Housing
When rattling persists after you’ve secured the motor and adjusted your vest fit, it’s time to assess whether the housing itself needs replacement. Persistent rattling signals that internal components may be damaged beyond simple adhesive fixes.
Start by examining the front housing panel closely. Look for cracks, warping, or visible damage around the motor mounting area. Even small fractures can allow motors to shift during use. If you spot any damage, the housing likely needs replacement since a compromised casing won’t hold motors securely no matter how much adhesive you apply.
Press firmly on different sections of the housing while wearing the vest. If you feel excessive movement or hear rattling from areas where you previously applied adhesive, the housing material itself may be deteriorating. Some housing materials become brittle over time and lose their ability to grip adhesive properly.
Pay attention to whether rattling returns quickly after you’ve fixed it. If the same motor loosens within days or weeks, the housing mounting points are probably worn out. Repeated loosening means the adhesive bond keeps failing because the housing surface can’t maintain a secure grip.
Check if multiple motors are rattling simultaneously. When several motors rattle at once, widespread housing damage is likely the cause rather than isolated motor issues. This situation calls for housing replacement to restore proper motor support across the entire vest.
Before ordering replacement housing, document exactly where rattling occurs. Record which motors are affected and how quickly the problem returns. This information helps ensure you get the correct replacement part and prevents the same issues from happening again with your new housing.
Maintenance Tips to Prevent Future Rattling
Regular maintenance keeps your haptic vest working smoothly and prevents rattling from returning. Start by checking your motor connections every two weeks if you use the vest frequently.
Inspect the adhesive bonds around each motor carefully. Look for any cracks or separation where the motor meets the housing. If you spot weak spots, clean the area gently and reapply adhesive before the problem gets worse.
Keep your vest clean and dry. Moisture can weaken adhesive over time and cause motors to shift slightly. Wipe down the exterior after each use. Store your vest in a cool, dry place away from direct sunlight.
Test your motors regularly by running short feedback sequences. Listen for any new sounds or vibrations that feel different. Catching problems early makes fixes much easier than waiting until rattling becomes severe.
Check your vest straps and fasteners monthly. Loose straps let the vest move around your body, which causes internal components to shift. Tighten all adjustment points to keep everything snug and stable.
Avoid exposing your vest to extreme temperatures. Heat can soften adhesives, while cold can make materials brittle. Keep the vest between 50 and 85 degrees Fahrenheit when possible.
Replace any worn padding inside the housing. Degraded padding no longer cushions the motors properly, allowing more movement. Fresh padding absorbs vibrations and reduces rattling noise.
Document when you perform maintenance tasks. Write down dates and what you checked. This record helps you spot patterns and know when components need attention.
Simple, consistent care prevents most rattling issues from developing. Spend just a few minutes each month on these checks to keep your haptic experience smooth and quiet.
Final Thoughts
Fixing a rattling haptic vest comes down to one simple idea. Secure the motors properly, and the noise goes away.
Most rattling problems start with loose motors inside the housing. Glue each motor firmly against the casing on both sides of the PCB. This small fix solves most issues quickly.
A snug fit also makes a big difference. Wear your vest as tight as possible. This reduces internal movement and stops parts from shifting around.
Don’t ignore small rattles when they first appear. Early attention saves you from bigger repairs later. A tiny noise today can turn into a bigger problem tomorrow.
If you’ve secured the motors and the vest still rattles, check the housing itself. Damaged or worn housing often needs full replacement. This is normal after months of regular use.
Remember that loose motors don’t just create annoying noise. They also weaken your haptic feedback quality. A secure motor gives you stronger, more accurate vibrations during gameplay or simulations.
Regular checks help you catch problems before they get worse. Look at your adhesive bonds often. Test your motors to confirm they’re working as expected.
Simple habits keep your vest in good shape. Store it properly. Keep it clean. Avoid rough handling that can loosen parts over time.
Fixing motor rattling isn’t complicated once you know the steps. Secure it, tighten it, and check it regularly. These three actions solve almost every rattling issue you’ll face.
With proper care, your haptic vest will deliver smooth, quiet, and effective feedback for a long time. A little maintenance goes a long way toward keeping your gear reliable and rattle free.
Frequently Asked Questions
Why does my haptic vest motor rattle?
Rattling happens when motors aren’t firmly attached to the housing. The motor sits inside the casing, and if the adhesive bond weakens or wasn’t applied correctly, the motor shifts during use. This movement creates noise and reduces feedback quality.
Internal components can also loosen over time from regular wear. Vibration from the motor itself can gradually weaken adhesive bonds if they weren’t strong enough initially.
Does motor rattling affect haptic feedback quality?
Yes, it absolutely does. A loose motor cannot transfer vibrations effectively to your body. You’ll notice weaker feedback sensations and less immersive experiences.
Proper motor adhesion significantly increases haptic effectiveness. When the motor sits snugly against the housing on both sides of the circuit board, vibrations transfer directly to you without energy loss from movement.
Can wearing my vest tighter reduce rattling?
Yes, this helps temporarily. A snug fit minimizes internal movement and reduces how much the loose motor can shift around. However, this is only a short term solution.
Wearing your vest as tight as possible helps, but it doesn’t fix the root problem. You still need to secure the motor properly with adhesive to eliminate rattling completely.
How do I know if my housing needs replacement?
Press firmly on different sections of the housing while wearing the vest. If rattling returns quickly after you’ve secured the motor, the housing itself may be damaged.
Check the front panel closely for cracks or warping. Replace the housing if rattling persists after you’ve fixed the motor and adjusted your fit.

Hi, I’m Archie Flynn, the founder and writer behind RapidResizerHub! 👋 I’m a passionate tech enthusiast who loves exploring the latest gadgets, smart devices, and trending electronics on Amazon. Through my honest, hands-on reviews and detailed buying guides, I help readers make smarter, well-informed shopping decisions.