How To Fix Golf Cart Battery Terminal Melting?
Have you ever popped open your golf cart and found a battery terminal melted or covered in gooey residue? It’s a scary sight. And it’s more common than you think.
Melted terminals are not just an ugly problem. They often signal something deeper is wrong with your cart’s electrical system.
Corrosion, loose connections, faulty cables, or a charger that does not match your battery specs can all cause this issue. If you ignore it, the damage can spread fast.
The good news? You can fix this problem yourself with a few simple tools and steps.
In this guide, we will walk you through the exact causes behind melting terminals. You will learn how to safely repair a damaged terminal at home.
We will also cover key prevention tips to stop this from happening again. From cleaning corrosion to checking cable health, we have got you covered.
By the end, you will know how to spot warning signs early. You will also know when it is time to replace a battery instead of repairing it.
Let’s get your golf cart back to running safely and smoothly.
In a Nutshell
Here’s a quick summary to keep in mind before you start:
-
Melting terminals usually point to a bigger electrical problem. Corrosion, loose cables, or a bad charger match can all be the root cause.
-
Always disconnect the battery pack first. Set the Run/Tow switch to “Tow” before touching any wires.
-
A simple fix involves drilling the lead terminal and installing a new threaded post. A large bolt or self tapper works as a temporary patch.
-
Clean terminals often with baking soda and water. This stops corrosion from building up again.
-
Check your cables regularly. Replace any cable that looks worn, cracked, or corroded.
-
Make sure your charger voltage matches your battery specs exactly. A mismatch puts stress on terminals and cables.
-
Never work on a live battery. Avoid sparks or flames near the terminals at all times.
-
If the damage runs deep, a replacement battery might be your safest option.
Follow these steps, and you will keep your golf cart running safely for years to come.
Why Golf Cart Battery Terminals Melt: Common Causes
Battery terminals melt due to excessive heat generated by electrical resistance. This heat builds up when current flows through a poor connection or damaged component.
High resistance at the connection point is the primary culprit. When terminals corrode or loosen, electricity must work harder to pass through. This extra effort creates heat, just like a light bulb filament glows hot. Over time, the plastic or lead melts.
Short circuits also cause rapid melting. A short happens when positive and negative connections touch accidentally or when insulation breaks down on cables. Current floods through the wrong path, generating intense heat instantly.
Corroded terminals prevent electricity from flowing smoothly. Corrosion acts like a barrier, forcing current to squeeze through tiny gaps. The concentrated energy at these gaps creates extreme temperatures.
Defective battery cables with damaged insulation or broken strands increase resistance. Worn cables cannot handle the current your golf cart demands. The weak spots heat up and melt nearby terminals.
Low battery pack voltage under load forces your cart to draw extra current. Your charger might also output voltage that does not match your battery specifications. Mismatched voltage causes the charging system to overheat components.
Loose cable connections are sneaky troublemakers. Even slightly loose bolts allow current to arc and spark. This arcing creates localized heat that melts plastic or lead quickly.
The key point: melting terminals signal an underlying electrical problem. The terminal itself is not usually the real issue. Something upstream is forcing too much current through a bad connection. Fixing only the terminal without finding the root cause means the problem returns soon.
Warning Signs You Shouldn’t Ignore
Your golf cart battery terminals shouldn’t be ignored when they start showing trouble. Pay close attention to these warning signs before a small problem becomes dangerous.
Heat and discoloration are your first clues. If terminals feel hot to the touch or show dark brown or black spots, electrical resistance is building up. This heat means electricity is struggling to flow through the connection point.
Visible corrosion looks like white, blue, or green crusty buildup on the terminals. This corrosion blocks proper electrical flow and creates resistance. Even light corrosion reduces efficiency and increases heat production.
Burning smells near the battery area demand immediate attention. A burnt plastic or rubber odor means insulation is breaking down on your cables. This smell often comes before actual melting occurs.
Loose or wobbly terminals are easy to spot. Gently try to move the cable connector on the battery post. If it shifts or rocks, the connection is failing. Loose connections cause arcing and excessive heat.
Swollen battery cases indicate internal pressure building from electrical stress. This swelling often happens alongside terminal problems. Your battery is working too hard and generating dangerous heat.
Difficulty starting or slow power delivery suggests voltage problems. When your charger doesn’t match your battery specs, the battery strains under load. This strain creates extra current draw and terminal heating.
Cracked or damaged cable insulation exposes the copper wires underneath. Exposed wires increase resistance and create short circuit risks. Check cables regularly for splits or worn spots.
Don’t wait for terminals to actually melt. Address these warning signs immediately to prevent fires, electrical damage, or complete battery failure.
Safety Precautions Before You Start Repairs
Before you touch anything on your golf cart battery system, stop and take a few minutes to prepare. Your safety depends on these steps.
Disconnect the battery pack completely before starting any work. This is non negotiable. Even a small spark near battery terminals can cause serious injury. Make sure the golf cart is parked on level ground and away from other people.
Set your Run/Tow switch to the “Tow” position. This extra step prevents accidental electrical discharge while you work. Wait at least five minutes after disconnecting to let residual charge dissipate safely.
Wear proper protective gear at all times. Safety glasses protect your eyes from battery acid splatter. Rubber gloves shield your hands from corrosive materials and electrical contact. Consider wearing a long sleeved shirt as an extra layer.
Never use open flames, sparks, or smoking materials near the battery area. Battery gases can ignite and cause explosions. Keep a fire extinguisher rated for electrical fires nearby, just in case.
Check your work area for hazards. Remove any metal tools or jewelry that could accidentally bridge battery terminals. Keep water and other liquids away from the battery system.
Inspect all cables and terminals before you begin repairs. Look for visible damage, corrosion, or loose connections. If you spot anything unusual, address it first.
Have a helper nearby if possible. Someone should know what you are doing and be ready to call for help if needed. Tell them where you are working and how long you expect the job to take.
These precautions take just minutes but protect you from serious electrical hazards and burns.
Step-by-Step Guide to Fixing a Melted Battery Terminal
Start by ensuring your battery pack is completely disconnected. This step prevents electrical shock and fire hazards while you work. Double check that both positive and negative cables are removed from the terminals.
Set your Run/Tow switch to the “Tow” position. This additional safety measure protects your electrical system during repairs. Wait a few minutes after disconnection to allow any residual charge to dissipate safely.
Inspect the melted terminal closely. Look for the extent of damage to the lead post. If the damage is minor, you may be able to salvage the terminal. Severe melting requires complete replacement.
For repairable terminals, drill a hole through the center of the lead post. Use a drill bit that matches your replacement hardware size. Work slowly and carefully to avoid creating additional damage. Remove any melted plastic or debris around the terminal.
Install a new threaded post into the drilled hole. Secure it firmly using appropriate fasteners. Ensure the connection is tight and stable. A loose replacement terminal will cause the same problem again.
If drilling isn’t possible, use a large bolt as a temporary fix. Insert it into the flat side of the terminal and tighten securely. This method works when the terminal structure is too damaged for threading.
Always address the root cause of the melting. Check your charger output voltage against your battery specifications. Inspect all cables for defects or corrosion. Tighten any loose connections you find.
Test your repair by reconnecting the battery pack carefully. Monitor the terminal area for heat during the first charge cycle. If heat builds again, disconnect immediately and investigate further electrical issues.
Cleaning and Restoring Corroded Terminals
Corroded terminals are one of the most common reasons golf cart batteries overheat and melt. Corrosion builds up over time from moisture, oxidation, and chemical reactions between the metal and air. This crusty buildup creates resistance, which forces electrical current to work harder and generate dangerous heat.
Start by disconnecting your battery pack completely. Safety comes first. Set your Run/Tow switch to the “Tow” position and wear gloves and eye protection.
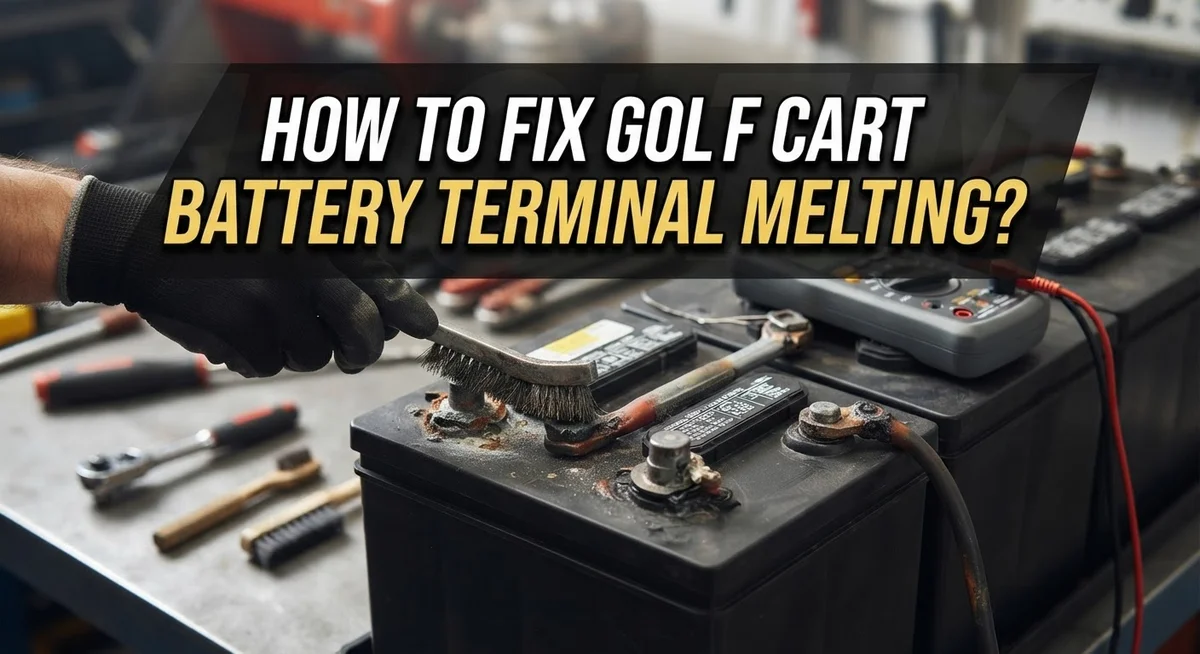
Remove the corrosion using baking soda and water. Mix them into a paste and apply it directly to the corroded terminals. Let it sit for a few minutes. Use an old toothbrush or soft wire brush to scrub away the white, blue, or green buildup gently.
Rinse the terminals thoroughly with clean water. Dry them completely with a cloth. Any moisture left behind will cause corrosion to return quickly.
Inspect your battery cables next. Look for cracks, fraying, or damage to the insulation. Damaged cables expose copper wires and create short circuits that cause melting. Replace any defective cables before reconnecting anything.
Check that all terminal connections are tight. Loose connections increase resistance and heat buildup. Tighten bolts firmly but don’t overtighten, as this can crack the terminals.
After cleaning and restoring your terminals, reconnect the battery pack slowly. Monitor the terminals for the first few minutes. They should stay cool to the touch.
Prevention is easier than repair. Clean your terminals every three to six months. Keep your battery area dry and free from debris. Regular inspection catches problems early before melting occurs. This simple maintenance adds years to your battery life.
Checking Battery Cables, Voltage, and Charger Compatibility
Your golf cart’s battery cables carry heavy electrical current. When they wear out or corrode, they create resistance that generates heat. This heat melts the terminals and damages your battery system.
Start by inspecting your cables carefully. Look for cracks in the outer insulation, fraying at the ends, or visible corrosion on the copper strands. Defective cables must be replaced entirely. A damaged cable cannot be repaired safely.
Check that every connection is tight. Loose cables cause sparking and overheating. Use a wrench to tighten each terminal connection firmly. A loose connection often feels warm to the touch even during normal operation.
Next, measure your battery pack voltage. A healthy golf cart battery system typically reads between 36 and 48 volts depending on your cart model. Use a multimeter to test the voltage while the cart sits idle and again under load (while driving slowly).
Low voltage under load signals a failing battery or internal short circuit. This forces excessive current through the terminals and causes melting.
Verify your charger output voltage matches your battery specifications. Many terminal melting problems stem from charger voltage mismatch. If your charger outputs 50 volts but your batteries are rated for 48 volts, the extra voltage creates dangerous heat buildup.
Connect your charger and measure its output voltage at the battery terminals. The reading should match your battery pack rating exactly. If the charger voltage is too high, the charger itself may be defective and needs replacement.
Address all three issues—cable condition, connection tightness, and voltage compatibility—to prevent melting from happening again.
Preventing Future Terminal Melting
The best way to stop terminal melting is to catch problems early. Check your terminals every three to six months. Look for white, blue, or green powder around the posts. This corrosion builds up resistance and generates heat.
Clean your terminals with baking soda and water. Use a soft brush to scrub away all buildup. Rinse thoroughly with clean water and dry completely. Tight connections matter just as much as clean ones. Wiggle each terminal to feel for looseness. A loose connection forces electricity to jump, which creates heat and melting.
Inspect your battery cables regularly. Cracks in the insulation or fraying at the ends signal trouble ahead. Damaged cables leak current and cause dangerous heat buildup. Replace any cable showing wear before it fails completely.
Test your charger output voltage monthly. Use a multimeter to measure the voltage at your battery terminals while charging. The reading must match your battery specifications exactly. A charger set too high will cook your terminals and damage your battery.
Keep your battery pack in good shape by using your cart regularly. Sitting unused for weeks allows internal corrosion to develop. Drive your cart at least once per week to keep the battery active.
Monitor your battery voltage under load. Low voltage during operation signals internal problems. Stop using the cart immediately if voltage drops below normal. A failing battery cell or internal short circuit needs professional attention.
Address problems the moment you spot them. Small issues become expensive repairs quickly. Regular maintenance prevents most terminal melting before it starts.
Common Mistakes to Avoid When Diagnosing or Repairing
Working on a live battery is the biggest mistake you can make. Always disconnect your battery pack before touching any terminals or cables. A live battery can cause serious electrical burns or start a fire if you accidentally create a spark.
Never use open flames or create sparks near the battery terminals. The hydrogen gas that batteries release during charging is highly flammable. Even a small spark can ignite this gas and cause an explosion.
Ignoring loose connections is another common error. Many people see melted terminals and replace them without checking if the connections are tight. Loose connections create resistance, which generates heat and causes melting in the first place. Tighten every connection before assuming the terminal itself is bad.
Driving your golf cart with low battery pack voltage is risky. When your battery voltage drops too far under load, the electrical system works harder and generates excessive heat. This heat travels to the terminals and causes melting. Check your voltage before each use.
Neglecting cable inspection leads to recurring problems. Defective cables with cracked insulation or internal damage cause resistance and short circuits. If you replace a melted terminal but leave a damaged cable in place, the problem will happen again.
Mismatching your charger voltage with your battery specifications creates constant stress on your electrical system. Always verify that your charger output matches what your battery needs. A charger that delivers too much voltage will overheat your battery and terminals.
The key point is this: melting terminals signal deeper electrical problems. Address the root cause, not just the symptom. Work safely, check connections thoroughly, and test your entire electrical system before reassembling anything.
Final Thoughts
Melting battery terminals feel scary at first. But you now know this problem has clear causes and clear fixes.
Corrosion, loose connections, and voltage mismatches create the heat that melts your terminals. Once you fix these root issues, the melting stops for good.
Repairing a melted terminal is simple with basic tools. Drilling a new hole and installing a threaded post gets your cart running again fast.
Safety comes first during any repair work. Always disconnect your battery pack and set the switch to “Tow” before touching anything.
Prevention beats repair every single time. Clean terminals, tight connections, and matched voltage keep your electrical system healthy.
Set a simple maintenance routine for your cart. Check cables every few months and test voltage regularly.
Small habits prevent big problems down the road. A few minutes of inspection saves you hours of repair work later.
Sometimes damage runs too deep to fix. If your battery pack shows severe corrosion or repeated melting, replacement might be your best option.
Don’t ignore the warning signs your cart gives you. Heat, discoloration, and loose terminals all point to underlying issues that need attention.
Your golf cart depends on a solid electrical connection. Treating your battery system with care keeps your cart reliable for years.
Take action today rather than waiting for bigger problems. Regular checks and quick fixes cost far less than emergency repairs or full battery replacement.
Golf cart maintenance doesn’t need to feel complicated. With the steps outlined here, you can handle terminal melting confidently and keep your cart running smoothly season after season.
Frequently Asked Questions
Why do golf cart battery terminals melt in the first place?
Battery terminals melt because of high electrical resistance or short circuits. When current flows through a corroded or loose connection, it generates intense heat. Defective battery cables also trap heat at the terminal point. A charger that outputs voltage higher than your battery specs can create constant electrical stress. Low battery pack voltage under load forces the system to work harder, which heats up connections even more.
Can I drive my golf cart with a melted terminal?
No. A melted terminal means your electrical system is failing. Driving with this problem risks complete battery failure or electrical fire. Your cart may lose power suddenly on the road. The underlying issue will only get worse. Stop using the cart immediately and address the root cause before driving again.
What’s the fastest way to temporarily fix a melted terminal?
Disconnect your battery pack first. Set the Run/Tow switch to “Tow” position for safety. You can drill a hole in the lead terminal and install a new threaded post. A temporary fix involves using a large bolt into the flat side of the terminal. This is not a permanent solution. You must find and fix the real problem—whether that’s corrosion, a bad cable, or voltage mismatch—to prevent melting from happening again.
How do I know if my charger is causing the melting?
Check your charger output voltage at the battery terminals with a meter. Compare it to your battery specifications. If the charger outputs higher voltage than rated, it’s overcharging your system. This creates constant heat and stress on terminals. Mismatched voltage is a common cause of melting that people miss.

Hi, I’m Archie Flynn, the founder and writer behind RapidResizerHub! 👋 I’m a passionate tech enthusiast who loves exploring the latest gadgets, smart devices, and trending electronics on Amazon. Through my honest, hands-on reviews and detailed buying guides, I help readers make smarter, well-informed shopping decisions.