How To Fix Liquid Metal Thermal Paste Seeping On Motherboard?
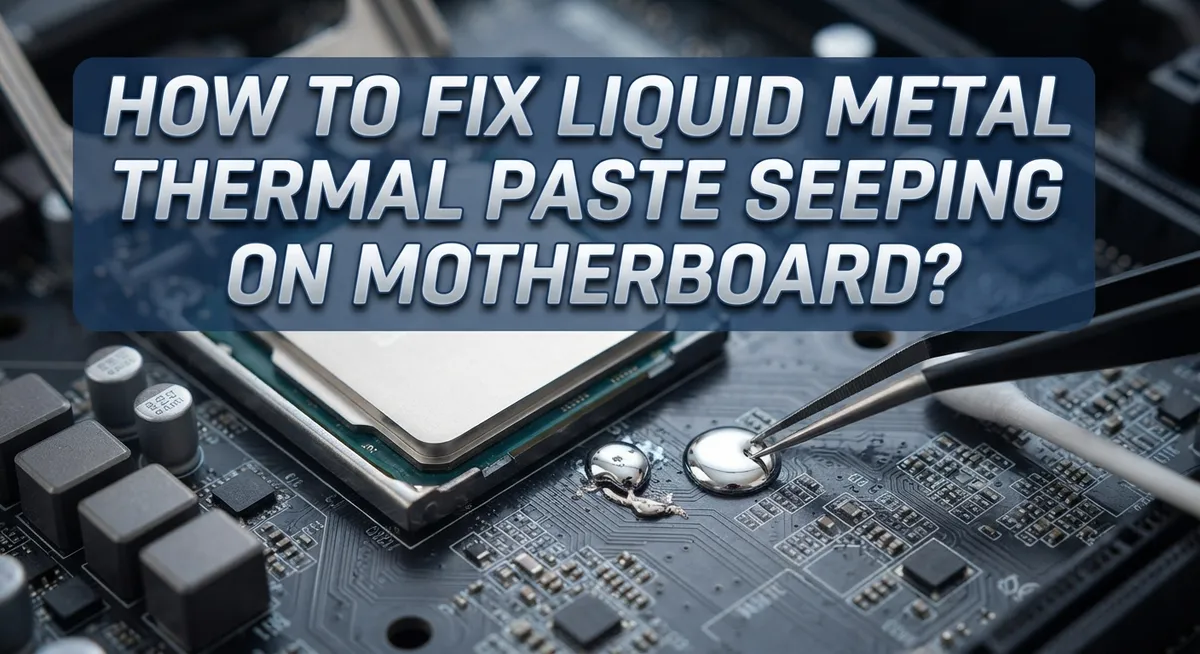
Liquid metal thermal paste sounds scary once it starts seeping on your motherboard. You are not alone if you feel a bit of panic right now.
The good news? This problem is fixable in most cases. You just need to act fast and follow the right steps.
Liquid metal is different from regular thermal paste. It conducts electricity, which means a spill near the wrong components can cause a short circuit. That is why quick action matters so much here.
In a Nutshell
- Act fast when you spot seepage. Liquid metal spreads quickly and can reach sensitive components if you wait too long.
- Use Q-tips first to physically soak up the spill. This removes the bulk of the liquid metal before you clean deeper.
- Follow up with 90% isopropyl alcohol on fresh Q-tips. This dissolves and lifts any leftover residue from the motherboard surface.
- Grab your phone flashlight and check every crevice. Liquid metal droplets hide in small gaps and around tiny components easily.
- For bigger surface areas, a microfiber cloth works well. It picks up residue without leaving scratches or lint behind.
- Never power on your PC until everything is completely dry. Any leftover moisture or conductive residue can cause a short circuit.
- Remember, liquid metal is electrically conductive. This makes cleanup way more urgent than a regular thermal paste spill.
Why Liquid Metal Seepage Happens
Liquid metal seepage happens for several specific reasons. Understanding why it occurs helps you prevent future accidents and fix current problems faster.
Liquid metal is a conductive fluid. Unlike regular thermal paste, it flows freely. Once applied between your CPU and cooler, it can escape if the barrier between these components isn’t tight enough. Even small gaps let liquid metal spread onto your motherboard.
Improper application is the main culprit. You apply too much liquid metal thinking more coverage equals better cooling. This excess material has nowhere to go except outward. It creeps along the CPU surface and drips onto surrounding components.
Cooler mounting problems also cause seepage. Your CPU cooler might not sit flat against the processor. A tilted cooler leaves gaps where liquid metal leaks through. Temperature changes make this worse because metal expands and contracts, pushing liquid outward.
Some users forget containment barriers entirely. Liquid metal needs physical boundaries to stay in place. Without barriers like thermal paste dams or protective tape around the CPU, seepage is nearly inevitable.
Vibration and movement accelerate the problem. Moving your PC or even bumping the case can shake liquid metal loose. The conductive fluid migrates toward lower areas on your motherboard through gravity and vibration.
Older or damaged coolers pose another risk. Worn mounting hardware doesn’t clamp down properly. Bent cooler bases don’t make full contact with your CPU. Both situations create pathways for liquid metal escape.
Temperature cycling matters too. When your PC powers on and heats up, liquid metal becomes more fluid. It flows more easily through small gaps. When temperatures drop, it cools and solidifies, but by then it has already spread across your motherboard.
The key takeaway? Liquid metal requires precision application, proper containment, and secure mounting. These three factors prevent seepage before it starts. Skipping any step dramatically increases your risk of motherboard damage.
Risks of Leaving Liquid Metal on Your Motherboard
Liquid metal thermal paste creates serious risks when it seeps onto your motherboard. Understanding these dangers helps you act quickly and prevent permanent damage.
Electrical conductivity is the primary threat. Liquid metal conducts electricity, unlike standard thermal paste. When conductive droplets touch circuit traces or component pins, they create unintended electrical paths. These paths cause short circuits that can instantly fry sensitive chips, capacitors, and voltage regulators.
Your CPU power delivery system faces particular danger. This area contains many closely spaced components that handle high electrical currents. A single conductive bridge between pins can destroy the entire power delivery network. Your motherboard becomes unusable after this type of damage occurs.
RAM slots and PCIe slots are also vulnerable. Liquid metal seeping into these connections creates shorts that damage both the slots and any installed cards. Your graphics card, storage drives, or memory modules may fail even if the motherboard survives.
The longer liquid metal sits on your board, the worse the situation becomes. Seepage spreads through capillary action into tight spaces and crevices. It reaches areas you cannot easily see or clean. Once it dries or oxidizes, removal becomes much harder.
Temperature cycling accelerates the damage process. Heat causes the liquid metal to spread further across the board. Cooling allows it to settle into new locations. This cycle repeats each time your system powers on and off.
Corrosion is another concern over time. Liquid metal can react with copper traces and component leads, creating permanent damage that goes beyond simple electrical shorts.
The good news? Most seepage situations are reversible if caught early. Acting within minutes of discovering the problem prevents lasting harm. Delay makes recovery increasingly difficult. This is why immediate inspection and cleanup are absolutely critical when you spot any liquid metal outside the CPU cooler mounting area.
What You’ll Need Before You Start the Cleanup
Before you start cleaning up liquid metal seepage, gather the right supplies. You need items that won’t damage your motherboard while effectively removing the conductive material.
Q-tips are your first line of defense. Stock up on several boxes because you’ll use many during cleanup. They absorb liquid metal quickly and let you reach tight spaces around components. Buy regular cotton swabs, not the fancy varieties.
90% isopropyl alcohol is essential for this job. This concentration removes residue without leaving moisture that causes corrosion. Lower alcohol percentages contain too much water. Higher concentrations work but 90% hits the sweet spot for electronics. You’ll need a fresh bottle, not one that’s been open for years.
A phone flashlight or small LED torch helps you spot remaining droplets. Liquid metal can hide in crevices and under components. Good lighting reveals every spill so you don’t miss anything.
Microfiber cloths handle larger surface areas after you’ve removed the bulk of the spill. These cloths won’t shed fibers like regular paper towels. Avoid lint-producing materials that leave residue behind.
Paper towels are acceptable for initial absorption, but microfiber is better. Avoid using your fingers or metal tools directly on the motherboard.
A small container holds your used Q-tips so they don’t drip during cleanup. You’ll also want good ventilation since isopropyl alcohol produces fumes.
Optional but helpful items include a magnifying glass for detailed inspection and a small brush with soft bristles for stubborn spots. Some people use compressed air, but be careful because it can spread liquid metal rather than contain it.
Gather everything before you start. This prevents you from leaving your motherboard exposed while hunting for supplies. Organization keeps your cleanup efficient and reduces the risk of accidental damage during the process.
Step-by-Step Guide to Removing Seeped Liquid Metal
Start by powering down your PC completely. Unplug the power cable from the wall outlet. Wait at least five minutes before touching anything inside. This prevents electrical shock and gives components time to cool.
Locate the affected area on your motherboard. Use your phone flashlight to see exactly where the liquid metal has spread. Look carefully around the CPU socket, power delivery components, and RAM slots. Liquid metal often pools in crevices you cannot see without good lighting.
Grab a Q-tip and gently press it against the liquid metal droplets. The Q-tip absorbs the conductive liquid through direct contact. Work slowly and avoid rubbing, as this spreads the metal further across the board. Replace the Q-tip frequently. You may need dozens of them for complete removal.
Once you’ve absorbed the bulk of the spill, switch to isopropyl alcohol. Dampen a fresh Q-tip with 90% isopropyl alcohol and wipe the affected surfaces. This removes residual liquid metal that Q-tips alone cannot capture. Work in small sections and inspect constantly with your flashlight.
Pay special attention to narrow spaces between components. Liquid metal hides in gaps around capacitors, connectors, and heatsink mounting points. Use multiple alcohol-soaked Q-tips to reach these areas thoroughly.
After cleaning, let the motherboard air dry completely. Do not rush this step. Isopropyl alcohol evaporates naturally, but moisture can still cause problems. Wait at least 30 minutes before reassembling your system.
Inspect one final time under bright light. Look for any shiny droplets or residue. If you spot anything, repeat the alcohol cleaning process. Only when the board looks completely clean and dry should you power your PC back on. This careful approach prevents short circuits and component damage.
How to Inspect for Hidden Residue and Droplets
After you’ve removed the bulk of liquid metal, hidden residue and droplets often remain in hard to see spots. These leftover traces still conduct electricity and pose a real threat to your motherboard.
Start your inspection with a phone flashlight or small LED torch. Shine the light at different angles across the affected area. This technique reveals droplets you might miss with your naked eye. Liquid metal reflects light differently than the motherboard surface, making it easier to spot.
Check all the narrow spaces first. Look between the CPU socket and nearby capacitors. Inspect around power delivery components and RAM slots. These tight areas trap liquid metal easily. Use your flashlight to peer into every crevice and corner.
Pay attention to the edges of the spill zone. Liquid metal spreads during the initial seepage, so contamination extends further than you’d expect. Check areas that seem clean at first glance. A single missed droplet can short your entire system.
Examine the underside of any cooler mounting hardware if you removed it. Liquid metal can travel along metal brackets and contact points. Wipe these areas with an alcohol soaked Q-tip.
Look for dried residue that appears as thin films or crusty spots. This residue is still conductive even after it dries. Don’t assume something is clean just because it looks dry.
After your visual inspection, use a Q-tip with 90% isopropyl alcohol to clean any suspicious spots you find. Work methodically across the entire affected region. Let the alcohol evaporate completely before reassembling anything.
Take your time during inspection. Rushing this step leads to missed droplets that cause failures later. Some users inspect their motherboards multiple times over several days to ensure complete removal. This extra caution prevents expensive damage from overlooked contamination.
Common Mistakes That Make Liquid Metal Spills Worse
Applying liquid metal without containment barriers is the biggest mistake people make. Liquid metal spreads easily across smooth surfaces like your motherboard. Without barriers, it can seep into tight spaces where it’s hard to reach and clean.
Many users don’t realize liquid metal is conductive. They leave residue on the board and power on their PC anyway. This causes short circuits that can permanently fry your components. Always wait until the board is completely dry before turning on your system.
Rushing the cleanup process creates major problems. People use paper towels or cloth that leave behind fibers and moisture. These materials don’t absorb liquid metal effectively. The metal continues spreading while you’re trying to clean it.
Ignoring hard to reach areas is another critical error. Liquid metal hides in crevices between components and under cooler mounting points. Skipping these spots means conductive residue stays on your board. It only takes one hidden droplet to cause failure.
Using the wrong cleaning solution is equally damaging. Water or low concentration alcohol leaves moisture that promotes corrosion. This moisture can activate the conductive properties of remaining liquid metal residue.
Not inspecting thoroughly enough leads to missed contamination. People assume they’ve cleaned everything after one quick pass. In reality, thin films and crusty spots remain invisible without proper lighting. A phone flashlight reveals what the naked eye misses.
Applying too much liquid metal in the first place compounds seepage issues. Excess material spreads beyond the CPU or GPU contact area. This increases the chance of it reaching sensitive components nearby.
Finally, users often don’t let alcohol evaporate completely. They reassemble their systems while the board is still damp. This traps moisture against components and increases short circuit risk.
These mistakes transform a manageable spill into catastrophic hardware damage. Taking your time and following proper procedures prevents expensive repairs.
Preventing Future Seepage When Reapplying Liquid Metal
When you reapply liquid metal after cleanup, prevention becomes your best defense. Start with proper containment barriers before you even open the thermal paste. Electrical tape or silicone barriers around your CPU socket and nearby components create a safety zone that catches any accidental spills.
Apply liquid metal in smaller amounts than you think you need. Most users make the mistake of using too much, which increases seepage risk significantly. A tiny dot in the center of your CPU is enough. You can always add more if coverage seems incomplete, but you cannot easily remove excess once it spreads.
Use application tools carefully. A small brush or applicator stick gives you better control than pouring directly from the container. This precision approach prevents oversaturation and keeps the paste exactly where it belongs.
Let the liquid metal settle for a few minutes before you install your cooler. This brief pause allows it to stabilize and reduces the chance of it migrating outward when mounting pressure gets applied.
When you mount your cooler, apply even pressure across all mounting points. Uneven pressure forces liquid metal out from under the cooler base. Tighten screws or bolts in a cross pattern, just like you would with car wheels. This distributes force evenly and minimizes seepage.
Monitor your temperatures after reapplication. Unusual temperature spikes might indicate that liquid metal has contacted components it shouldn’t. Catch problems early before they cause permanent damage.
Keep your cleanup supplies nearby during the entire reapplication process. Having Q-tips and isopropyl alcohol within arm’s reach means you can address small spills immediately before they become major problems. Quick action prevents liquid metal from spreading into tight spaces and crevices where removal becomes extremely difficult.
Final Thoughts
Liquid metal spills feel scary at first. But you can fix them with patience and the right steps.
Act fast when you notice seepage. Quick action stops the spread and lowers your risk of damage.
Grab your Q-tips and alcohol as soon as you spot a leak. These simple tools solve most seepage problems.
Remember that liquid metal conducts electricity. This is why cleanup matters so much for your motherboard’s health.
Never power on your device until you finish cleaning completely. This single rule protects your entire system.
Check every corner with a flashlight. Small droplets hide in places you might not expect.
Take your time during inspection. Rushing leads to missed spots and future problems.
Let alcohol evaporate fully before you reassemble anything. This step feels tedious but it saves your hardware.
If you plan to reapply liquid metal, use less than before. Small amounts reduce your risk of another spill.
Consider your comfort level with this process. Liquid metal is not for everyone, especially on laptops or sealed systems.
Standard thermal paste works fine for most builds. It offers good cooling without the conductive risks.
If you choose liquid metal, respect its power. Handle it with care and always use containment barriers.
Mistakes happen even to experienced builders. The good news is that most seepage issues have simple fixes.
Stay calm if this happens to you. Follow the cleanup steps we covered and your motherboard should survive.
Double check your work before you power on your PC. This final inspection catches problems you might have missed.
Your motherboard represents a real investment. Treat liquid metal spills seriously but do not panic.
With careful cleanup and prevention, you can enjoy liquid metal’s cooling benefits. Just respect the process and stay alert during application and removal.
Frequently Asked Questions
What happens if I don’t clean liquid metal seepage right away?
Liquid metal spreads quickly across your motherboard. The longer it sits, the further it travels into tight spaces and crevices. This increases the risk of short circuits dramatically. Your PC could fail completely if the metal reaches critical components. Act fast when you spot seepage. The first few minutes are critical for preventing permanent damage.
Can I use water to clean liquid metal off my motherboard?
No. Water is a terrible choice for this job. It leaves moisture behind that promotes corrosion and electrical problems. You need 90% isopropyl alcohol instead. This alcohol evaporates quickly and removes conductive residue safely. Never use water, vinegar, or low concentration alcohol solutions. These leave behind dampness that causes shorts.
How do I know if I cleaned all the liquid metal away?
Use a phone flashlight to inspect every corner of your motherboard. Look around RAM slots, PCIe slots, and near the CPU socket. Liquid metal hides in tight spaces easily. Shine light at different angles to catch any remaining droplets. Check twice if you’re unsure. Missing even small amounts of conductive liquid can destroy your system.
Should I power on my PC immediately after cleaning?
Absolutely not. You must wait for isopropyl alcohol to evaporate completely. This takes 15 to 30 minutes depending on humidity. Powering on too soon traps moisture underneath components. This creates short circuits even if you cleaned thoroughly. Be patient and let everything dry fully before reassembling.
Is liquid metal worth the risk for beginners?
Standard thermal paste works well for most builds. Liquid metal requires careful handling and quick cleanup skills. If you’re inexperienced, consider sticking with regular paste. You avoid the stress and danger of potential seepage. Liquid metal is better suited for experienced builders who understand the risks.

Hi, I’m Archie Flynn, the founder and writer behind RapidResizerHub! 👋 I’m a passionate tech enthusiast who loves exploring the latest gadgets, smart devices, and trending electronics on Amazon. Through my honest, hands-on reviews and detailed buying guides, I help readers make smarter, well-informed shopping decisions.