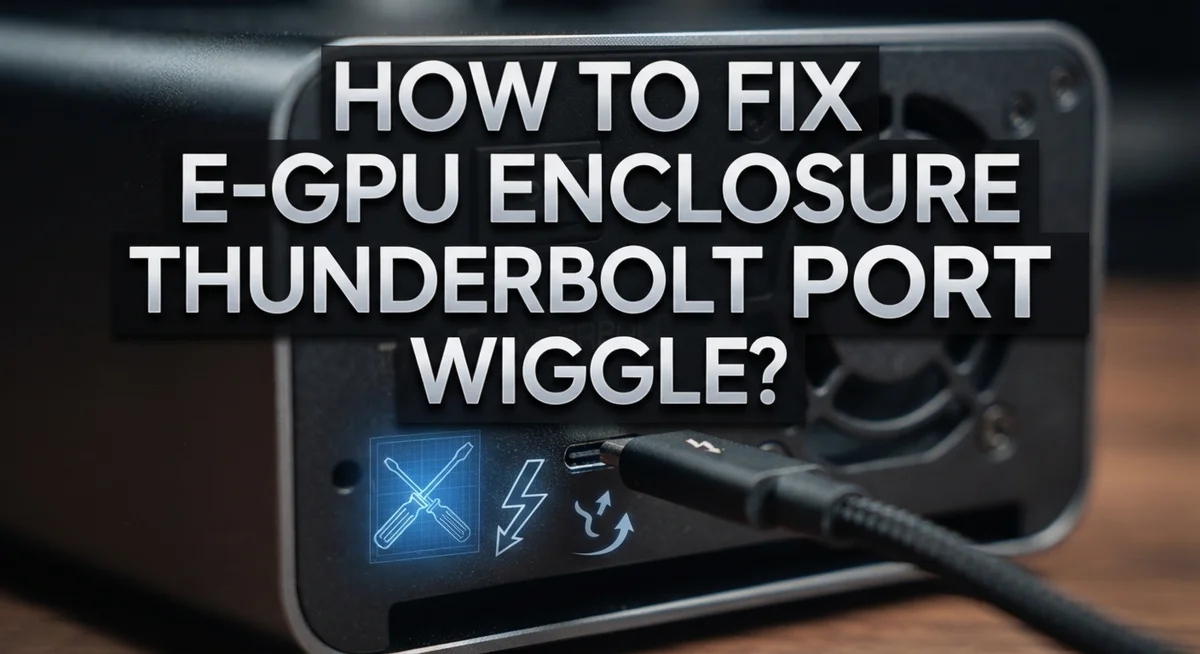
How To Fix E-GPU Enclosure Thunderbolt Port Wiggle?
Does your eGPU enclosure feel loose at the Thunderbolt port? That little wiggle can cause big problems.
A wobbly connection often leads to random disconnections. Your external GPU might drop out during gaming or work sessions.
This issue happens more often than you think. Many users report a loose fit between the Thunderbolt cable and the enclosure port.
In a Nutshell
- The wiggle is mechanical, not electrical. A loose Thunderbolt connector causes poor contact. This often leads to random eGPU disconnections.
- Super glue can fix a loose port. A thin layer on the connector gives it a snug fit again. This is a simple, user-tested solution.
- Always check your connection order. Boot your laptop first, then plug in AC power. Connect the eGPU only after that.
- Confirm detection every time. Open Device Manager and check under Display adapters. This tells you if your system actually sees the eGPU.
- BIOS settings matter a lot. Secure Boot may need to be disabled. PCIe tunneling and Thunderbolt security levels also affect detection.
- Not every laptop supports eGPUs. Your machine needs a Thunderbolt controller chip built in. Without it, no fix will help.
- Performance stays the same. The wiggle affects connection stability, not eGPU speed. Fixing the fit solves the real problem.
What Causes Thunderbolt Port Wiggle in eGPU Enclosures
A Thunderbolt port wiggle in your eGPU enclosure stems from a mechanical fit problem, not an electrical failure. The connector sits slightly loose inside the port, which reduces contact reliability between the pins and the socket.
Several factors create this looseness. Manufacturing tolerances vary between enclosures and cables. Some connectors have tighter specs than others. Over time, repeated plugging and unplugging wears down the contact surfaces. Heat cycles can also loosen the fit as materials expand and contract.
The wiggle itself is purely physical. Your connector moves back and forth inside the port because there is extra space. This movement interrupts the electrical connection momentarily. Your laptop may disconnect from the eGPU randomly, even though the cable remains plugged in.
Why this matters for your setup. A loose connection drops frames during GPU intensive tasks. You might see stuttering in games or rendering software. The eGPU disconnects without warning, forcing your system to switch back to integrated graphics. This creates frustrating interruptions.
The problem worsens with vibration. Moving your laptop or touching the cable can trigger disconnections. Even a gentle bump to your desk may cause the connection to fail temporarily.
This is not a sign of deeper damage. The Thunderbolt port itself works fine. Your cable functions normally. The issue is purely about fit and contact pressure. This makes it fixable without replacing expensive components.
Understanding this mechanical nature helps you approach the fix correctly. You are not dealing with a software glitch or hardware failure. You simply need to restore proper contact between the connector and the port. This knowledge guides your troubleshooting steps and helps you choose the right solution for your situation.
Signs Your Thunderbolt Connection Is Loose
A loose Thunderbolt connection shows itself in specific ways. Pay attention to these warning signs so you can catch the problem early.
Your eGPU keeps disconnecting randomly. This is the most obvious indicator. You are working on a graphics intensive task, and suddenly your external GPU vanishes from Device Manager. The system falls back to integrated graphics without warning. This happens more frequently under heavy load.
You see performance stutters or frame drops. When your Thunderbolt connection is loose, data transfer becomes unreliable. Your GPU may disconnect for milliseconds, causing lag spikes. Games stutter. Video editing software freezes. The problem intensifies when you move your laptop or eGPU enclosure slightly.
The port itself feels wiggly when you touch it. Gently try to move the Thunderbolt cable side to side without forcing it. If there is noticeable play in the connector, your port is too loose. This physical movement directly causes electrical contact loss.
Device Manager shows your GPU as unknown or with an error code. Open Device Manager on Windows and expand the Display adapters section. If your eGPU appears with a yellow warning triangle, your connection is unstable. Sometimes it shows as an unknown device instead of your graphics card model.
Your system fails to recognize the eGPU on startup. You plug in your enclosure, but Windows does not detect it. You need to disconnect and reconnect multiple times before it appears. This inconsistency points to poor contact at the Thunderbolt port.
You notice the issue worsens with cable movement. If your eGPU disconnects only when you adjust the cable position, your port is definitely loose. A secure connection stays stable regardless of minor cable shifts.
These signs all indicate the same problem: mechanical looseness at your Thunderbolt connection point. Address this promptly to restore reliable GPU performance.
Step-by-Step: Tightening the Thunderbolt Connector with Super Glue
A loose Thunderbolt connector creates an unreliable connection between your laptop and eGPU enclosure. Super glue offers a practical solution to this mechanical fit problem. The process is straightforward and requires only a few common household items.
First, gather what you need. You will need super glue, a small brush or applicator, and a clean cloth. Make sure your laptop is powered off and disconnected from the eGPU enclosure before you start.
Examine the Thunderbolt connector carefully. Look at the metal pins and the plastic housing. The wiggle typically happens because the connector sits too loosely in the port. Super glue creates a thin, permanent layer that fills these small gaps.
Apply a very thin layer of super glue to the connector. Use the brush to coat only the outer edges and sides where the connector meets the port. Do not apply glue to the pins themselves or inside the port. Excess glue can damage your equipment.
Let the glue cure completely. Most super glue sets within 24 hours, but check the product instructions for exact timing. Do not attempt to use your eGPU during this waiting period.
Once dry, test the connection. Plug the Thunderbolt cable into your laptop port slowly and carefully. The connector should feel snug now. There should be no side to side movement.
Boot your laptop first before connecting the eGPU. This prevents connection issues during startup. Plug in your AC power adapter next, then connect the eGPU enclosure last.
Open Device Manager and verify your GPU appears under Display adapters. This confirms the connection works properly. If you see an unknown device or error code, the glue fix alone may not solve your issue.
This method works best when the wiggle is purely mechanical. If your eGPU still does not detect after tightening, check your BIOS settings and Thunderbolt security level next.
Verifying eGPU Detection After the Fix
After you’ve applied the super glue fix to your Thunderbolt connector, verification is essential. You need to confirm your eGPU is actually working before trusting the repair.
Start by disconnecting all USB devices and external monitors from your laptop. This eliminates interference during detection. Power down your system completely and wait 30 seconds.
Plug in your AC power adapter next. Your laptop needs full power for eGPU detection. Battery mode sometimes prevents proper recognition of external GPUs.
Now connect your eGPU enclosure to the Thunderbolt port. Insert it slowly and deliberately. You should feel a firm click when the connector seats properly. This is different from the loose wiggle you felt before.
Wait about 10 to 15 seconds for your system to recognize the device. Open Device Manager on Windows by right clicking the Start menu.
Look for “Display adapters” in the list. Click the arrow to expand it. Your external GPU should appear here with a recognizable name. If you see a question mark or yellow exclamation mark, detection failed.
Check your Thunderbolt security settings in your system. Some laptops restrict external PCIe devices by default. Access your BIOS or firmware settings and verify that PCIe tunneling is enabled. You may also need to adjust Thunderbolt security from “Restricted” to “User Connects” mode.
If Device Manager still shows nothing, try disconnecting and reconnecting the eGPU. Occasionally the initial connection needs a refresh.
Run a simple graphics test to verify the GPU is functional. Open a graphics intensive application or benchmark tool. Monitor performance and look for stability.
Pay attention to any disconnections during this test. A properly fixed connector should maintain connection throughout. If drops still occur, the super glue may not have fully cured or the wiggle remains.
Checking Firmware, BIOS, and Thunderbolt Security Settings
Your Thunderbolt port wiggle often stems from firmware or security settings rather than just loose hardware. These settings control how your system communicates with external devices like your eGPU enclosure.
Start by checking your BIOS settings. Restart your laptop and enter the BIOS menu during startup. Look for options labeled “Thunderbolt Security,” “PCIe Tunneling,” or “External PCIe Support.” These features must be enabled for your eGPU to function properly.
PCIe tunneling is especially important. This setting allows your Thunderbolt port to carry GPU data directly to your system. If disabled, your eGPU won’t work even if the physical connection feels solid.
Next, disable Secure Boot in your BIOS if your eGPU isn’t being recognized. Secure Boot can prevent external devices from connecting properly. Save your BIOS changes and restart your system.
On Windows, check your Thunderbolt security level through your system settings. Some laptops have a dedicated Thunderbolt control panel. Access it through Settings or your manufacturer’s control software. Set the security level to allow external devices to connect without additional authorization.
Update your Thunderbolt firmware if available. Visit your laptop manufacturer’s support website and download any pending Thunderbolt driver or firmware updates. These updates often fix compatibility issues and improve device recognition.
After making these changes, boot your system completely before connecting your eGPU. This order matters because your laptop needs to load all settings before detecting external hardware.
Connect your AC power adapter first, then attach your eGPU enclosure to the Thunderbolt port. Wait 15 seconds for your system to recognize the device. Open Device Manager and check under Display adapters to confirm your GPU appears.
If problems persist, the wiggle may be purely mechanical, requiring the physical connector fix discussed earlier.
Proper Boot and Connection Sequence for eGPU Setups
The proper sequence for booting and connecting your eGPU makes a huge difference in avoiding detection problems. Many users skip steps and wonder why their system doesn’t recognize the external GPU.
Start with your laptop powered off. Plug in your AC power adapter first. This ensures your system has stable power before you introduce the eGPU. Let your laptop sit for a few seconds after plugging in the adapter.
Now power on your laptop and let it fully boot into Windows or your operating system. This is critical. Your system needs to complete all startup processes before you connect external hardware. Rushing this step causes connection failures and detection issues.
Once your laptop is completely booted and stable, connect your eGPU enclosure to the Thunderbolt port. You should see it appear in Device Manager within 10 to 15 seconds. If the wiggle is severe, the connection may drop during this window.
Wait another 30 seconds after connection before you open Device Manager. This gives your system time to fully recognize and initialize the external GPU. Some systems need extra time to load drivers.
Check Device Manager by right clicking your Start menu and selecting Device Manager. Look under “Display adapters” for your external GPU. It should appear there with a normal status (no yellow exclamation marks).
If your eGPU doesn’t show up, disconnect it and wait 5 seconds. Reconnect it again. Sometimes the initial connection attempt fails due to timing.
Avoid connecting your eGPU while your system is still booting. This is one of the biggest mistakes people make. Your laptop must finish loading all drivers and services first.
This boot sequence prevents most connection problems. The wiggle issue becomes much more obvious once you follow this proper order. You’ll know immediately if it’s a mechanical problem or a software issue.
Common Mistakes That Worsen Port Wiggle Issues
Many users make mistakes that actually make port wiggle worse. Understanding these errors helps you avoid them.
Forcing the connector in at wrong angles is a common mistake. The Thunderbolt connector has a specific orientation. Pushing it in sideways or at an angle creates internal damage. This damage makes the wiggle problem permanent. Always align the connector straight before inserting it.
Repeatedly connecting and disconnecting without waiting between attempts causes wear. Your port has tiny pins inside. Each connection stresses these pins slightly. When you plug in, wait 15 seconds. Then disconnect only if needed. Rushing this process speeds up the wiggle problem.
Using excessive force during insertion damages the connector’s internal contact points. The port should slide in smoothly. If you feel resistance, stop and check the alignment. Never push hard or twist the connector. Gentle, straight insertion protects your hardware.
Ignoring environmental factors makes things worse too. Dust inside the port reduces contact quality. Heat causes metal expansion, which increases looseness. Keep your port clean and your laptop cool. Use compressed air to remove dust carefully.
Applying adhesive incorrectly can trap dirt or create uneven pressure. If you choose the super glue method, apply only a thin layer. Too much glue prevents proper connection. Uneven application creates new pressure points that worsen wiggle.
Connecting the eGPU before your system fully boots causes detection failures. This frustrates users into repeated reconnection attempts. Each attempt adds stress to the port. Always let your laptop complete startup first.
Skipping firmware checks leaves security settings misaligned. Your BIOS might disable PCIe tunneling. Your Thunderbolt security level might block the connection. These settings create false detection problems. Users then blame the physical wiggle when the real issue is software.
The key is patience and proper technique. Treat your Thunderbolt port gently. Follow the correct sequence. Verify settings before troubleshooting hardware.
Final Thoughts
Port wiggle in your eGPU enclosure feels annoying, but it’s usually fixable. Most cases come down to a loose mechanical fit, not a broken system.
A thin layer of super glue on the connector often solves the wobble for good. This creates a snug fit without damaging the port.
Before reaching for glue, though, rule out software causes first. Check your BIOS settings, disable Secure Boot if needed, and confirm PCIe tunneling is active.
Boot sequence matters more than people think. Always connect your AC adapter, boot fully, then attach your eGPU. This order prevents many detection issues that mimic hardware problems.
Remember that not every laptop supports eGPUs. Your machine needs a proper Thunderbolt controller chip to work correctly. No amount of glue or firmware tweaking fixes an incompatible system.
Also keep in mind that a wiggly port rarely affects your actual gaming or rendering performance. Once your eGPU connects properly, it runs at full capacity. The wiggle is a mechanical annoyance, not a performance killer.
If glue feels too permanent, try other fixes first. Update your Thunderbolt firmware. Check your security level settings. Verify detection through Device Manager after each attempt.
Patience helps here. Rushing the boot sequence or forcing connections only makes things worse over time. Take it slow, follow each step, and test after every change.
Most users find their wiggle issue disappears with either the glue trick or a firmware update. Both are simple, low cost fixes you can do yourself.
Your eGPU setup should feel stable and reliable. With the right fix, that wobbly connection becomes a thing of the past. Test your setup thoroughly once you finish, and enjoy smoother, more dependable performance from your external graphics card.
Frequently Asked Questions
Why does my Thunderbolt port feel loose?
A loose Thunderbolt port usually means the connector has a mechanical fit issue. The connector inside the port may have worn down slightly or never seated perfectly. This wiggle happens because the Thunderbolt cable doesn’t grip tightly enough in the socket.
The good news is that port wiggle rarely affects your actual performance. Your eGPU still works fine even with a loose connection. The wiggle just feels uncomfortable and may cause occasional disconnections.
Can I fix the wiggle without taking my device apart?
Yes, you can fix it without opening anything. A thin layer of super glue applied to the connector is the most common user solution. This makes the connector slightly thicker so it grips more snugly inside the port.
Apply the glue carefully and let it dry completely before connecting your eGPU. This is a permanent fix, so make sure you’re ready to commit to it. If you prefer reversible options, try other troubleshooting steps first.
Should I try software fixes before using glue?
Absolutely. Software issues often cause connection problems that feel like physical wiggle. Start by disconnecting everything and restarting your laptop completely.
Then plug in your AC adapter, boot fully into your operating system, and reconnect your eGPU. Wait 30 seconds before checking Device Manager to see if your graphics card appears. Disable Secure Boot in your BIOS settings if the device still doesn’t show up. Many detection failures disappear after these steps.
Does port wiggle mean my eGPU won’t work?
Not at all. Port wiggle is a mechanical problem, not a performance problem. Your eGPU functions normally even with a loose connection. You might experience occasional disconnections, but the actual speed and power remain unchanged.
What causes port wiggle to get worse over time?
Forcing the connector in at wrong angles damages the internal contacts. Repeatedly connecting and disconnecting without waiting between attempts causes extra wear. Using excessive force during insertion also speeds up degradation. These habits make the wiggle worse much faster than normal use.

Hi, I’m Archie Flynn, the founder and writer behind RapidResizerHub! 👋 I’m a passionate tech enthusiast who loves exploring the latest gadgets, smart devices, and trending electronics on Amazon. Through my honest, hands-on reviews and detailed buying guides, I help readers make smarter, well-informed shopping decisions.