How To Fix Macro Pad Rotary Encoder Shaft Snapping?
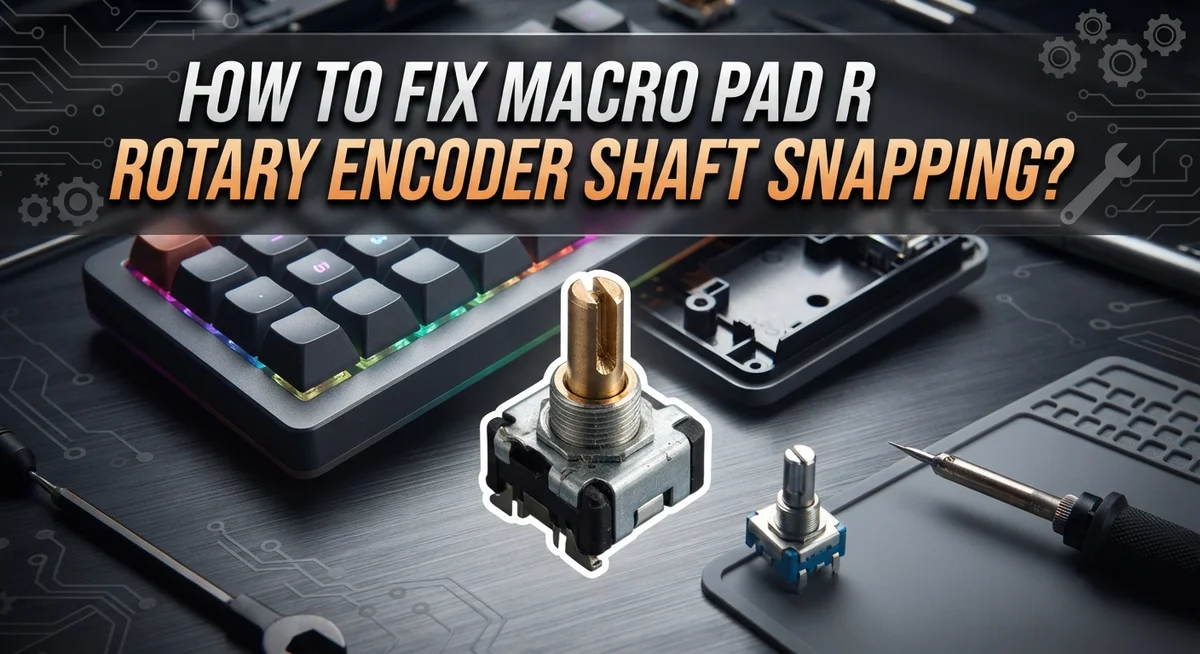
Your macro pad rotary encoder shaft snapping is a common problem. It often happens right when you feel most excited about your new build. One wrong twist and that tiny shaft breaks off completely.
This issue frustrates many builders. The shaft looks tough, but it is actually very fragile. Small mistakes during assembly can cause it to crack or snap in seconds.
The good news is that this problem is fixable. You can also learn how to prevent it from happening again.
In a Nutshell
- Rotary encoder shafts are delicate. They break easily during assembly or regular use. Handle them with care at every step.
- Over-tightening is the top cause. Twisting the mounting nut too much puts stress on the shaft. This stress leads to cracks or snaps.
- Misalignment causes damage too. Pushing a knob onto the shaft at the wrong angle can bend or break it. Always line up parts before pressing them together.
- Tighten nuts gently. Give the nut about a quarter turn using a wrench or pliers. This is enough to secure it without adding pressure.
- 3D printed plates need extra caution. These plates are softer than metal. They make shafts more likely to snap under force.
- Threadlocker helps prevent slipping. Adding a small amount of green Loctite to the shaft keeps knobs steady. This reduces the need for extra force later.
- Fixing a snapped shaft is possible. With the right steps, you can repair or replace the broken part. Your macro pad can work like new again.
Why Rotary Encoder Shafts Snap on Macro Pads
Rotary encoder shafts snap for several specific reasons. Understanding these causes helps you avoid damage when building or repairing your macro pad.
Over-tightening the mounting nut is the primary culprit. When you twist the nut too hard, you create excessive pressure on the shaft. The shaft cannot handle this stress and fractures. This problem gets worse with 3D printed plates. These plates are softer than metal and transfer more force directly to the shaft.
Misalignment during knob attachment causes many breaks too. If you push the knob onto the shaft at an angle, you bend the shaft sideways. This bending creates weak points. Continued use then snaps the shaft completely. Always line up the knob straight with the shaft before pressing down.
Improper assembly technique contributes to shaft damage. Forcing components together without checking alignment puts sudden stress on the shaft. The shaft was never designed to handle this kind of impact force.
Magnetic encoder disks can also break the shaft. If the disk becomes loose, it spins independently. This creates vibration that weakens the shaft over time. Eventually, the shaft gives way under normal use.
Regular wear and tear damages shafts gradually. Each time you turn the encoder, tiny stresses accumulate. After months of use, these small stresses add up. The shaft becomes brittle and finally snaps.
Material fatigue happens when shafts experience repeated stress. The metal loses its strength. Even gentle turning can then cause a break.
Knowing these causes helps you take better care of your macro pad. You can prevent most breaks by using gentle pressure during assembly and avoiding over-tightening.
Signs Your Encoder Shaft Is Damaged or Broken
Your encoder shaft may show several warning signs before it completely fails. Watch for these indicators to catch problems early.
A shaft that feels loose when you turn the knob suggests internal damage. The shaft may have cracked or fractured inside the encoder housing. Wiggle the knob gently side to side. Excessive movement means the shaft no longer fits snugly in its bearings.
Grinding or clicking sounds during rotation indicate shaft damage. These noises happen when broken pieces rub together inside the encoder. The shaft may have split into fragments. You might also hear a grinding sensation through the knob itself.
The knob sits at an unusual angle after assembly. This happens when the shaft bends or breaks during installation. The knob won’t align straight anymore. It may tilt to one side or sit crooked on the encoder.
Resistance increases during rotation. A damaged shaft creates friction inside the encoder. You’ll notice the knob becomes harder to turn compared to before. The movement feels stiff or sticky rather than smooth.
The encoder stops responding to your inputs entirely. A completely broken shaft prevents the encoder from detecting rotation. Your macro pad won’t register any commands from that knob. This is the final stage of shaft failure.
Visual cracks appear on the shaft itself. You might see small fractures if you remove the knob carefully. Look for white stress marks or splits along the shaft length. These cracks will spread over time with continued use.
Check your encoder regularly for these signs. Early detection helps you replace or repair the encoder before complete failure occurs. This prevents your macro pad from becoming unusable during important work sessions.
Tools and Materials You’ll Need for the Repair
Before you start fixing a snapped rotary encoder shaft, gather the right tools and materials. Having everything ready makes the repair process smooth and prevents frustration.
Wrenches and pliers are essential for holding the encoder steady. You’ll need a wrench or adjustable pliers to grip the encoder nut while you work. This prevents the encoder from spinning when you apply pressure. A socket wrench works well too if you have the correct size.
A replacement encoder shaft is your main repair component. Since the shaft is broken, you cannot reuse it. Purchase a complete encoder unit with a new shaft rather than trying to replace just the shaft alone. This ensures compatibility with your macro pad.
Threadlocker compound prevents future problems. Green threadlocker is the standard choice for this application. It keeps components from loosening during use without making permanent bonds. Apply a small amount to the shaft before reassembly.
Knobs and keycaps may need replacement if they’re damaged. Check whether your current knob fits the new encoder shaft properly. Sometimes damaged knobs contribute to shaft failure.
A screwdriver set helps you remove the macro pad housing and access the encoder. Both Phillips and flathead options are useful. You may need to remove multiple screws to reach the broken component.
Alignment tools like a small level or straightedge help position components correctly. Proper alignment prevents future shaft damage during reinstallation.
Safety glasses protect your eyes during disassembly. Small parts can pop loose unexpectedly.
Gather these items before starting your repair. Organization saves time and reduces the chance of damaging other components during the fix.
Step-by-Step Guide to Replacing a Snapped Encoder Shaft
Start by powering off your macro pad completely. Disconnect any cables and remove the device from your workspace. This prevents accidental electrical issues during repair.
Next, locate the screws holding your macro pad housing together. Most designs use small Phillips head screws on the bottom or sides. Remove these carefully and set them aside in a safe container so you don’t lose them.
Gently separate the housing to expose the PCB and encoder assembly. Work slowly to avoid damaging ribbon cables or other delicate components inside.
Find the mounting nut on the encoder shaft. Use your wrench or pliers to hold the encoder body steady while you loosen this nut. Turn it counterclockwise slowly. Do not force it if it feels stuck, as this can damage the shaft further.
Once the nut loosens, carefully slide the broken encoder out of the mounting hole. Remove the damaged shaft completely and set it aside.
Insert your replacement encoder into the same mounting position. Align it so the shaft sits straight and centered in the hole.
Apply moderate pressure when sliding the new encoder into place. Make sure it seats fully against the mounting surface.
Thread the mounting nut back on by hand first. This prevents cross threading, which damages the shaft. Once hand tight, use your wrench to secure it with just a quarter turn. This is the critical step where most people over tighten and cause new damage.
Add a small amount of green threadlocker to the shaft before attaching your knob. This prevents slipping without requiring excessive tightening force.
Reassemble your macro pad housing by reversing the disassembly steps. Test the encoder by rotating the knob smoothly through its full range.
Proper Knob Alignment and Nut Tightening Techniques
Proper alignment and nut tightening are the two most critical factors in preventing shaft snapping. When you install your knob onto the encoder shaft, precision matters far more than speed.
Start by examining your knob and shaft together before any assembly. The knob opening must align perfectly with the shaft’s flat edge or key slot. Misalignment creates uneven pressure points. These weak spots concentrate stress on one side of the shaft, making breakage likely even with normal use.
Hold the encoder steady with a wrench or pliers on the mounting nut. This prevents the entire encoder from rotating while you work. Position your wrench so it grips the nut firmly without slipping.
Now comes the tightening step. Apply gentle, steady pressure as you turn the nut clockwise. Stop after approximately one quarter turn past hand tight. This is the critical point where most people make mistakes. Do not continue tightening. Over tightening is the leading cause of shaft snapping in macro pads.
The pressure from an overly tight nut compresses the shaft against the mounting plate. This creates a stress concentration point. Eventually, the shaft fractures at that exact location.
For 3D printed mounting plates, reduce tightening pressure even further. These materials flex slightly under load, which means excessive nut tension transfers directly to the shaft as bending force.
Before tightening, apply a small drop of green threadlocker to the shaft threads. This prevents the nut from loosening during use without requiring excessive force for installation.
Test your knob rotation gently before fully securing everything. It should spin smoothly without resistance. If you feel grinding or resistance, stop immediately and check your alignment.
Common Mistakes That Cause Repeat Shaft Breakage
Over tightening the encoder mounting nut is the single biggest cause of repeat shaft breakage. Many people assume a tight nut means a secure connection, but this actually crushes the shaft against your mounting plate. The pressure snaps the delicate component even before you attach your knob.
Misalignment during knob installation creates another common failure point. When you press a knob onto the shaft at an angle, you apply uneven force to one side. This bending stress fractures the shaft instantly. Always check that your knob sits perfectly straight before pressing down.
Forcing components without checking alignment first leads to repeated problems. People often rush through assembly and don’t verify that everything lines up. Take 30 seconds to hold your knob next to the shaft and confirm they’re perfectly centered.
Using excessive pressure when pressing knobs onto shafts causes immediate damage. The shaft is not meant to handle sudden impact or hard pressure. Apply only moderate, steady force as you attach your knob.
Skipping the threadlocker step means your nut will loosen over time. A loose nut vibrates against the shaft, creating micro fractures. These tiny breaks eventually lead to complete shaft failure. Green threadlocker prevents this slippage and protects your encoder.
Installing encoders into misaligned mounting holes creates stress on the shaft. Before you push the encoder into place, verify the hole is perfectly aligned. Forcing an encoder into a slightly off hole bends the shaft and causes breakage.
3D printed mounting plates are especially problematic because they compress under pressure. If you’re using a 3D printed plate, reduce your tightening force by half. The material simply cannot handle the same pressure as metal plates.
Troubleshooting Encoders That Still Malfunction After Repair
When your macro pad encoder still doesn’t work after repair, the issue usually stems from assembly errors rather than a faulty replacement part. Start by removing the macro pad housing again and inspecting the encoder installation closely.
Check whether the encoder sits flush against the mounting plate. Misalignment is a sneaky culprit that causes shafts to snap repeatedly. The encoder shaft must align perfectly with the mounting hole before you tighten anything. Even slight angles create stress that breaks the shaft during knob attachment.
Next, examine your threadlocker application. If you skipped this step during reassembly, the mounting nut gradually loosens as you rotate the knob. This movement causes the shaft to fracture under normal use. Apply green threadlocker to the shaft threads and wait for it to cure before testing.
Verify that your replacement encoder matches your original part exactly. Different encoder models have varying shaft diameters and material compositions. An incorrect replacement might seem functional initially but fail under regular rotation.
Test the encoder without your knob attached first. Rotate the shaft gently by hand to confirm smooth operation. If resistance exists, the encoder is already damaged or installed incorrectly.
Pay close attention to mounting plate material. Plastic plates compress differently than metal ones. If your macro pad uses 3D printed plates, excessive tightening pressure crushes the plastic around the encoder, creating shaft stress that leads to breakage.
Finally, ensure your knob attaches with gentle, even pressure. Press straight down without twisting or angling the knob. Forcing components together is the fastest way to snap a new shaft immediately after installation.
Preventing Future Shaft Snapping on Your Macro Pad
Preventing shaft snapping starts with understanding what causes the damage in the first place. Most breaks happen during assembly, not during normal use. The key is treating your encoder shaft like a delicate component that needs careful handling.
Start by storing your macro pad in a safe location away from drops or impacts. Physical shock is one of the fastest ways to crack a shaft. Keep your macro pad on a stable surface during typing sessions. Avoid placing heavy objects on top of it.
When you use your rotary encoder, apply gentle, steady pressure. Don’t twist the knob with sudden jerking motions. Smooth, controlled rotation protects the internal shaft from stress fractures. If your knob feels stiff or resistant, stop immediately. Forcing it will snap the shaft.
Check your encoder regularly for signs of wear. Listen for grinding sounds or feel for unusual resistance. Catching problems early prevents complete failure. If you notice any changes in how your knob feels, investigate before the shaft breaks completely.
Keep moisture away from your macro pad. Humidity can weaken the shaft material over time. Store it in a dry environment, especially if you use it in a humid room.
Consider how often you rotate your knob. Frequent, repetitive use puts more stress on the shaft. If you use your encoder constantly throughout the day, be extra vigilant about monitoring its condition.
Finally, handle your macro pad gently during transport. Don’t toss it into bags or apply pressure to the knob while moving. These small precautions add up and significantly extend your encoder’s lifespan. Your careful attention to daily use prevents most future shaft damage.
Final Thoughts
Fixing a snapped rotary encoder shaft is simple once you know the right steps. Most breaks happen from over tightening or poor alignment, not from bad luck.
You now have the knowledge to repair your macro pad with confidence. Take your time during each step.
Patience matters more than speed when working with small components. Rushing the process leads to mistakes that cause repeat damage.
Remember to align your knob carefully before pressing it onto the shaft. This single step prevents most future problems.
Apply threadlocker to keep your nut secure over time. Skipping this step often leads to loose components and stress on the shaft.
Avoid over tightening the mounting nut. A quarter turn past snug is enough for most encoders.
If your encoder still malfunctions after repair, go back through your assembly steps. Check alignment, threadlocker, and mounting plate condition first.
Your macro pad deserves careful handling both during repair and daily use. Treating it gently extends the life of every component inside.
Keep spare encoders on hand if you use your macro pad heavily. This makes future repairs faster and less stressful.
Regular maintenance checks help you catch problems early. A quick inspection every few weeks can save you from bigger repairs later.
Think about your mounting plate material too. Plastic and metal plates behave differently under pressure, so adjust your technique accordingly.
With the right approach, shaft snapping becomes a rare issue instead of a recurring headache. You can enjoy smooth, reliable performance from your macro pad for a long time.
Fixing this problem is not complicated once you understand the basics. Apply what you learned here, and your encoder should serve you well for years to come.
Frequently Asked Questions
Why does my rotary encoder shaft keep breaking?
Rotary encoder shafts snap for a few main reasons. Over-tightening the mounting nut puts too much pressure on the shaft itself. When you press the knob onto the shaft with excessive force, you can crack it instantly.
Misalignment also causes breaks. If your knob doesn’t line up perfectly with the shaft, pressing it on creates uneven stress. The shaft bends and snaps under that pressure.
3D printed mounting plates make this worse. Plastic compresses under pressure, which pushes the shaft at odd angles.
How tight should I make the encoder mounting nut?
Tighten the nut about 1/4 turn after it sits flush. Stop there. You want the encoder secure, not crushed.
Use a wrench or socket to hold the nut steady. This prevents the encoder from spinning while you work. Never force it tight. If the nut resists after a quarter turn, something is misaligned.
Can I repair a snapped shaft myself?
Unfortunately, no. A broken shaft cannot be glued or welded back together effectively. The encoder will not function properly.
Your best option is to replace the entire encoder with a new one. Buy a replacement that matches your original part exactly.
What should I do before attaching my knob?
Test the encoder without the knob first. Rotate the shaft by hand to make sure it spins freely. This confirms the encoder works before you add the knob.
Apply green threadlocker to the shaft before fitting components. This prevents slippage and keeps everything secure over time.
How do I attach the knob safely?
Align your knob with the shaft carefully. Press it on with gentle, even pressure. Use your fingers, not a tool.
The knob should slide on smoothly. If it resists, stop and check the alignment. Force damages the shaft instantly.

Hi, I’m Archie Flynn, the founder and writer behind RapidResizerHub! 👋 I’m a passionate tech enthusiast who loves exploring the latest gadgets, smart devices, and trending electronics on Amazon. Through my honest, hands-on reviews and detailed buying guides, I help readers make smarter, well-informed shopping decisions.