How To Fix Mechanical Keyboard Stabilizer Wire Popping Out?
You press a key on your mechanical keyboard, and something feels wrong. There’s a rattle, a wobble, or the key pops right off in your hand.
Chances are, your stabilizer wire has popped out of place. This is a common problem for mechanical keyboard users, but it’s not something you need to panic about.
The good news? You don’t need to be a repair expert to fix this. In most cases, you can solve the issue at home with a few simple tools and a little patience.
In a Nutshell
- The problem: A stabilizer wire slips out of its housing. This causes a key to feel wobbly, rattle, or pop off completely.
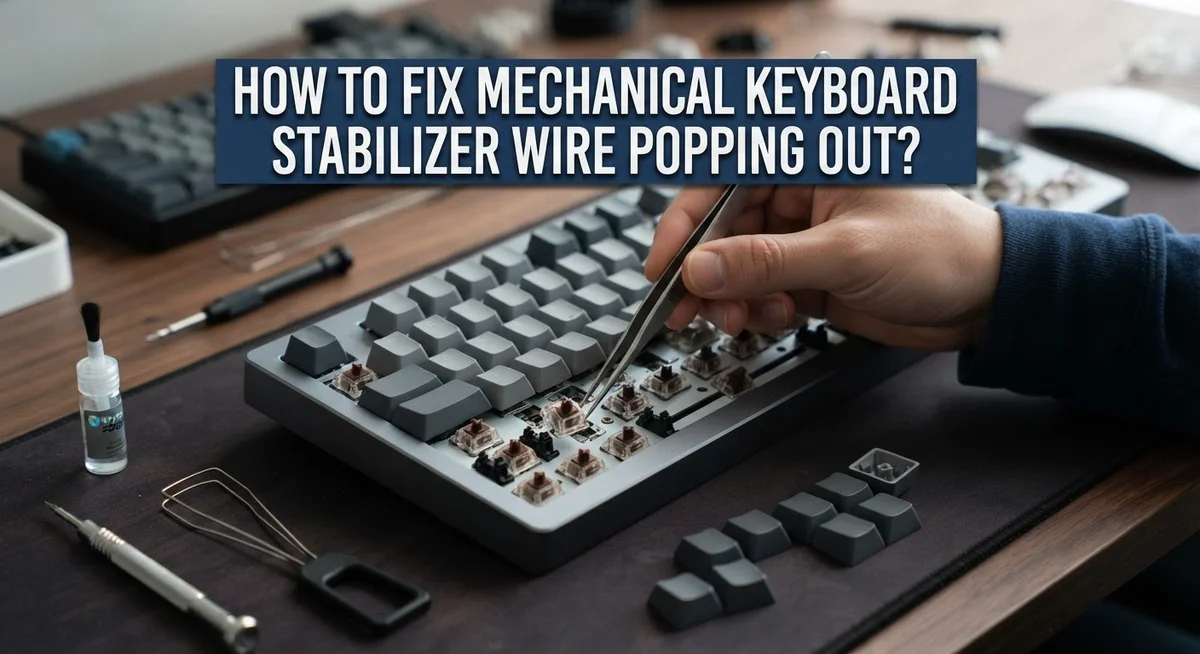
- The fix: Grab a pair of pointed tweezers. Gently guide the wire back into its slot in the stabilizer housing.
- No desoldering needed: You can fix this issue even if your keyboard is already soldered. The stabilizer housing stays accessible from the top.
- Common causes: Bent wires, loose fits, and improper installation during assembly are the usual culprits.
- Quick workaround: Thin rings of scotch tape placed sticky side out inside the stabilizer holes can reduce wire movement. This helps prevent future popping.
- When to replace: If the wire is badly bent or straightening does not work, it might be time to swap the stabilizer entirely.
- Prevention matters: Regular cleaning with isopropyl alcohol and proper lubrication keep stabilizers working smoothly. This reduces the chance of wires popping out again.
What Causes Stabilizer Wires to Pop Out
Stabilizer wires pop out for several straightforward reasons. Understanding these causes helps you prevent the problem and fix it faster when it happens.
Bent wires are the most common culprit. During shipping, assembly, or normal use, the wire can develop kinks or curves. When a wire bends, it no longer fits snugly in the stabilizer housing. The wire then slides out with each keystroke until it completely dislodges.
Improper installation during keyboard assembly causes many popping issues. If the wire wasn’t seated fully into the stabilizer slots from the start, it sits loose inside the housing. Even gentle key presses can nudge it further out over time.
Loose fit in the housing happens when stabilizers wear down or when components don’t match properly. Some stabilizer types have tighter tolerances than others. If your housing has extra space, the wire moves around too much and eventually escapes.
Lubrication problems can also play a role. When stabilizers are too dry, friction increases and wires shift position more easily. On the flip side, too much lubricant makes wires slippery, and they slide out of place.
Manufacturing defects occasionally occur. A stabilizer housing might have slightly misaligned slots or a wire that arrived already bent. These factory issues show up immediately or after a few uses.
Repetitive stress from heavy typing eventually loosens any stabilizer wire. The constant up and down motion gradually works the wire outward. Keyboards used intensively may experience this faster than casual typing setups.
Recognizing these causes helps you address the root problem, not just the symptom. This means your fix lasts longer and prevents repeat failures.
Tools You’ll Need Before You Start
Before you start fixing your stabilizer wire, gather the right tools. Having everything ready makes the repair quick and prevents frustration.
Pointed tweezers are your main tool for this job. Look for tweezers with a fine, sharp tip. They let you grip and guide the wire with precision. Flat tweezers won’t work as well because they can’t grab small components easily.
Isopropyl alcohol helps clean your stabilizers before you reseat the wire. Dust and debris can prevent proper seating. Use a small brush or cotton swab to apply it. This step takes just a minute but makes a real difference.
A small brush or soft cloth removes loose particles from the stabilizer housing. You want a clean surface so the wire sits flush. An old toothbrush works fine if you don’t have a dedicated brush.
Lubricant is optional but helpful. Some people use stabilizer specific lubricants to reduce friction and popping. A tiny amount goes a long way. Too much lubricant actually causes problems, so use restraint.
Scotch tape serves as a backup solution. You can cut thin rings and place them sticky side out in stabilizer holes. This reduces unwanted movement without permanent changes.
A well lit workspace matters more than you might think. Good lighting helps you see the wire clearly. Your phone flashlight or a desk lamp works perfectly.
Finally, have a small container nearby to hold tiny parts if you remove the stabilizer. This prevents losing components on your floor.
These basic tools cost very little and last for many repairs. Most people already own tweezers and alcohol at home.
Step-by-Step: Reseating a Popped Stabilizer Wire
Start by examining your stabilizer wire closely. Look for any visible bends or kinks along its length. A bent wire won’t seat properly into the stabilizer housing, no matter how hard you push it.
Use your pointed tweezers to straighten the wire gently. Work slowly and apply even pressure. Avoid twisting or jerking the wire, as this can cause further damage.
Once the wire is straight, identify where it should sit. The stabilizer housing has specific slots or grooves designed to hold the wire. Locate these slots before attempting to reseat.
Position your tweezers at one end of the wire. Carefully guide it into the first slot of the stabilizer housing. Move slowly and let the wire find its natural position.
Push the wire in gradually from one side. Watch as it slides into place along the entire length of the stabilizer. You should feel slight resistance as it seats fully.
Check that both ends of the wire sit flush in their slots. The wire should not stick out or wiggle when you gently tug it. If it moves freely, it’s not seated correctly yet.
Apply gentle pressure at the center of the wire. This helps the entire length settle into the housing properly. Hold this pressure for a few seconds.
Test the stabilizer by pressing down on the stem. It should feel stable and return smoothly to center. If the wire pops out again, the bend may be too severe or the housing may be damaged.
In this case, consider replacing the entire stabilizer assembly. Repeated popping after proper reseating indicates a deeper issue that tweezers alone cannot fix.
Fixing Bent or Misaligned Wires
When your stabilizer wire bends or sits at an odd angle, the key won’t function properly. Bent wires are the most frustrating problem because they prevent the wire from sliding smoothly into its slots. The good news is you can fix this without removing your keyboard from the desk.
Start by looking at the wire under good lighting. Use your pointed tweezers to examine both ends carefully. If the wire curves or twists, you’ve found your problem. Gently apply pressure with the tweezers to straighten the wire back to its original shape. Work slowly because wires bend easily in the wrong direction too.
After straightening, check if the wire sits properly in the stabilizer housing. Sometimes the wire is straight but positioned incorrectly. Push it into the correct slot using your tweezers. Make sure both ends rest flush against the housing walls. The wire should not stick out or sit crooked.
Test the stabilizer by pressing down on the stem multiple times. The key should move smoothly without resistance. If the wire pops out again immediately, it may have a permanent bend that won’t hold its shape.
Misaligned wires often happen when you install stabilizers quickly or without paying attention to positioning. Take your time guiding the wire into place. Apply steady, gentle pressure rather than pushing hard all at once.
If straightening and repositioning don’t work after two or three attempts, the wire likely suffered damage. At this point, replacing the entire stabilizer assembly makes more sense than continuing to fight with a damaged component. A new stabilizer costs less than your time spent troubleshooting.
Using Tape Rings to Reduce Wire Movement
Tape rings work as a simple solution to keep your stabilizer wire from popping out repeatedly. This method uses thin tape to create friction inside the stabilizer housing, which holds the wire more securely in place.
The basic idea is straightforward. You wrap thin scotch tape around the stabilizer holes where the wire sits. The sticky side faces outward, creating a gripping surface that catches and holds the wire. This reduces excessive movement that causes popping issues.
Here’s how to apply tape rings effectively. First, cut small pieces of tape into rings or strips. Make sure the tape is thin enough not to interfere with the stem. Wrap the tape around the stabilizer housing holes where the wire enters. Press it down firmly so it stays in place.
The tape should be snug but not so tight that it blocks the wire completely. You want the wire to sit in the housing without sliding around. Test the key after applying tape to ensure smooth operation. If the key feels stuck or stiff, remove the tape and try again with less material.
This method works best for minor popping issues caused by loose fits. It’s not a permanent fix for severely bent wires. If your wire is damaged or bent, tape alone won’t solve the problem.
Clean your stabilizer before applying tape. Dust and debris reduce the tape’s effectiveness. Use isopropyl alcohol and a small brush to remove any buildup inside the housing.
Tape rings are reversible, so you can remove them anytime. If the popping returns after weeks or months, simply reapply fresh tape. This low cost approach buys you time before considering a full stabilizer replacement.
Cleaning and Lubricating Stabilizers for Better Fit
Cleaning your stabilizers removes dust and debris that cause wires to slip out of position. Start by removing your stabilizer assembly from the keyboard if possible. Use isopropyl alcohol and a soft brush to gently clean around the wire housing and slots.
Pay special attention to the areas where the wire sits. Dirt buildup creates gaps that let the wire move around too much. Wipe away any residue with a lint free cloth and let everything dry completely before reassembling.
Lubrication helps the wire stay seated while moving smoothly. Apply a thin layer of stabilizer lubricant to the wire and housing slots. The key is using just enough lubricant without overdoing it. Too much lubricant actually makes the wire more likely to pop out.
Work the lubricant in by gently moving the wire back and forth a few times. This distributes it evenly and helps the wire settle into the correct position. Wipe away any excess lubricant with a clean cloth.
After lubricating, reseat the wire into its slots using pointed tweezers. Push gently from both ends to ensure it sits flush in the housing. Test the stabilizer by pressing down on the stem several times to confirm proper seating.
Clean and lubricated stabilizers generally stay in place much better than dirty ones. This maintenance step takes only a few minutes but prevents many popping issues. Make cleaning part of your regular keyboard care routine, especially if you notice any wire movement or instability in your keys.
Common Mistakes That Make the Problem Worse
Many people make mistakes that actually worsen stabilizer wire problems. Understanding these errors helps you avoid making things worse when you try to fix the issue.
Forcing the wire back without straightening it first is a common error. If your wire is bent, pushing it back into the housing won’t solve anything. The bent shape prevents proper seating. You’ll just end up with the same popping problem within hours.
Applying too much force during reinsertion damages the wire further. Tweezers should guide the wire gently into position. Rough handling can kink the metal or crack the housing slots. Your stabilizer becomes permanently damaged this way.
Ignoring dirt and debris makes everything worse. Dust particles get trapped around the wire, creating gaps that let it slip out. Many people skip cleaning and jump straight to repositioning. This guarantees the wire pops out again soon.
Using the wrong tools causes serious damage. Thick or dull tweezers can bend the wire sideways. Metal tools that slip can scratch the housing and widen the slots. Pointed tweezers work best because they grip without crushing.
Reassembling without checking alignment leads to repeated failures. After you reseat the wire, you must verify it sits flush in both slots. Many people rush this step and find the wire pops out immediately after.
Overtightening tape rings is another mistake. Tape that’s too snug restricts wire movement and prevents the key from functioning smoothly. Your key will feel stiff or unresponsive.
Finally, attempting fixes on already damaged wires wastes time. If a wire is severely bent or cracked, straightening won’t help. Replacement becomes necessary. Recognize when your wire needs replacing rather than spending hours on failed repairs.
When Repair Isn’t Enough: Signs You Need a Replacement
Your stabilizer wire may work fine after a simple fix, but sometimes replacement becomes the better option. Understanding when to replace saves you time and frustration.
Severe bending is the first sign. If your wire has major kinks or curves that won’t straighten, replacement makes sense. A bent wire won’t seat properly no matter how carefully you reposition it. The shape itself prevents correct alignment in the stabilizer housing.
Repeated popping after multiple attempts tells you the wire is likely damaged. If you’ve straightened and reseated the wire two or three times and it keeps popping out, the metal probably suffered internal stress. Metal fatigues when bent repeatedly, and fixing it again will just create the same problem.
Visible cracks or breaks mean immediate replacement. Even tiny fractures weaken the wire structure. A cracked wire won’t hold its position and may break completely during use.
Persistent issues after cleaning and lubrication suggest the wire itself is compromised. If your stabilizer is clean, properly lubricated, and the wire still won’t stay seated, the wire may be warped beyond repair.
Loss of tension or springiness is another key indicator. Press the wire gently with your tweezers. A healthy wire resists pressure and springs back. A damaged wire feels loose or flabby, showing it’s lost its structural integrity.
Time investment matters too. If you’ve spent significant time troubleshooting one wire, replacement costs less effort than continued fixes. New stabilizer wires are affordable and take minutes to install.
Replacement becomes practical when fixes fail repeatedly or damage is obvious. Trust your instincts. When repair feels like a temporary band aid, replacement is the smarter choice.
Final Thoughts
Fixing a stabilizer wire that pops out is a simple task once you know the steps. You don’t need advanced skills or expensive tools. A pair of tweezers and some patience solve most problems.
Most wire popping issues come from bent wires or dirty stabilizers. Cleaning and straightening the wire fixes the problem in minutes. Reseating it correctly stops the popping for good.
Prevention matters just as much as the fix itself. Regular cleaning with isopropyl alcohol keeps your stabilizers running smoothly. Proper lubrication reduces friction and keeps the wire seated.
Scotch tape rings offer a quick workaround when you need a temporary solution. They reduce wire movement and stop popping in many cases. This trick works well while you wait for replacement parts.
Sometimes a fix isn’t enough. Severely bent or cracked wires need replacement rather than repair. Trying to force a damaged wire back into place only causes more harm.
Your keyboard deserves proper care and attention. Taking time to clean, lubricate, and inspect stabilizers prevents future issues. This small effort keeps your typing experience smooth and reliable.
Anyone can master this repair with basic tools and a little practice. Tweezers, patience, and careful technique make the difference between a lasting fix and a repeated headache.
Remember that mechanical keyboards need occasional maintenance to perform their best. Stabilizer wires are a small part of the whole system, but they matter a lot for comfort and sound.
Take your time with each step. Rushing leads to more mistakes and wasted effort. A careful approach saves you time and keeps your keyboard working great for years to come.
Frequently Asked Questions
Why does my stabilizer wire keep popping out?
Your wire pops out because it’s either bent or not seated properly in the stabilizer housing. Bent wires don’t fit snugly, so they slip out easily. Improper installation during assembly is another common cause. Dirt and debris inside the stabilizer can also prevent the wire from sitting flush.
Check if your wire has visible kinks or curves. If it does, straightening it should solve the problem. Sometimes the wire just needs to be pushed back into the correct slot more firmly.
Can I fix this without desoldering my keyboard?
Yes, you can fix it without desoldering. Use pointed tweezers to carefully reseat the wire into the stabilizer. This works even on already soldered boards.
First, identify where the wire sits. Then gently guide it back into place. The key is using a steady hand and the right tool. Tweezers give you the precision you need.
What tools do I actually need?
You only need a few basic items. Pointed tweezers are essential for handling the small wire. Isopropyl alcohol helps clean dirt from the stabilizer. A small brush can remove debris.
That’s really it. You don’t need expensive equipment or special gear. Most people already have tweezers at home.
How do I prevent this from happening again?
Clean your stabilizers regularly with isopropyl alcohol. Make sure the wire is straight before installation. Check that it sits fully in both stabilizer slots.
Proper lubrication also helps keep everything stable. Use the correct amount so the wire doesn’t move around too much.

Hi, I’m Archie Flynn, the founder and writer behind RapidResizerHub! 👋 I’m a passionate tech enthusiast who loves exploring the latest gadgets, smart devices, and trending electronics on Amazon. Through my honest, hands-on reviews and detailed buying guides, I help readers make smarter, well-informed shopping decisions.