How To Fix Onewheel Footpad Grip Tape Bubbling?
Bubbling grip tape on your Onewheel can feel like a small annoyance at first. But left alone, it can turn into a bigger problem. Loose grip tape affects your footing and can mess with sensor engagement.
This issue shows up most often near the sensor areas and along the pad edges. Riders often notice it after months of use or exposure to heat and moisture. The good news is you can fix it yourself at home.
This guide walks you through the entire process step by step. You will learn how to safely remove bubbled grip tape without damaging your footpad. We will also cover how to clean old adhesive residue properly.
In a Nutshell
- Pull the tape across the pad, never upward. This prevents tearing and keeps the foam underneath safe.
- Warm the adhesive first. Use a hairdryer on low heat to soften it. This makes removal much easier.
- Clean all old residue. Wipe the footpad with isopropyl alcohol. Skipping this step causes weak adhesion later.
- Use fresh 3M 300LSE tape for reapplication. Press it down firmly across the entire surface.
- Heat and massage the new grip after installing it. This restores flexibility and helps sensors work properly.
- Check for full contact between the grip and footpad. Any gaps can lead to bubbling again soon.
Why Onewheel Grip Tape Bubbles Over Time
Grip tape bubbles form because moisture and heat gradually weaken the adhesive bond between the tape and your Onewheel footpad. Your feet create sweat and moisture every time you ride, and this dampness seeps under the grip tape over time.
The adhesive that holds grip tape down works best in dry conditions. When moisture gets trapped underneath, the bond fails. Heat from friction and sun exposure also speeds up this process. The adhesive becomes less sticky as temperatures rise and fall repeatedly.
Sensor areas bubble first because they experience the most flexing. Your foot presses down on these spots constantly while riding, which creates repeated stress on the adhesive. The edges of the footpad also suffer because they receive less pressure overall, making them easier for moisture to penetrate.
Dust and dirt particles underneath the grip tape create small gaps. These gaps let air and moisture flow freely, pushing the tape away from the footpad surface. Even tiny bubbles grow larger as more moisture accumulates.
Your riding style matters too. Heavy riders put more pressure on the footpad, which can actually speed up bubbling in some cases. Riders who frequently ride in wet conditions or humid climates see this problem develop faster.
The good news is that bubbling doesn’t mean your grip tape is ruined. You can fix it easily by lifting the bubble, cleaning the area underneath, and reapplying fresh adhesive. Understanding why bubbles form helps you prevent them from coming back. Regular maintenance and keeping your feet dry during rides reduces the chances of this issue returning.
Tools and Materials You’ll Need
Before you start fixing your Onewheel footpad grip tape, gather the right supplies. Having everything ready makes the process smooth and prevents frustration mid repair.
You will need a hairdryer or heat gun to warm the adhesive. Heat makes old glue flexible and easier to work with. A regular household hairdryer works perfectly for this job.
Grab some isopropyl alcohol and clean cloth or paper towels. This removes old adhesive residue and dirt from underneath the tape. Make sure the surface is completely clean before reapplication.
A plastic scraper or old credit card helps lift bubbled corners gently. Avoid metal tools that might damage your footpad. The goal is to peel back the tape without tearing it.
You will need grip tape adhesive designed for this purpose. Standard adhesive options include double sided tape formulas made for board sports equipment. Check that your adhesive works on rubber and composite materials.
Have a roller or pressing tool ready. You can use a clean water bottle, your hand, or a small roller. This applies firm, even pressure when pressing the tape back down.
Grab some heat source for final installation. After reapplying tape, you will heat it again to set the adhesive properly. The same hairdryer from earlier works great here.
Keep a measuring tape or ruler nearby. You might need to cut new grip tape to size if replacing the entire footpad.
Finally, wear gloves if your skin is sensitive to adhesive. This protects your hands during the cleaning and reapplication steps.
Organizing these items before starting saves time and keeps your workspace efficient.
Step-by-Step: Safely Removing Bubbled Grip Tape
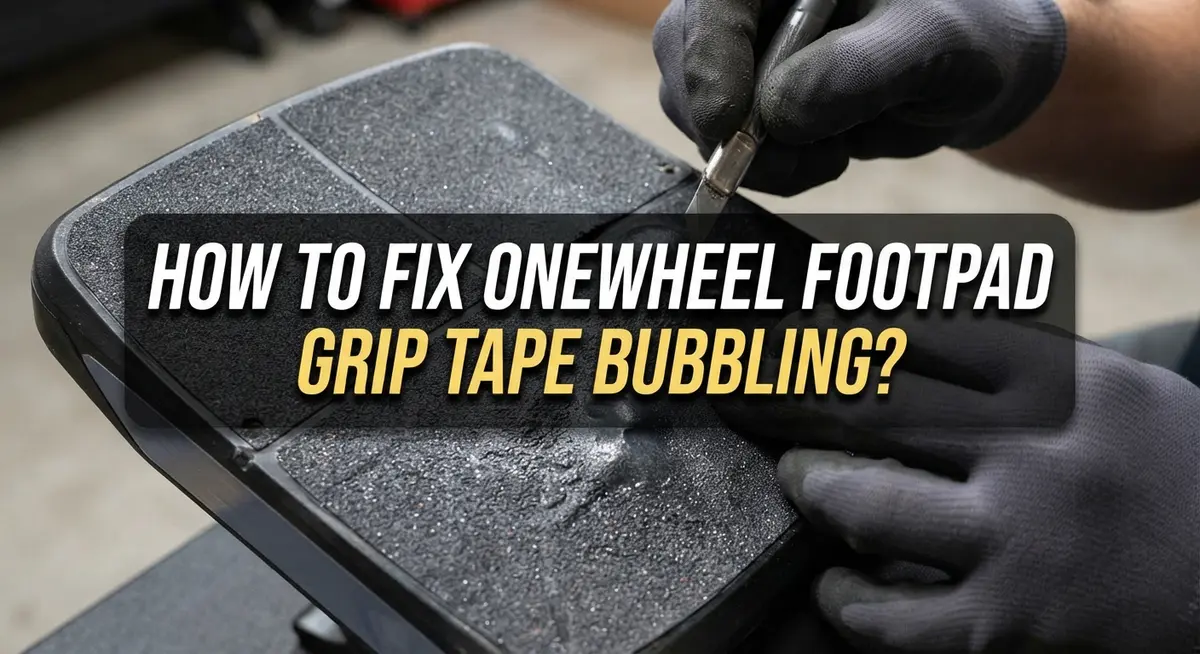
Start by identifying exactly where the bubbles are on your footpad. Run your hand across the surface and mark each bubble with a small piece of tape or a marker. This helps you focus on problem areas and track your progress.
Heat your adhesive first. Use a hairdryer on medium heat and warm the bubbled section for 30 to 60 seconds. The warmth makes the old adhesive more flexible and easier to work with. Keep the hairdryer moving to avoid overheating one spot.
Once warm, gently lift the bubbled corner with your plastic scraper or old credit card. Work slowly and deliberately. Pull the tape across the pad, never upward, as pulling up causes permanent damage to both the tape and the footpad surface underneath.
As you lift, continue heating the adhesive underneath. This combination of heat and gentle pulling makes removal much easier. If resistance builds, heat again rather than forcing the tape up.
After removing the bubbled section, clean all old adhesive residue with isopropyl alcohol and a cloth. Scrub thoroughly until the footpad feels smooth and sticky residue is completely gone. Let the area dry fully before moving forward.
Inspect the exposed footpad for any damage or remaining debris. Wipe it down one more time with a clean, dry cloth. Make sure no dust, dirt, or moisture remains on the surface.
Check that your removed grip tape is still usable. If it’s torn, stained, or too damaged, you’ll need replacement tape. If it looks good, you can reapply it once the footpad is clean and ready.
Cleaning the Footpad Before Reapplication
Before you reapply your grip tape, the footpad surface must be completely clean. Any dirt, dust, or old adhesive left behind will cause the bubbles to return quickly.
Start by wiping down the entire footpad with a dry cloth. Remove all loose debris and dust particles. Pay special attention to the areas where bubbles formed, as these spots often trap the most dirt.
Next, use isopropyl alcohol and a clean cloth to thoroughly wipe the footpad. This removes any sticky residue from the old adhesive. Dampen your cloth with alcohol but avoid soaking the footpad. Work in small sections and let each area dry completely before moving to the next spot.
Check the edges and sensor areas carefully. These zones collect more grime than flat sections. Use a soft brush or old toothbrush to gently scrub around the sensor if needed. The sensor area requires extra attention because it flexes more during riding.
Inspect the footpad surface for any damage or gouges. If you see rough spots or cracks, the new grip tape won’t adhere properly. Sand these areas gently with fine grit sandpaper if necessary, then wipe away the dust.
Allow the footpad to air dry completely. Moisture prevents adhesive from bonding correctly. Give it at least 5 to 10 minutes of drying time in a warm room.
The cleaner your footpad, the better your grip tape will stick. A properly prepared surface is the foundation for a long lasting repair. This simple step prevents future bubbling and keeps your Onewheel riding safely.
Step-by-Step: Reapplying Grip Tape with 3M 300LSE
Now that your footpad is clean and dry, you’re ready to reapply the grip tape using proper adhesive. The 3M 300LSE adhesive is a reliable choice for this repair because it bonds well to both the footpad and grip tape material.
Start by cutting a piece of grip tape slightly larger than the bubbled area you removed. This extra material gives you room to trim and ensures complete coverage. Position the new grip tape over the damaged section, making sure it overlaps the existing grip tape by at least half an inch on all sides.
Apply the 3M 300LSE adhesive to the back of your new grip tape piece. Spread it evenly across the entire surface using a roller or your fingers. Work methodically to avoid missing any spots, as incomplete adhesive coverage causes future bubbling.
Press the grip tape firmly onto the footpad. Start from the center and work outward toward the edges. Use steady, even pressure to eliminate air pockets. This step is critical for proper bonding.
Heat the newly applied grip tape with your hairdryer on a medium setting. Move the heat source across the entire area for about two minutes. This warming softens the adhesive and helps it set faster.
After heating, massage and knead the grip tape firmly with your hand. This breaks in the flexibility and ensures the adhesive bonds completely. Pay special attention to the edges where bubbles often return.
Allow the adhesive to cure for at least 24 hours before riding your Onewheel. This waiting period lets the bond strengthen fully. Your grip tape should now feel secure and flexible, ready for regular use.
Heating and Massaging for Proper Adhesion
Heat plays a critical role in fixing grip tape bubbles. When you warm the adhesive, it becomes more flexible and easier to work with. Use a standard hairdryer on medium heat for the best results.
Start by warming the bubbled area for about 30 seconds. Move the hairdryer back and forth across the grip tape. The heat softens the adhesive underneath, making it more pliable. This step matters because cold adhesive doesn’t bond well to the footpad.
Massage the grip tape immediately after heating. Use firm, circular motions with your hand or fingers. Press down hard as you knead the surface. This action pushes out trapped air and helps the adhesive make full contact with the footpad below. Work from the center of the bubble outward toward the edges.
Heat the area again if needed. Some stubborn bubbles require multiple rounds of heating and massaging. Don’t rush this process. Each heating and kneading cycle improves the bond strength.
Pay special attention to the edges of your grip tape patch. These areas tend to lift first if not properly adhered. Massage the perimeter thoroughly until you feel the grip tape sitting flush against the footpad.
After you finish massaging, apply heat one final time. This seals the adhesive and helps it cure properly. Let the area cool naturally without touching it.
Allow at least 24 hours before riding your Onewheel. The adhesive needs this time to set completely. Riding too soon can reopen the bubbles. This waiting period ensures your repair lasts much longer and performs reliably on your board.
Common Mistakes That Cause Repeat Bubbling
Grip tape bubbling often repeats because riders make the same mistakes during removal and reinstallation. Understanding these errors helps you avoid the cycle of constant repairs.
Pulling upward instead of across is the biggest mistake. When you lift grip tape straight up, you tear the adhesive underneath and damage the footpad surface. This leaves rough spots where new tape won’t stick properly. Always pull the grip tape horizontally across the pad, not vertically upward.
Skipping adhesive removal causes bubbles to return quickly. Old adhesive residue acts like a barrier between new tape and the footpad. Your new grip won’t bond properly if it sits on top of old glue instead of the clean pad surface. Take time to remove every trace of old adhesive with isopropyl alcohol.
Applying insufficient pressure is another common error. Many riders press the grip tape down once and assume it’s done. The adhesive needs firm, sustained pressure across the entire surface. Weak pressure creates small air pockets that expand into bubbles over time.
Not heating the adhesive before reapplication prevents proper bonding. Cold adhesive doesn’t flow into the footpad’s texture. Heat makes the adhesive flexible and sticky enough to create a strong bond. Without heat, your repair fails within days.
Riding too soon after repair is equally problematic. The adhesive needs at least 24 hours to cure completely. Riding immediately puts stress on a partially set bond, causing new bubbles to form.
Forgetting to massage after heating leaves the grip tape stiff and uncontoured. A stiff grip tape separates from the footpad’s natural flex. Massage the heated tape firmly to help it conform to your pad’s shape and maintain adhesion through riding.
Troubleshooting Sensor and Footpad Sensitivity Issues
When grip tape bubbles form near your sensor areas, they create sensitivity problems. Your Onewheel may not recognize your foot position correctly. This causes the board to behave unpredictably or fail to respond to your weight shifts.
Bubbling happens because adhesive loses contact with the footpad surface. Moisture, dirt, or improper installation all contribute to this issue. The sensor sits directly beneath the grip tape, so any separation affects how it reads your movements.
Start by identifying exactly where the bubbles are. Press gently around the sensor area to find all loose spots. Some bubbles may be small and easy to miss.
Lift the bubbled corner slowly. Move your fingers across the grip tape, not upward. Pulling up damages both the tape and the footpad underneath.
Use isopropyl alcohol to clean away old adhesive residue. This step matters more than most riders realize. Leftover glue prevents new tape from bonding properly.
Heat the area with a hairdryer on medium setting. Warmth makes the adhesive flexible and easier to work with. Apply heat for about 30 seconds before attempting removal.
Once you’ve cleaned the surface completely, let it dry for several minutes. Apply your new adhesive and press the grip tape down firmly. Heat the area again and massage it with circular motions.
Pay special attention to the sensor edges. These areas need complete contact for proper function. Knead the grip tape until it feels flexible and conforms to the footpad shape.
Allow at least 24 hours before riding. This curing time ensures the adhesive sets completely. Premature riding causes the bubbles to return immediately.
Final Thoughts
Fixing bubbling grip tape does not need to feel daunting. You just need patience and the right steps.
Start with heat. Warm the bubbled section gently before you touch it. This softens the adhesive and makes your job easier.
Pull the grip tape across the pad, never upward. This simple habit protects the tape from tearing or cracking.
Clean every trace of old adhesive with isopropyl alcohol. A clean surface helps the new bond stick properly and last longer.
Apply fresh 3M 300LSE tape to the footpad before pressing the grip back down. This step creates a strong base for adhesion.
Press firmly across the entire surface. Complete contact between the grip and the footpad prevents future bubbles from forming again.
Heat the area once more after reapplying the grip. Massage it with your hands to restore flexibility and smooth out any stiffness.
This process works well for Pint, Pint X, and other Onewheel models. The same principles apply across the entire lineup.
Sensor areas deserve extra attention during this repair. Stiff grip tape near sensors can cause engagement problems on your board.
Heating and massaging those spots restores flex quickly. This small effort keeps your sensors working the way they should.
Give the adhesive time to cure fully before you ride. Rushing this step often undoes all your hard work.
Fixing bubbling grip tape is simple once you understand the process. Heat, clean, press, and massage form the core of every repair.
Follow these steps carefully and your footpad will feel solid again. Your Onewheel will ride smoothly, safely, and comfortably for many more sessions.
Frequently Asked Questions
Why does grip tape bubble come back after I fix it?
Bubbles return when you skip cleaning old adhesive residue. The new tape won’t stick properly to leftover glue underneath. You must remove all old adhesive with isopropyl alcohol before reapplying fresh tape.
Another reason is insufficient pressure during reinstallation. Press firmly across the entire footpad surface. Don’t rush this step.
Can I fix bubbling near the sensor area?
Yes, you can fix sensor area bubbles safely. These spots need extra attention because stiff grip tape affects sensor engagement. Heat the adhesive on medium setting with a hairdryer.
After reapplying the tape, massage and knead the sensor area thoroughly. This breaks in the flexibility and restores proper contact with your footpad. The sensor will work normally once the grip tape becomes supple again.
How long should I wait before riding after repair?
Wait until the adhesive cures completely. This typically takes several hours. Riding too soon prevents the bond from setting properly.
Let the repaired area sit overnight if possible. This ensures maximum adhesion strength. Your grip tape will perform better with patience.
Does this repair work on all Onewheel models?
Yes, this process works for all models including Pint, Pint X, and other versions. The footpad structure and grip tape application are consistent across the lineup.
The repair steps remain the same regardless of your model. Heat, clean, apply fresh tape, press firmly, and massage the area for best results.

Hi, I’m Archie Flynn, the founder and writer behind RapidResizerHub! 👋 I’m a passionate tech enthusiast who loves exploring the latest gadgets, smart devices, and trending electronics on Amazon. Through my honest, hands-on reviews and detailed buying guides, I help readers make smarter, well-informed shopping decisions.