How To Stop My Smartphone Camera From Blurring Close-Up Shots?
You hold your phone close to a flower, a coin, or a tasty plate of food. You tap the screen. Then the photo comes out soft, fuzzy, and frustrating. Sound familiar?
You are not alone, and the good news is that most close-up blur problems are simple to fix. Your phone camera is more capable than you think. It often just needs the right distance, the right settings, and a steady hand.
This guide walks you through every reason your close-up shots blur and gives you clear steps to fix each one. No expensive gear is required.
Key Takeaways
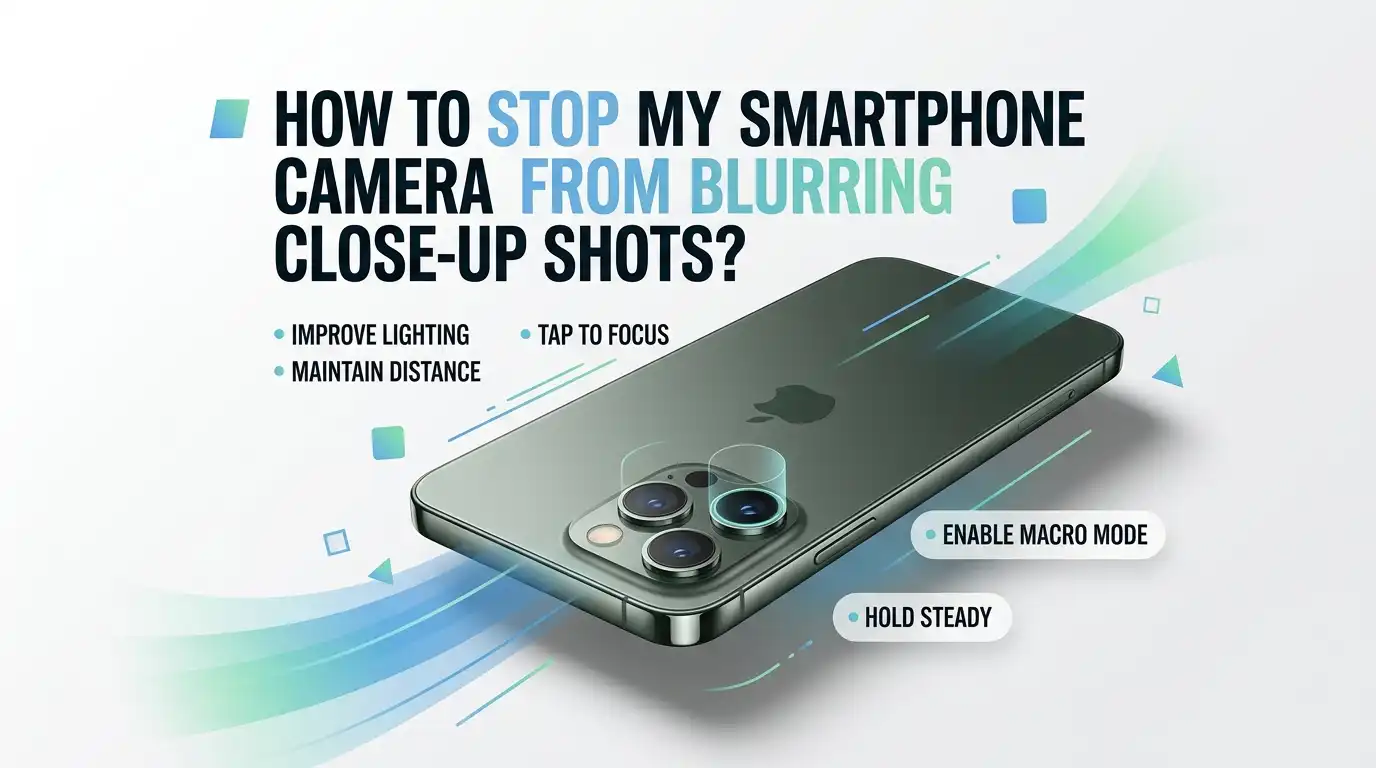
- Your phone has a minimum focus distance. If you get too close, the lens cannot focus at all. Backing up a few centimeters often fixes the blur instantly.
- A dirty lens is the most common cause. Pockets and fingers leave oil and dust on the glass. Wipe the lens with a soft cloth before every important shot.
- Tap to focus and lock it. Do not trust the camera to guess. Tap your subject on the screen, then use AF lock so the focus does not drift.
- Macro mode uses a different lens. Most phones switch to the ultra-wide camera for close-ups. Learn when to turn macro mode on and when to switch it off.
- Light and stability matter most. Good light gives a faster shutter, which freezes movement. A steady grip or a small tripod removes shake and sharpens every shot.
- Manual focus apps give full control. When autofocus fails on tiny subjects, switching to manual focus puts the sharpness in your hands.
Why Does Your Phone Camera Blur Close-Up Shots?
Let us start with the root cause. Your phone camera has a built in limit called the minimum focus distance. The lens simply cannot focus on anything closer than this point.
When you push the phone too near your subject, the image goes soft no matter how many times you tap the screen. This is normal behavior, not a broken phone. Another big reason is depth of field. Phone cameras now use large sensors with bright apertures.
At close range, only a thin slice of the photo stays sharp, and the rest blurs. Movement and low light add to the problem. So the blur usually comes from physics, not a defect. Once you understand these causes, the fixes below make perfect sense and become easy to apply.
Clean Your Camera Lens First
This is the easiest fix, and it solves more problems than people expect. Your lens collects oil, dust, lint, and fingerprints every single day. Your phone rides in pockets, bags, and hands. All that grime sits on the glass and scatters light, which creates a soft, hazy, blurry image.
Before you blame the camera, clean the lens. Use a soft microfiber cloth and wipe in gentle circles. Avoid paper towels and shirts, since rough fabric can scratch the coating.
For stubborn grime, breathe lightly on the glass first, then wipe. Do this before every close-up shot. A clean lens often turns a blurry mess into a crisp picture in seconds. Make this your number one habit.
Pros: It is free, fast, and works for every phone. Cons: A scratched lens will still blur even after cleaning, so wipe gently and avoid harsh materials.
Understand Your Phone’s Minimum Focus Distance
Every camera, including yours, needs a minimum gap between the lens and the subject. Most standard phone cameras need about 10 to 20 centimeters to focus. Get any closer with the main lens, and the picture turns soft.
This is the single most overlooked cause of close-up blur. The fix is simple: back up slightly. Move the phone a few centimeters away from your subject until the image snaps into focus. Then crop the photo later if you want it bigger. You can test your own phone easily.
Slowly move toward a coin or a leaf and watch the screen. The point where it goes blurry is your limit. Knowing this number changes how you shoot forever. Respect that distance, and your blur problems shrink fast.
Pros: Costs nothing and works on any device. Cons: You may lose some detail, since you stand farther away and crop in afterward.
Tap To Focus On Your Subject Every Time
Do not let the camera guess where to focus. The autofocus often locks onto the background instead of your tiny subject. This is why your flower looks soft while the wall behind it looks sharp. The fix is to tap the exact spot you want sharp.
On almost every phone, you tap the subject on the screen, and a small box appears to confirm the focus point. Tap directly on the petal, the coin edge, or the eye of an insect.
Always tap before you shoot a close-up. Wait for the screen to confirm sharp focus, then press the shutter. This one habit alone fixes a huge share of blurry photos. It takes one extra second and gives you control over what the camera prioritizes.
Pros: Instant control and works in the default camera app. Cons: Focus can shift if you or the subject moves after tapping, so timing matters.
Use AF Lock To Hold The Focus Steady
Tapping to focus is great, but the focus can drift the moment your hand moves. This is where AF lock saves your shot. AF lock freezes the focus and exposure so they stay fixed until you take the photo.
On most phones, you tap and hold your subject on the screen until a lock symbol or a yellow box appears. Once locked, you can slightly reframe without losing sharpness. This is perfect for close-ups, where even tiny movements throw off the focus.
Lock the focus on your subject, then steady your hand and shoot. On many Android phones it shows a small lock icon, and on iPhones it reads AE/AF Lock at the top. This trick keeps your close-up crisp even when conditions are tricky. It is a favorite among mobile photographers for a reason.
Pros: Holds sharp focus and stops mid-shot drift. Cons: You must unlock it for the next scene, or new shots may come out wrong.
Turn On Macro Mode The Right Way
Modern phones include a macro mode built for close-ups. Most phones switch to the ultra-wide camera to focus as close as 2 to 3 centimeters. When you move near a subject, the phone often detects this and turns on macro automatically.
Look for a small flower icon or a macro label on your screen. The iPhone Pro models focus from about 2 centimeters, and the Pixel Pro from about 3 centimeters. Let the phone switch lenses, then tap to focus and shoot.
This mode is the proper tool for very tiny subjects like insects, textures, and jewelry. Macro mode lets you get closer than the main lens ever could. Learn where this setting lives in your camera app, and you unlock a whole new range of sharp close-up shots.
Pros: Lets you focus extremely close with one tap. Cons: Image quality can drop in low light, since the ultra-wide lens is smaller and weaker.
Know When To Switch Macro Mode Off
Here is a surprise: macro mode is not always the best choice. Sometimes the ultra-wide lens gives a softer, more distorted, and lower quality result than the main camera. The ultra-wide sensor is smaller, so it struggles in dim light and can warp the edges of your frame.
If your close-up does not need extreme magnification, turn macro mode off and let the main lens work. You will need to step back a little so the main camera can focus, but the detail and color will often look much better.
Test both methods on the same subject and compare them on screen. Pick the version that looks sharpest, not just the closest. Many phones let you disable automatic macro switching in the camera settings, which gives you full say over which lens shoots.
Pros: Better detail and color from the stronger main sensor. Cons: You cannot get as close, so very tiny subjects may look too small.
Add More Light To Sharpen Your Shots
Light is the secret weapon of sharp photos. In bright conditions, your camera uses a faster shutter speed, which freezes movement and blur. In dim light, the shutter stays open longer, so any tiny shake or motion smears the image. The fix is to add light to your scene.
Move near a window, step outside, or turn on a lamp. Daylight is the best free light source you have. For very close subjects, a small portable LED light works wonders by lighting fine details.
Avoid using the harsh built-in flash for close-ups, since it often flattens and overexposes the subject. Instead, position soft, even light from the side. More light means faster shutter speeds, less blur, and crisper detail. This simple change improves close-ups dramatically and costs almost nothing.
Pros: Faster shutter, sharper detail, and richer color. Cons: Harsh or direct light can create glare and hard shadows, so soften it when possible.
Hold Your Phone Steady Or Use A Tripod
Camera shake is a top cause of close-up blur. At close range, even a tiny wobble ruins the sharpness. Your breathing and heartbeat can move the phone just enough to smear fine detail.
The solution is stability. Hold the phone with both hands and tuck your elbows against your body. Rest your hands on a table, a wall, or any solid surface. For the best results, use a small phone tripod to keep the camera perfectly still.
A steady base removes shake and gives you the sharpest possible close-up. Pair a tripod with the self-timer, set to three seconds, so your finger does not jolt the phone when you tap the shutter. Stability turns shaky, soft photos into clean, detailed shots. This is one of the most reliable upgrades you can make.
Pros: Removes shake and allows slower, sharper exposures. Cons: A tripod adds gear to carry, and setup takes a little extra time.
Use The Volume Button Or Timer To Shoot
Pressing the on-screen shutter is a sneaky source of blur. Tapping the screen pushes the phone slightly and creates motion at the worst moment. This small jolt softens your close-up just as the camera captures the shot.
There are two easy fixes. First, use the volume button as your shutter, since it often causes less movement than tapping the glass. Second, use the self-timer. Set a three second delay, then take your hand off the phone completely.
The camera fires on its own with zero shake from your finger. This is especially powerful when your phone rests on a surface or tripod. Both tricks are free and built into your camera app. They remove the final bit of motion that ruins otherwise perfect close-up photos. Try them on your next shot.
Pros: Removes finger shake at the moment of capture. Cons: The timer adds a short delay, which can be tricky for moving subjects.
Switch To Manual Focus With A Camera App
When autofocus keeps failing on tiny subjects, take control with manual focus. A manual focus app lets you set the exact point of sharpness yourself. Apps like Halide for iPhone and pro modes on many Android phones offer a focus slider.
You slide it back and forth until your subject looks razor sharp on screen. This is the trick serious mobile photographers use for macro work. Set focus to manual, then adjust the slider while watching the detail snap into place.
Many apps also show focus peaking, which highlights the sharp areas in a bright color. You can also set the shutter speed to 1 over 250 or faster to freeze shake. Manual focus removes the guesswork and gives you full command of close-up sharpness. It takes practice, but the results are worth it.
Pros: Total control and reliable sharpness on tiny subjects. Cons: It is slower to use and has a learning curve for beginners.
Mind Your Angle And Depth Of Field
The way you point your phone affects how much stays sharp. At close range, only a thin slice of your photo can be in focus at once. This is depth of field, and it is very shallow during close-ups. If you shoot at a steep angle, part of your subject falls outside the sharp zone and blurs.
The fix is to line up your phone parallel with your subject. Keep the flat plane of your subject facing the lens straight on. For a flower or a coin, this keeps the whole face sharp. Shooting straight on also reduces the blurry edges that bother many people.
You can also step back slightly and zoom in to flatten the perspective. Adjust your angle thoughtfully, and more of your close-up will land in crisp focus.
Pros: More of your subject stays sharp across the frame. Cons: A flat, straight-on angle can look less creative than a dramatic one.
Try The Telephoto Lens For Clean Close-Ups
If your phone has a telephoto or zoom lens, it can be a secret close-up tool. The telephoto lens lets you stand back yet still fill the frame with your subject. This extra distance keeps you outside the minimum focus limit of the main lens while giving you a tight, detailed view.
Standing back also creates a pleasing blurred background that makes your subject pop. Switch to the 2x, 3x, or 5x lens, then frame your close-up from a comfortable distance.
Some flagship phones even use the telephoto lens for high quality macro shots, which look far better than the ultra-wide method.
This trick gives natural perspective and sharp detail at the same time. Test your zoom lenses on the same subject and keep the version that looks cleanest and crispest.
Pros: Natural perspective, sharp detail, and nice background blur. Cons: Not every phone has a true telephoto lens, and it needs good light.
Check For Hardware Problems And Software Glitches
Sometimes the blur is not your technique. A dropped phone can damage the lens or the focus motor inside the camera. If your camera worked fine and suddenly blurs after a fall, hardware may be the issue. First, rule out software.
Close the camera app fully and reopen it, then restart your phone. A simple restart clears glitches that freeze the autofocus. Update your camera app and your operating system, since fixes often arrive in updates.
Remove any thick case or screen protector that covers the lens. If the camera still cannot focus at any distance, the autofocus may be physically stuck or broken. At that point, contact your phone maker or a trusted repair shop. Rule out the easy software fixes first before you spend money on a repair.
Pros: Solves glitch-based blur for free with a quick reset. Cons: Real hardware damage needs a paid repair or a professional service.
Frequently Asked Questions
Why does my phone blur when I get too close?
Your camera has a minimum focus distance. The lens cannot focus on subjects that are closer than this limit. Most main lenses need about 10 to 20 centimeters. The fix is to back up slightly or switch to your phone’s macro mode, which uses the ultra-wide lens to focus much closer.
How do I turn on macro mode on my phone?
Move close to your subject, and many phones switch to macro mode automatically. Look for a small flower icon or a macro label on the screen. You can also open your camera settings to enable or disable automatic macro control. iPhone Pro and Pixel Pro models support it, along with many recent Android phones.
Will cleaning my lens really fix blurry photos?
Yes, very often. Oil, dust, and fingerprints scatter light and create a soft, hazy image. A quick wipe with a soft microfiber cloth removes the grime and restores sharpness. Make lens cleaning a habit before every important shot, and avoid rough materials that could scratch the glass.
Why is only part of my close-up sharp?
This is depth of field. At close range, only a thin slice of the photo stays in focus. The rest naturally blurs. To keep more of your subject sharp, line up your phone parallel with it and shoot straight on. You can also step back a little and zoom in.
Do I need a special app for sharp close-ups?
Not always. The default camera with tap to focus, AF lock, and macro mode handles most close-ups well. For tiny subjects, a manual focus app gives extra control with a focus slider and adjustable shutter speed. Try the built-in tools first, then add an app if you want more precision.
My camera blurs after I dropped my phone. What now?
First, rule out software. Restart the phone, update the camera app, and remove any case covering the lens. If the camera still cannot focus at any distance, the autofocus may be physically damaged. In that case, contact your phone maker or a trusted repair shop for a proper inspection.

Hi, I’m Archie Flynn, the founder and writer behind RapidResizerHub! 👋 I’m a passionate tech enthusiast who loves exploring the latest gadgets, smart devices, and trending electronics on Amazon. Through my honest, hands-on reviews and detailed buying guides, I help readers make smarter, well-informed shopping decisions.