How To Fix Monitor Power Button Plunger Sinking?
Does your monitor’s power button feel loose or stuck? Does it sink into the housing instead of clicking back out? This is a common problem, and it happens when the button mechanism inside your monitor wears out or breaks.
A sinking power button can be frustrating. You might struggle to turn your monitor on or off. Sometimes the button gets stuck completely, leaving you unable to control your screen at all.
The good news is that you can often fix this issue yourself. It just takes some patience and the right approach.
In this guide, we will walk you through every step needed to fix a sinking power button plunger. You will learn how to safely power down your monitor, open the housing, and access the button module.
We will also cover important safety tips, like draining residual power before you start. Plus, we will highlight common mistakes to avoid during the repair process.
By the end, you will know exactly how to diagnose the problem and get your monitor’s power button working like new again.
In a Nutshell
Here is a quick summary of the fix, so you know what to expect:
-
Drain the power first. Hold the power button for 30 to 60 seconds. This removes leftover power from the monitor before you touch anything inside.
-
Open the housing with care. Take out the rear screws. Then pry the front bezel apart slowly to avoid cracks or scratches.
-
Find the button module. Locate the power button and disconnect it from the logic board. This gives you clear access to the broken part.
-
Remove the faulty parts. Take out the circuit board and cable connected to the button assembly. This lets you inspect or replace the sinking plunger.
-
Wait before reassembly. Give it one full minute after draining power. This step protects the internal components when you put everything back together.
-
Avoid rushing. Take your time with each step. Going too fast often causes more damage than the original problem.
With these steps, your monitor’s power button should click properly again.
What Causes a Sinking Power Button Plunger
A sinking power button plunger happens when the internal spring or mechanical components wear out over time. The spring loses its tension and can no longer push the button back up after you press it.
Dust and debris accumulate inside the button mechanism. This buildup prevents the spring from moving freely. When particles get trapped, the button gets stuck in the pressed position.
The plastic housing around the button can crack or warp. This damage changes how the button sits in its slot. When the housing shifts, the button no longer aligns properly and sinks deeper than it should.
Repeated pressing wears down the internal spring. Every time you power on your monitor, the spring compresses and extends. After thousands of presses, the spring loses its strength and stops bouncing back completely.
Moisture and humidity can damage the spring inside the button. Water exposure causes rust and corrosion on metal parts. This corrosion makes the spring stiff and unable to function normally.
The plastic button itself can degrade from heat exposure. Monitors generate significant heat during operation. This heat can make plastic brittle and cause it to crack or deform over time.
The connection between the button and the circuit board can loosen. If screws or connectors come undone, the button assembly shifts out of position. This misalignment makes the button sink into the housing.
Finally, manufacturing defects sometimes cause premature failure. A weak spring or poor assembly from the factory can fail much sooner than expected. These defects usually show up within the first few years of use.
Understanding these causes helps you prevent future problems and fix the current issue effectively.
Tools and Preparation Before You Begin
Before you start fixing your monitor’s power button, gather the right supplies. Having everything ready prevents frustration and keeps the repair smooth.
You will need basic hand tools. A small Phillips head screwdriver removes the rear housing screws. A flathead screwdriver or plastic pry tool helps separate the front bezel without scratching it. Avoid metal tools that could damage delicate plastic parts.
Get cleaning supplies on hand. A can of compressed air clears dust from internal components. Isopropyl alcohol and lint free cloths remove debris from the button mechanism. These items help you see what caused the sinking problem.
Prepare your workspace carefully. Use a clean, flat surface with good lighting. A small container holds screws so you don’t lose them during disassembly. Take photos of cable connections before you disconnect anything. These pictures help you remember where everything goes back together.
Wear an anti static wrist strap if you have one. This protects sensitive electronic components from static electricity damage. Even small static charges can harm circuit boards.
Keep a notepad nearby. Write down the order of steps as you work. Note which screws came from which locations. Monitor housings often have different screw sizes, and mixing them up causes problems later.
Make sure you have adequate time. Don’t rush this repair. Set aside at least one hour for the complete process. Working slowly prevents accidental damage to delicate parts.
Finally, ensure your monitor is unplugged and completely powered down. Wait several minutes before opening the housing. This safety step prevents electrical shock and protects internal components from power surges.
Step 1: Power Cycle and Drain Residual Power
Power cycling your monitor is the first step to fix a sinking power button plunger. This process safely drains residual electrical charge from your device. Start by unplugging the monitor from the wall outlet. This disconnects all power sources immediately.
Wait about 30 seconds after unplugging. This pause allows capacitors inside the monitor to discharge completely. Your monitor stores electrical energy even when turned off. Removing this energy protects you and prevents damage during repair work.
Next, press and hold the power button for 30 to 60 seconds. Hold it down firmly without releasing. You won’t see any lights or responses from the monitor. This is normal and expected. The button press helps drain any remaining power trapped in the system.
After holding the button, release it and wait another full minute. Don’t rush this waiting period. Let all residual power dissipate completely. This waiting time is critical for your safety and the monitor’s internal components.
Check that no lights appear on the monitor. No LED indicators should be visible. If you see any lights, wait longer and repeat the power button hold.
Once you confirm the monitor is fully drained, you’re ready to proceed with disassembly. Never open your monitor without completing this power cycle step. Residual power can cause electrical shocks or damage sensitive circuit boards.
This simple but important step takes just a few minutes. It protects both you and your monitor during the repair process. Skipping this step risks injury or making the problem worse. Take your time and follow this process carefully before moving forward with any internal work.
Step 2: Disassemble the Monitor Housing
Start by locating all the screws on the rear panel of your monitor. Most monitors have between four and eight screws holding the housing together. Use your Phillips head screwdriver to remove each one slowly and carefully. Place these screws in a small container so you don’t lose them.
Once you remove the rear screws, gently pry the front bezel away from the main housing. Work your way around the edges slowly. Many monitors have plastic clips that hold the bezel in place, so patience is essential here. Don’t force anything or you risk cracking the plastic frame.
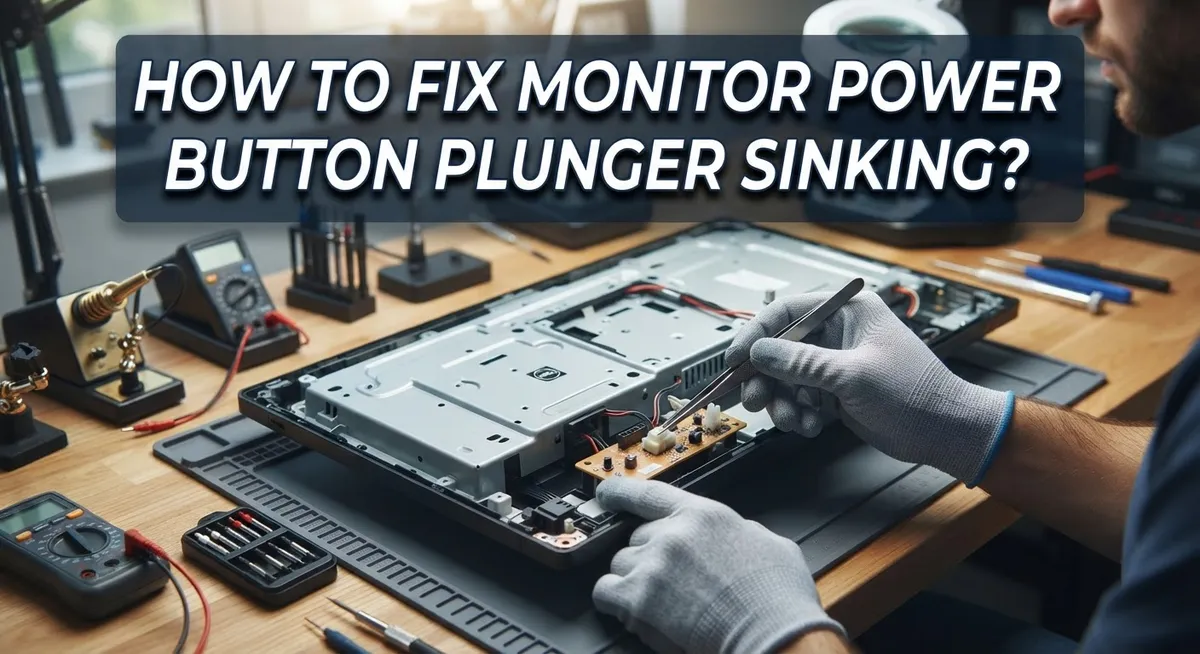
As the bezel separates, look for any cables connecting it to the main circuit board. These typically include LED indicator wires and the power button connector. Gently disconnect these cables by pulling them straight out from their sockets. Take a photo with your phone before disconnecting anything so you remember where everything goes.
Carefully set the front bezel aside on a clean surface. Now you can access the internal components. Look for the power button assembly, which is usually mounted near the top or side of the housing. You may see a small plastic housing or bracket holding the button mechanism in place.
Work methodically through this process. Rushing increases the risk of breaking delicate plastic components or damaging internal circuits. If you encounter resistance at any point, stop and look for additional screws or clips you might have missed. Take your time, and the disassembly will go smoothly.
Step 3: Access and Repair the Power Button Module
Now that you’ve drained power and removed the housing, it’s time to access the button module itself. This is where the actual repair happens.
Locate the power button assembly on the front bezel. You’ll see it’s connected to the main circuit board with a small cable or ribbon connector. Gently disconnect this cable by carefully pulling the connector straight out. Don’t twist or bend it sideways, as this can damage the pins.
Next, examine how the button module attaches to the bezel. Most monitors use small plastic clips or screws to hold it in place. If you see screws, remove them with your Phillips head screwdriver. If you see clips, gently pry them away using a plastic tool or the edge of your screwdriver.
Once the module is free, lift it straight out of the bezel. Set it on your clean workspace. Take a moment to inspect the button plunger closely. Look for cracks, debris, or signs that the spring mechanism has failed.
The plunger sinking usually means the internal spring lost tension or broke. Check if any small parts are loose inside the assembly. Sometimes dust accumulation prevents the button from returning to its original position. Use a clean, dry cloth to gently wipe away any visible debris.
If the spring appears intact but weak, it may have lost its elasticity over time. This is a common wear issue. Before reassembling, test the button mechanism by pressing it several times. It should click and return smoothly each time.
Document everything with photos before you proceed further. This helps you remember exactly how everything connects during reassembly.
Step 4: Reassemble and Test the Monitor
Now that you’ve repaired the power button module, it’s time to put everything back together carefully. This step is just as important as the disassembly process because mistakes here can damage your monitor or create new problems.
Start by reconnecting the power button module to the front bezel. Make sure it sits flush and aligns properly with the opening. The module should fit snugly without forcing. Check that all cable connections are secure before moving forward.
Next, position the front bezel back onto the monitor housing. Align it carefully so the edges match up evenly around the entire perimeter. Gently press the bezel down until it clicks into place. Don’t force it if you feel resistance, as this usually means something isn’t aligned correctly.
Reattach all the rear panel screws you removed earlier. Tighten them firmly but don’t overtighten, as this can crack the plastic housing. Work in a crosswise pattern to ensure even pressure.
Before plugging in your monitor, double check that everything looks correct. Make sure no cables are pinched or loose inside the housing. Verify that the bezel sits flush with no gaps.
Now plug your monitor back into the power outlet. Press the power button gently to test it. The button should depress smoothly and spring back without any sinking sensation. If the monitor powers on and the button feels normal, your repair was successful.
If the button still sinks or the monitor won’t power on, unplug it immediately and wait another minute. Then check your power supply connections and try again. Sometimes residual power needs additional time to fully drain before reassembly.
Tips for a Smooth Repair Process
Here are practical tips to help you repair your monitor power button smoothly and successfully.
Take your time during disassembly. Rushing causes broken plastic clips and damaged cables. Work slowly through each step. Set aside at least 30 to 45 minutes for the entire repair process.
Organize your workspace before you start. Use a clean, flat surface with good lighting. Keep all screws in a small container so you don’t lose them. Take photos of each stage as you go. These photos help you remember where everything goes during reassembly.
Use gentle pressure when prying the bezel. The front panel has clips holding it in place. Start at one corner and work your way around slowly. If something resists, stop and look for fasteners you missed. Forcing the bezel can crack the plastic permanently.
Handle internal components with care. Avoid touching circuit board contacts with bare hands. Static electricity can damage sensitive parts. Ground yourself by touching a metal part of the monitor frame before handling internal components.
Wait after power draining. Even after holding the power button for 60 seconds, wait one full minute before opening the housing. This ensures all residual electricity drains completely. Patience here prevents electrical shocks and component damage.
Keep track of cable positions. Notice how each cable connects before disconnecting it. Some cables have specific orientations. Wrong reconnection prevents your monitor from powering on.
Test before fully reassembling. If possible, power on the monitor with the housing partially open. This lets you confirm the button works before closing everything up. Once you confirm success, reassemble the housing completely and secure all screws firmly.
Common Mistakes to Avoid
When fixing a sinking monitor power button plunger, certain mistakes can make things worse. Understanding what to avoid saves you time and protects your monitor from additional damage.
Rushing the disassembly process is the biggest mistake people make. You might break delicate plastic clips or snap internal connectors if you work too fast. Take your time and follow each step carefully. Speed creates costly errors that require professional repair.
Forcing the bezel separation without finding all fasteners causes serious problems. Some screws hide under rubber feet or stickers on the monitor back. If you pry too hard before removing every screw, the plastic bezel cracks and splits. Always check the entire rear panel for hidden fasteners before applying any pressure.
Skipping the power drain step puts you at electrical risk. Even unplugged monitors hold residual power in capacitors. Hold the power button for 30 to 60 seconds before opening the housing. This simple action prevents electrical shock and protects internal components from power surges.
Neglecting to document your work creates reassembly confusion. Take photos before disconnecting cables or removing parts. These images help you remember where everything goes back together. Reassembly becomes much simpler with visual references.
Touching circuit board contacts with bare hands introduces static electricity. This discharge can permanently damage sensitive electronics. Wear an anti static wrist strap or touch a grounded metal part before handling internal components.
Using excessive force on the button module itself breaks the mechanism further. The module contains fragile springs and plastic parts. Handle it gently and support it properly during removal and reinstallation.
Final Thoughts
A sinking power button plunger looks like a small problem. But it stops you from turning your monitor on or off properly.
The good news is that this fix is simple for most people. You do not need special tools or advanced technical skills.
Just remember the basics. Power drain first, then open the housing gently, then access the button module carefully.
Take breaks if you feel rushed. A calm approach prevents cracked clips and damaged cables.
Most sinking plunger issues come from worn springs or loose connections inside the button assembly. Once you spot the problem, the repair itself takes only a few minutes.
If your monitor does not power on after reassembly, do not panic. Check your cable connections again.
Sometimes a cable gets loose during reassembly. Open the housing once more and confirm everything sits in place.
Canned air also helps here. It clears dust from the power supply and logic board, which can affect performance.
If you ever suspect water damage, stop immediately. Cut the power supply first before touching anything inside the monitor.
Water and electronics are a dangerous mix. Safety always comes before repair.
For everyday sinking button problems, though, this guide gives you everything you need. You can fix it at home without paying for professional repair services.
Keep your workspace clean and your movements slow. This single habit prevents most mistakes people make during this repair.
With patience and the right steps, your monitor’s power button will work like new again. You will feel confident tackling similar repairs in the future too.
Trust the process, follow each step, and your monitor will thank you.
Frequently Asked Questions
What causes a monitor power button plunger to sink in the first place?
A sinking plunger happens when the spring mechanism inside the button assembly weakens or breaks. Over time, repeated pressing wears down the spring’s ability to push back. Sometimes the plastic clips holding the spring snap off due to age or accidental drops. Dust and debris can also jam the mechanism, preventing normal movement.
Can I fix a sinking power button without taking my monitor apart?
Yes, there’s a quick temporary fix. Use a pen or thin object to press through the housing and activate the button directly. This bypasses the stuck plunger and lets you control power. However, this is only a workaround. For a real fix, you’ll need to open the monitor and repair the internal spring or clips.
What should I do if my monitor won’t turn on after I fix the button?
First, check that you reconnected all cables properly during reassembly. A loose power cable connection is the most common culprit. Use canned air to clean the power supply area, circuit board, and cooling fan. Sometimes dust buildup prevents power delivery. If the monitor still won’t start, let it sit unplugged for several hours before trying again.
Is it safe to open my monitor if I suspect water damage?
No. Stop immediately and cut the main power supply. Water inside electronics creates serious safety hazards like short circuits or electric shock. Let the monitor dry completely in a warm, dry place for several days before attempting any repairs. If water damage is severe, replacement might be safer than repair.
How long does a power button plunger fix usually take?
Most fixes take 30 to 60 minutes for someone doing it for the first time. This includes careful disassembly, the actual repair, and reassembly. Work slowly to avoid breaking delicate components. Rushing leads to mistakes that create bigger problems.

Hi, I’m Archie Flynn, the founder and writer behind RapidResizerHub! 👋 I’m a passionate tech enthusiast who loves exploring the latest gadgets, smart devices, and trending electronics on Amazon. Through my honest, hands-on reviews and detailed buying guides, I help readers make smarter, well-informed shopping decisions.