How To Fix Laptop Bottom Chassis Screw Anchor Stripping?
You open your laptop to clean the fan or swap out a battery. You put the bottom chassis back on. The screw spins and spins but never tightens.
Sound familiar? This is a classic case of stripped screw anchors. It happens to almost everyone who opens their laptop more than once.
The good news is that this problem is fixable. You do not need to panic or think your laptop is ruined.
Screw anchors strip for simple reasons. Over-tightening is the biggest culprit. Repeated disassembly without care is another common cause.
In this article, we will show you how to spot the damage. We will explain what to do before removing anything. You will learn about contacting manufacturer support for replacement parts.
We will also cover a handy trick using brass standoffs to reinforce broken anchor points. This method works well when official replacements are not available.
By the end, you will know exactly how to fix this frustrating issue. Your laptop chassis will stay secure again, no wobbling and no loose panels.
In a Nutshell
Here is a quick summary if you are short on time.
-
Stripped anchors happen from over tightening. Repeated disassembly also wears down the plastic or metal threads over time.
-
Check the damage first. Look closely at the anchor point before you touch anything else. This tells you how bad the problem really is.
-
Remove the damaged screw if you can. A gentle approach works best here. Forcing it can make the anchor point worse.
-
Contact manufacturer support early. Many companies offer replacement screw sets for common models. This is often the simplest fix available.
-
Try brass standoffs for reinforcement. These small parts can rebuild a broken anchor point. They give the screw something solid to grip again.
-
Avoid rushing the repair. Patience matters more than speed in this process. A careful fix now saves you bigger headaches later.
-
Repair success depends on severity. Minor stripping is usually easy to solve. Severe damage might need extra parts or professional help.
Follow these steps and your laptop chassis will hold together properly again.
What Causes Screw Anchor Stripping in Laptop Chassis
Screw anchor stripping happens when the threads inside your laptop’s chassis wear out or break. This prevents screws from gripping properly, leaving your bottom panel loose and unstable.
Over tightening is the most common culprit. When you force a screw too hard, the plastic or metal threads inside the anchor point compress and fail. The screw spins freely without holding anything in place.
Repeated disassembly also causes damage. Every time you open your laptop, you risk weakening those anchor points. The threads wear down gradually until they no longer grip the screw.
Manufacturing defects can also play a role. Some laptops ship with weak anchor points from the factory. Poor quality plastic or thin metal threads fail faster than they should.
Moisture and corrosion damage anchors too. If liquid gets inside your laptop, rust forms on metal anchor points. Corrosion eats away at the threads and weakens their hold.
Age and material fatigue matter as well. Plastic anchors become brittle over time. Metal anchors can develop micro cracks from constant expansion and contraction as your laptop heats up and cools down.
Impact or dropping your laptop can strip anchors instantly. A hard fall or bump can crack the plastic housing around the anchor point or misalign the metal threads.
Improper screw size causes problems too. Using a screw that is too large forces the anchor to stretch. Using one that is too small leaves gaps, and the screw cannot grip properly.
The hinge area is especially vulnerable. This section moves constantly, putting constant stress on anchor points. Hinges strip more often than other areas on your laptop chassis.
Signs Your Screw Anchor Is Stripped or Damaged
A stripped screw anchor shows clear warning signs. The most obvious one is when the screw spins freely without tightening. You turn it, but it does not grip the chassis at all.
Listen for clicking or rattling sounds when you hold the laptop. This noise often means the screw is loose inside the anchor hole. The chassis may also feel slightly wobbly or shift when you apply gentle pressure.
Visual inspection reveals damage quickly. Remove the bottom cover carefully and look at the screw holes. Stripped anchors show enlarged holes or visible cracks around the opening. The plastic or metal threads inside may appear crushed or flattened.
Check if the screw sits flush against the surface. A screw that sticks out or sits at an angle suggests the anchor is damaged. The fastener should fit snugly when properly tightened.
Feel for resistance when turning the screw. A healthy anchor resists your turning motion with steady tension. A stripped anchor feels loose and offers almost no resistance. The screw may even fall out on its own.
Examine the screw itself too. If the screw is bent, corroded, or has damaged threads, the anchor may seem stripped when the problem is actually the fastener. Compare it to other screws on your laptop to spot differences.
Pay attention to where the damage occurs. Hinges and frequently opened areas strip more often than other spots. Repeated opening and closing weakens these anchor points faster.
Document any damage with photos before attempting removal. This helps if you need to contact manufacturer support later. Clear images show the exact problem and help support teams recommend the right solution for your specific model.
Tools and Materials Needed Before You Start
Before you start fixing a stripped screw anchor, gather the right tools and materials. Having everything ready prevents frustration and keeps you focused on the repair.
Basic hand tools make up the foundation of your toolkit. You need a screwdriver set with multiple head types and sizes. Most laptop chassis screws use Phillips or Torx heads, so include both. A flashlight or headlamp helps you see inside tight spaces clearly. Tweezers assist with removing small parts or debris from anchor points.
Inspection and documentation tools matter just as much. Bring a magnifying glass to examine the damage closely. A smartphone camera works perfectly for taking photos of the stripped anchor before you begin work. These images help you remember the exact location and severity of damage.
Materials for the actual repair depend on your chosen method. If you plan to use brass standoffs, collect a few in different sizes that match your laptop’s screw specifications. Gather replacement screws if the manufacturer provided them or if you ordered them separately. Keep a small container to organize removed screws so you don’t lose them.
Safety and protection items round out your supplies. Wear an anti static wrist strap to protect sensitive electronics from electrical discharge. Have a soft cloth available for wiping surfaces and keeping your work area clean. A small mat or towel protects your laptop’s finish during the repair process.
Organization saves time throughout the entire job. Lay out all tools and materials before you open your laptop. Create a workspace with good lighting and enough room to move comfortably. This setup prevents mistakes and makes the repair process smoother and faster.
Step-by-Step: Removing the Damaged Screw Safely
Removing a damaged screw from your laptop’s bottom chassis requires patience and the right approach. Start by powering off your laptop completely and unplugging all cables. This prevents electrical damage and keeps you safe during the process.
Locate the stripped screw anchor. Use a flashlight to see inside the chassis clearly. Take photos of the damage before you touch anything. This documentation helps if you contact manufacturer support later.
Attempt screw removal gently. If the screw head is intact, try using a screwdriver that fits snugly into the slot. Apply steady, even pressure without forcing. Stripped anchors often make screws spin freely, so you may need to work slowly. If the screw won’t budge, stop immediately. Forcing it can cause additional damage to surrounding areas.
For stuck screws, try these safe techniques. Apply a small amount of penetrating oil around the screw head. Wait 15 minutes for the oil to work into the threads. Then attempt removal again with gentle, consistent pressure.
If the screw head is damaged or rounded, you may need a screw extractor tool. These specialized tools grip damaged screws and pull them out safely. Work carefully to avoid enlarging the hole further.
Never force removal if resistance increases. This approach only worsens the damage. If you cannot remove the screw after several gentle attempts, stop and contact your laptop manufacturer’s support team.
Once you remove the screw successfully, inspect the anchor point closely. Document the damage with clear photos. This information becomes valuable when discussing repair options with manufacturer support or when considering alternative fixes like brass standoffs for reinforcement.
Step-by-Step: Repairing the Anchor with Brass Standoffs
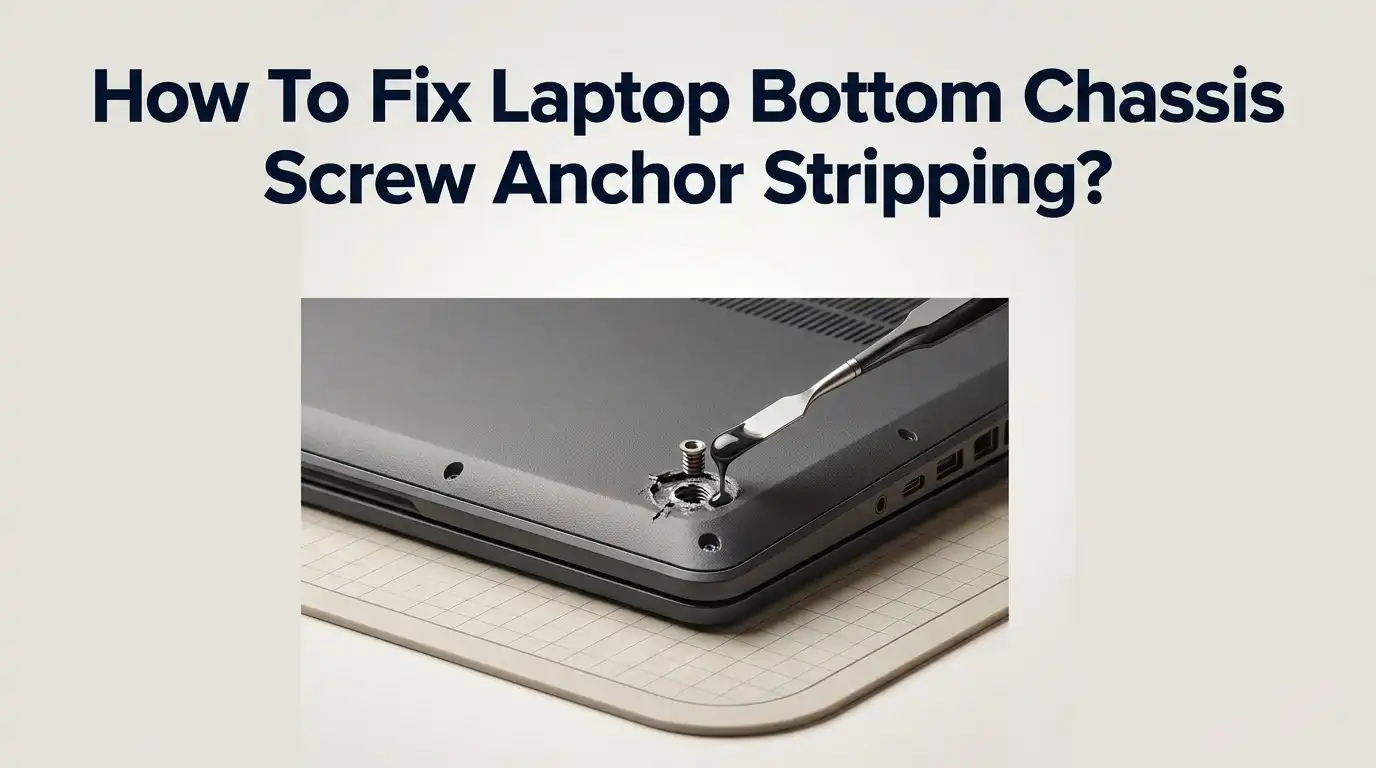
Brass standoffs offer a reliable solution for reinforcing damaged screw anchor points on your laptop’s bottom chassis. These small metal tubes slip over the existing anchor and create a new, stronger fastening surface.
Start by measuring your current screw size. Most laptop chassis use M2 or M2.5 screws. Document this measurement before proceeding. You’ll need standoffs that match both your screw diameter and the thickness of your chassis material.
Remove the damaged screw completely if possible. Clean away any debris or corrosion from the anchor hole. Inspect the hole to confirm the damage extent. Small cracks around the hole are repairable. Large splits or missing material may require professional support.
Insert the brass standoff into the damaged anchor hole. The standoff should fit snugly without forcing. If the hole is too large, you may need a slightly larger standoff diameter. Position the standoff so it sits flush against the chassis surface.
Secure the standoff firmly in place. Some standoffs use internal threads that grip the hole. Others require adhesive to stay put. Check the standoff type you’re using and follow its installation method.
Once the standoff is secure, insert your screw through the bottom chassis and into the standoff’s threaded center. Tighten gently and gradually. Stop immediately if you feel unusual resistance. Over tightening defeats the purpose of the repair.
Test the connection by gently pulling on the chassis. The screw should hold without movement or clicking sounds.
Contact your laptop manufacturer first before attempting this repair. Many companies provide replacement screw sets or chassis panels at no cost. This official solution often works better than DIY fixes and preserves your warranty coverage.
Requesting Replacement Screws and Support from the Manufacturer
Your laptop’s stripped screw anchor doesn’t mean permanent damage. The manufacturer often provides the simplest solution. Start by contacting the support team for your specific laptop model.
Most manufacturers keep replacement screw sets in stock. They understand that anchor stripping happens during normal use and maintenance. Provide them with your laptop’s model number and serial number when you reach out.
Document the damage before you contact support. Take clear photos showing the stripped anchor point from multiple angles. This documentation helps the support team understand the severity and respond faster. Include photos of the screw itself too, if it’s still intact.
When you communicate with support, explain exactly what happened. Did the screw strip during normal use? Did it happen after repeated disassembly? This context helps them determine whether the issue falls under warranty coverage.
Most manufacturers ship replacement screws at no cost. They often include several extras in case you need them for future repairs. Some companies also provide small brass standoffs or reinforcement solutions alongside the screws.
Request expedited shipping if your laptop is unusable without the bottom chassis secured. Many support teams recognize this urgency and prioritize your order.
While waiting for replacement parts, keep your laptop in a safe position. Avoid moving it around if the bottom chassis feels loose. This prevents additional damage to the hinge points or internal components.
If the manufacturer cannot provide replacement parts within your timeline, ask about alternative solutions. Some support teams can recommend certified repair centers in your area. These centers often have parts available and can complete repairs quickly.
Common Mistakes That Make Stripping Worse
Over-tightening screws is the fastest way to destroy anchor points. When you apply too much force, the internal threads strip completely. The screw spins freely without gripping anything. Stop tightening the moment you feel resistance. Your goal is a snug fit, not maximum force.
Repeated disassembly without care compounds the damage. Each time you remove and reinstall a screw, friction wears the anchor threads. The metal becomes weaker with every cycle. If you must open your laptop frequently, consider using a case or protective cover instead. This reduces how often you need to access the bottom chassis.
Attempting DIY fixes before contacting support often makes things worse. Many people try to fill stripped holes with epoxy, plastic, or metal shavings. These temporary solutions fail quickly. The screw anchor fails again after a few uses. You waste time and money on materials that don’t work.
Ignoring the problem and continuing to use a loose chassis causes additional damage. A wobbly bottom cover puts stress on nearby anchor points. More screws strip as a result. One damaged anchor becomes three or four. The entire bottom panel becomes unstable.
Using the wrong screwdriver size damages the screw head. A loose fit causes the driver to slip and round off the head. Now you cannot grip the screw properly. Always use a screwdriver that fits snugly into the slot.
Forcing removal of a stuck screw strips the anchor faster. Apply gentle pressure and wait a few minutes. Let penetrating oil do the work. Patience prevents permanent damage. Rush the process and you lose the anchor point forever.
Troubleshooting Persistent Fit and Fastening Issues
When your laptop’s bottom chassis screw anchors strip, the fastening fails and your device becomes unstable. This happens because the threaded hole loses its grip on the screw. You need a clear troubleshooting approach to fix this problem.
First, stop using the laptop with a loose chassis. Continued movement damages the anchor point further and can harm internal components. Place your device on a flat surface and avoid moving it around.
Next, assess the damage severity. Gently try to remove the stripped screw using the correct screwdriver size. Apply steady pressure without forcing it. If the screw won’t budge, stop immediately and contact manufacturer support instead of risking more damage.
Document everything before taking action. Take clear photos showing the stripped anchor from different angles. This helps support teams understand your situation and provide the right replacement parts.
Contact your laptop manufacturer’s support team directly. Most companies keep replacement screw sets available and ship them at no cost. Explain what happened and provide your photos. Support staff often includes extra screws for future needs.
While waiting for replacement parts, keep your laptop stationary. Don’t attempt temporary fixes that might cause additional harm. Avoid opening the chassis repeatedly during this time.
If the anchor damage is severe, some manufacturers offer replacement bottom chassis panels. This is often faster than trying to repair individual anchor points. Support teams can advise whether repair or replacement makes more sense for your specific situation.
The key is acting quickly and communicating with your manufacturer. Most stripped anchor problems get resolved within days through official support channels.
Final Thoughts
Fixing a stripped screw anchor doesn’t have to feel overwhelming. With the right approach, you can get your laptop back together safely.
Brass standoffs work well for anchor points that are damaged beyond simple repair. They give your screws a fresh surface to grip.
Manufacturer support remains your best first step. Companies like Framework and others often send replacement screws or parts at no charge.
Patience matters here. Rushing the repair process usually leads to more damage. Take your time with each step.
Remember to document everything before you start. Photos of the damage protect you if you need warranty support later.
Avoid the urge to force a fix on your own before reaching out to support. DIY attempts sometimes turn a small problem into a bigger one.
Screw anchor stripping is common, especially if you’ve opened your laptop multiple times. It doesn’t mean your device is ruined.
Most cases get resolved through simple communication with support teams. They understand this issue well and often have solutions ready.
Severity determines your options. Minor stripping might just need careful handling. Severe damage may need standoffs or full chassis replacement.
Whatever the case, don’t ignore a loose bottom panel. Continued use without proper fastening puts your internal components at risk.
Stay calm and follow the steps that fit your situation. Whether it’s contacting support or using standoffs, solutions exist for almost every scenario.
Your laptop can work like new again with the right repair approach. Take action early, and you’ll avoid bigger headaches down the road.
Frequently Asked Questions
Can stripped screw anchors actually be fixed?
Yes, they can be fixed in most cases. The solution depends on how severe the damage is. Minor stripping sometimes responds well to careful handling and proper screw placement. More serious damage often requires brass standoffs to reinforce the anchor point.
Your best option is contacting the manufacturer support team first. They frequently provide replacement screw sets or entire bottom chassis panels at no cost.
What should I do if the screw won’t come out?
Stop forcing it immediately. Applying pressure to a stuck screw makes anchor stripping worse, not better. Let the screw sit for a few minutes so any corrosion or debris can settle.
Try using the correct screwdriver size. A mismatched driver damages both the screw head and the surrounding anchor. If it still won’t budge, contact support rather than risk further damage.
How do I know if my anchor is stripped or just loose?
A loose screw usually tightens easily and holds firmly once seated. A stripped anchor feels different. The screw spins freely without gripping, or it sinks into the chassis without resistance.
Take clear photos from multiple angles before attempting anything else. Document the exact location and condition. This helps support teams understand your situation better.
Is it safe to use my laptop with a stripped anchor?
No. A loose chassis creates instability and allows internal components to shift. This movement can damage delicate parts inside your device over time.
Keep your laptop stationary while you arrange a fix. Avoid opening and closing the lid repeatedly. Contact support immediately so they can send replacement parts or guidance.

Hi, I’m Archie Flynn, the founder and writer behind RapidResizerHub! 👋 I’m a passionate tech enthusiast who loves exploring the latest gadgets, smart devices, and trending electronics on Amazon. Through my honest, hands-on reviews and detailed buying guides, I help readers make smarter, well-informed shopping decisions.